
An art and craft station is a defined zone where children draw, paint, cut and glue. It combines a work surface, reachable supplies, a mess boundary and a place for finished work to go. Supply access depends on age, because federal rules treat small parts as a hazard for children under 31. This guide is for parents planning or fixing a home art zone. It covers the whole topic, from placement to archiving, and routes to deeper guides on each part.
Quick Answer
What is an art and craft station?
It is a playroom zone planned around five parts: placement, work surface, supply access, supervision and finished-work flow. A station works when a child can start, finish and reset without adult rescue. Labels matter too: U.S. art materials carrying the ASTM D-4236 statement are reviewed for chronic hazards at least every 5 years2.
Why it matters:
Art is the messiest, most material-heavy activity in most playrooms. Without a system, it spreads into every other zone.
Key Takeaways
- Placement comes first: light, floor protection, parent sightlines and distance from active-play paths decide whether the station works.
- The Labeling of Hazardous Art Materials Act dates to 1988 and requires a toxicological assessment of art materials at least every 5 years2.
- Painting needs its own wet-media layer: water handling, splash containment and a direct path to drying.
- Supplies split into two access tiers, self-serve and ask-first, and each tier lives at a different height.
- The most common misconception is that more storage fixes a messy art zone; a finished-work exit and a reset routine fix it.
Art & Craft Stations in 30 Seconds
| If you are… | Do this |
|---|---|
| Working with a small room or shared space | Use a wall-edge or corner station with vertical storage and a portable supply caddy. |
| Setting up for a toddler | Offer a short material set, keep ask-first items in adult-held storage, and keep the table in your sightline. |
| Planning for two or more children | Give each seat its own duplicate high-use tools and a personal project tray. |
| Painting several times a week | Add a wet-media layer: weighted water cups, a splash mat and a clear path to the drying spot. |
| Drowning in finished artwork | Build a drying, display and archive flow with a fixed review rule. |
What Is an Art & Craft Station?
An art and craft station is a dedicated part of a room where children make things with paper, paint, glue, clay and tools. Storage and cleanup are built for that work. It is a zone, not a piece of furniture. A table alone is not a station; a table with a supply system, a mess boundary and an exit for finished work is.
The station has a clear scope. It includes the work surface, seating or standing space, supply storage, floor and table protection, drying space, display and long-term artwork storage. It excludes sensory bins, homework desks and studio-grade materials such as solvent paints, which belong in other zones or with adult artists.
Wet media refers to paint, glue, ink and clay that need water, drying time or splash control. Dry media covers crayons, pencils, markers and paper crafts. The difference drives most planning decisions, because wet work needs a water plan and a drying route that dry work does not.
Playroom Architect plans the art zone as one part of the room as a system. The station sits beside reading, pretend play and active zones, and it shares their circulation paths. Montessori-inspired planning calls the room “the Third Teacher”: the space itself guides independence, focus and routine instead of only containing play. An art station built that way shows children where things live, what they can reach, and what done looks like.
Why Art & Craft Stations Matter
Art stations matter because they hold the most regulated and most mess-prone materials in a playroom. U.S. law has required hazard labeling on art materials since 1988, and covered products must be reassessed at least every 5 years2. That rule protects the label, but the room still decides who can reach what.
Three gaps show up again and again in parent descriptions of art zones that stopped working:
- The table works for one session, then turns into a storage surface for half-finished projects.
- Paint, water and glitter escape the table and reach rugs, sofas and walking paths.
- Finished artwork has nowhere to go, so it piles up on counters and the fridge.
Age fit adds a second layer. The Consumer Product Safety Commission states the small-parts rule plainly:
Children’s products that are intended for use by children under 3 that present a choking, aspiration, or ingestion hazard because of small parts are banned hazardous substances.
CPSC publishes that guidance for products designed for young children1. Craft supplies such as beads, pom-poms and googly eyes are not always designed for that age, so storage height and supervision fill the gap. A station planned with these facts in view resets faster, keeps mess inside its boundary and grows with the child.
The Five-Part Art Station Framework
The Five-Part Art Station Framework groups the friction points that recur in home art zones into the smallest set that covers the whole station. The five parts are placement, work surface, supply access, supervision and age fit, and finished-work flow. Each part depends on the one before it.
1. Placement and Footprint
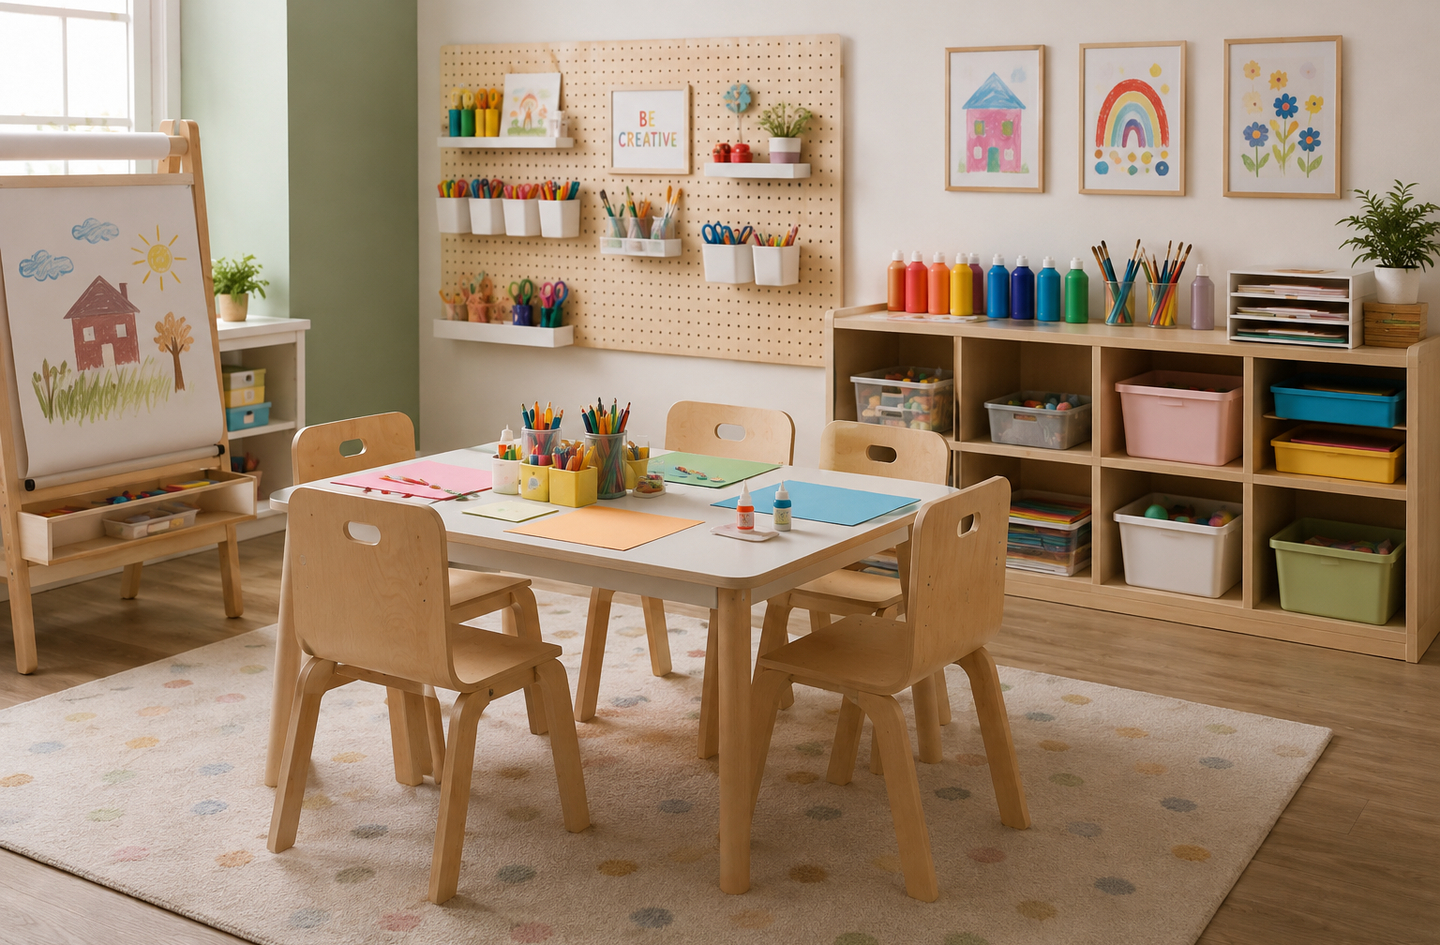
Placement decides how much mess control the station needs. The strongest spot has usable daylight, a hard or protected floor, a clear parent sightline and short reach to storage. It sits away from the main walking path and away from sofas, beds and soft rugs. In small rooms, a corner or wall-edge layout with vertical storage keeps the central play floor open. A fold-away surface works when the floor must stay clear between sessions. DIY stations built from a stable table and shelf can work well, but tall shelving needs anchoring, and wall-mounted pieces depend on the wall behind them.
Fixing placement first is cheaper than buying mats and storage to compensate for a bad spot.
Deeper read: where to put an art area in a playroom.
Deeper read: small kids art station layouts.
Deeper read: DIY kids art station setup.
2. Work Surface and Posture
The work surface is where the station earns its keep. A table should let the child sit with feet supported and elbows near tabletop height, with room to push a chair back. Wipeable tops, rounded edges and a paper-roll holder all shorten setup and cleanup. An easel supports standing work, large arm movement and vertical painting, while a table supports seated detail work and group projects. A painting station adds weighted water cups, splash containment and brush storage. Tabletop and floor mats protect surfaces, but a curled edge becomes a trip point.
Choose the surface for the activity done most often, not for the one that photographs best.
Deeper read: kids art table size, seating and cleanability.
Deeper read: kids easel vs art table.
Deeper read: planning a kids painting station.
Deeper read: craft mats for tables and floors.
3. Supply Access and Storage
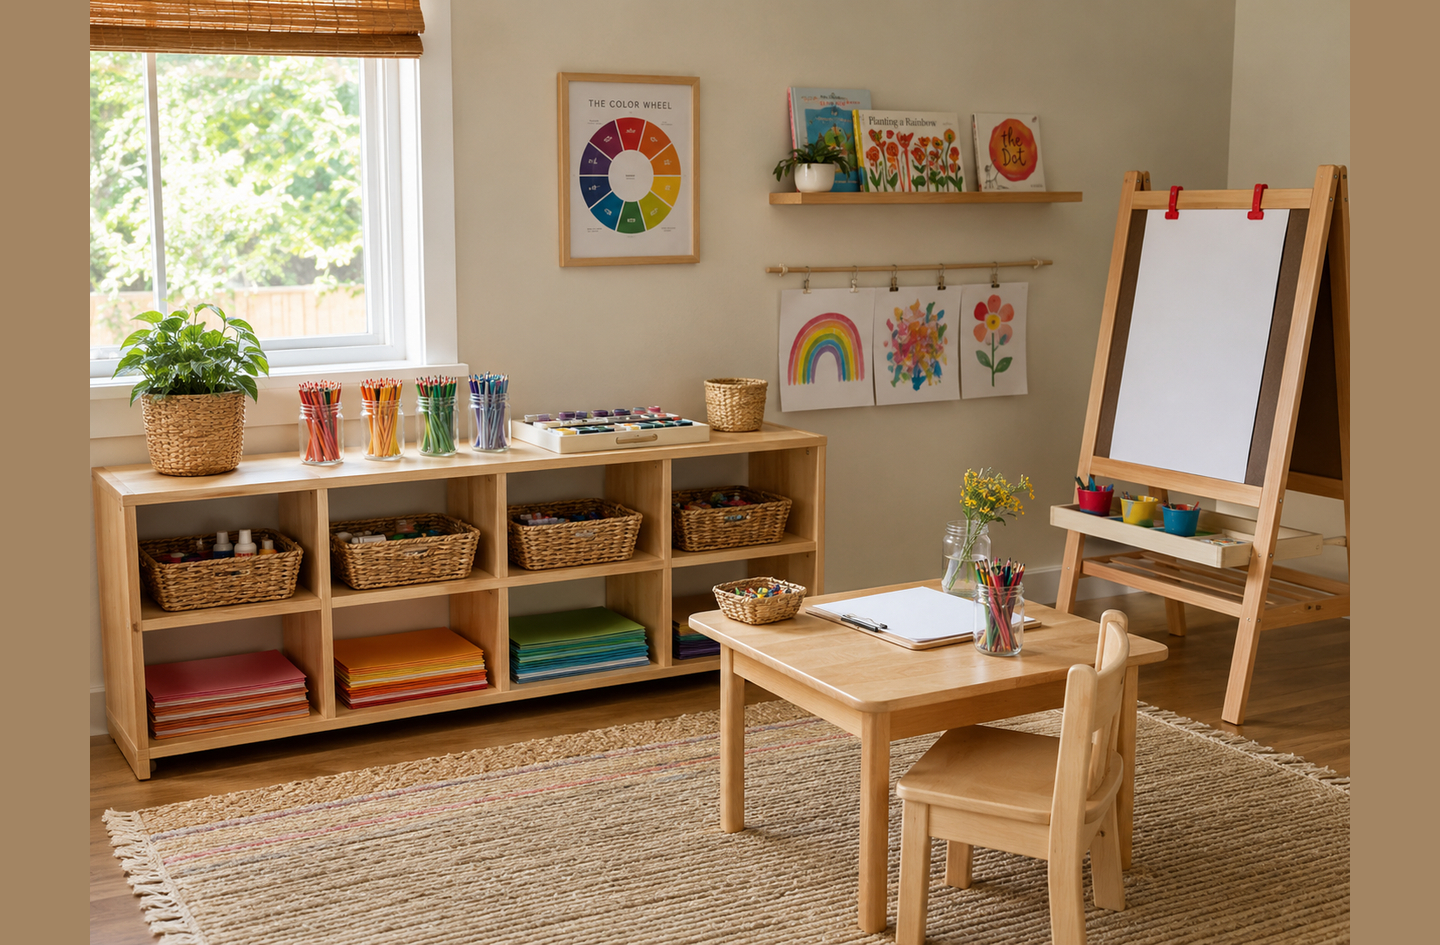
An access tier is a group of supplies that share the same rule for who may take them out. Self-serve items, such as crayons, paper and washable markers, live at child height in clear or labeled containers. Ask-first items, such as sharp scissors, glitter and small beads, sit higher or behind a closed door. Frequency of use sets placement: daily items within reach, weekly items one shelf up, backup stock out of sight. A rolling cart suits shared rooms but needs locking casters and a fixed parking spot. On the table itself, a small staging zone, tool cups and a scrap bin keep the surface clear between projects.
Two tiers are enough; a third tier usually means too many supplies are out.
Deeper read: organizing kids art supplies for independent use.
Deeper read: self-serve vs ask-first art supplies.
Deeper read: when an art cart beats a fixed station.
Deeper read: kids craft table organization.
4. Supervision and Age Fit
ASTM D-4236 is the U.S. standard practice for labeling art materials for chronic health hazards. Its label statement means the product was assessed; it is not a promise that the product suits every age. Small parts are banned in products intended for children under 31, so toddler stations keep beads and similar items adult-held. Ventilation matters for markers and glues, since EPA reports several organic compounds average 2 to 5 times higher indoors3. Siblings need duplicate high-use tools and separate project trays.
Supervision is a layout decision as much as a parenting one: place the station where an adult can see it without hovering.
Deeper read: choosing safer art supplies for kids.
Deeper read: toddler art station setup.
Deeper read: craft stations for siblings.
5. Finished-Work Flow
Finished-work flow refers to the path a project takes after the child stops working: drying, display, archive or recycling. A drying spot sits next to the table, so wet paper never crosses the room. A rotating gallery on clips, ledges or front-opening frames holds the current favorites near the station. Older pieces move to a portfolio, a bin per child or a photo record. A fixed review rule, such as one sort per season, keeps the archive from becoming another pile.
Design for the reset, not just the reveal: the exit for artwork matters as much as the table.
Deeper read: art drying racks for kids.
Deeper read: building a rotating kids artwork gallery.
Deeper read: storing kids artwork from in-progress to archive.
How to Choose the Right Setup
The most important decision criterion is the activity done most often. A family that paints weekly needs a different station from one that mostly draws. Work through these steps in order:
- Observe before shopping. Watch two or three art sessions. Note where supplies come from, where mess lands and where finished work ends up.
- Pick the spot. Choose light, a hard or protected floor and a parent sightline, away from the main walking path.
- Match the surface to the main activity. Seated detail work points to a table. Standing, large-scale painting points to an easel.
- Split supplies into two tiers. Self-serve items go low and visible. Ask-first items go high or behind a closed door.
- Plan the exit. Decide where wet work dries, where finished work shows and when it is sorted.
Profiles help narrow the choice. A single preschooler in a small room fits a corner table with a portable caddy. Two school-age siblings fit a longer table with mirrored supply sets. A family with no spare floor fits a fold-away surface or a rolling cart parked against a wall.
Watch for red flags. A station that needs an adult to fetch every supply will not build independence. Storage taller than the table, if unanchored, adds tip risk. A rug under a painting table turns every spill into a deep-cleaning job. Finally, any plan to mount shelves or a fold-down desk on a wall should start with the wall itself; a licensed contractor can confirm what that wall will hold.
Read more: comparing easels and art tables by activity.
Compare All Art Station Formats
| Criteria | Dedicated art table | Activity table + mat | Easel | Wall-edge or fold-away | Rolling art cart |
|---|---|---|---|---|---|
| Work posture | Seated | Seated | Standing | Seated or standing | Supplies only; pairs with any surface |
| Floor footprint | Largest; needs clearance on all used sides | Medium | Small | Smallest when folded | Small, plus a parking spot |
| Wet media fit | Strong with wipeable top | Good with a full-coverage mat | Strong for vertical painting | Limited; drips reach the wall | Carries water cups, not a surface |
| Children at once | 2 to 4 | 2 to 4 | 1 to 2 (double-sided) | 1 to 2 | Serves a whole table |
| Reset effort | Low with built-in storage | Medium; mat must be cleaned | Low | Medium; fold-up step | Low if parking spot is fixed |
| Best for | Daily, mixed media | Shared rooms with a family table | Painting and large drawings | Small rooms | Shared or multi-use rooms |
Choose a dedicated art table if: art happens most days and the room has space for it.
Choose an activity table with a mat if: the same table also serves snacks, puzzles or homework.
Choose an easel if: painting and big, standing work dominate.
Choose a wall-edge or fold-away surface if: floor space is the tightest constraint.
Choose a rolling cart if: art moves between rooms or shares space with other activities.
Deeper read: kids easel vs art table.
Common Mistakes
Mistake 1: Buying storage before choosing the spot
Why it is a mistake: Storage bought first fixes the station’s location, often next to carpet, a sofa or the main walking path.
What to do instead: Place the zone first, then buy storage that fits that wall and that reach height.
Read more: placing an art area around sightlines and mess boundaries.
Mistake 2: Treating painting like drawing
Why it is a mistake: A drawing table has no water plan, no splash boundary and no drying route. Wet work then crosses the room.
What to do instead: Add a wet-media layer with weighted cups, a mat and a drying spot within arm’s reach.
Read more: painting station planning for water and drying.
Mistake 3: Putting every supply within reach
Why it is a mistake: Full access feels generous but creates decision overload and a slow reset. Small items also reach toddlers, the age group the federal small-parts ban is written around.
What to do instead: Keep a short self-serve set at child height and rotate the rest from higher storage.
Read more: which supplies to keep self-serve.
Mistake 4: Giving finished work no exit
Why it is a mistake: In the 17 art-station topics mapped for this guide, four address what happens after the work is done. That share reflects how often finished work, not supplies, becomes the clutter.
What to do instead: Set up a drying spot, a small rotating display and an archive with a review rule.
Read more: kids artwork storage from in-progress to archive.
Best Art & Craft Stations by Use Case
The best station depends on room size, the children’s ages and the main activity. Four profiles cover most homes.
Best for Small Rooms
A corner or wall-edge station with vertical storage and a portable caddy keeps the central floor open for play. A fold-away surface suits rooms that must clear fully between sessions.
Deeper read: building a functional craft corner in a small room.
Best for Toddlers
A low, washable table, a short set of chunky crayons and washable paint, and adult-held storage for everything else. The station sits where a parent can see it from the main seating area.
Deeper read: toddler art station with child-height storage.
Best for Siblings
A longer table with one seat per child, duplicate high-use tools and a personal project tray each. Supplies sit in the middle or at both ends to cut reach-across conflict.
Deeper read: sharing table space and supplies between siblings.
Best for Frequent Painters
An easel or a wipeable table on a hard floor, weighted water cups, a splash mat and a drying rack within arm’s reach of the work.
Deeper read: sizing a drying zone without blocking the room.
Frequently Asked Questions
What does ASTM D-4236 on an art supply label mean?
ASTM D-4236 on a label means the product was reviewed for chronic health hazards under U.S. art-material labeling rules. The Labeling of Hazardous Art Materials Act, enacted in 1988, requires that assessment to be repeated at least every 5 years2. The statement confirms a review took place and that any needed warnings appear on the label. It does not mean a product suits every age, so read the age guidance and keep supplies in their original, labeled packaging.
At what age can a child use an art station independently?
Independence grows in stages rather than at one age. CPSC rules ban small parts in products intended for children under 31, so toddler stations keep beads, pom-poms and similar items adult-held. Preschoolers can self-serve crayons, paper and washable paint from low shelves. School-age children can manage more tools, such as child scissors and glue, with a clear reset routine. For a specific child’s readiness or motor skills, a pediatric occupational therapist is the right person to ask.
Does a kids art station need ventilation?
Fresh air helps, especially for markers, glues and adhesives. EPA lists craft materials, including glues, adhesives and permanent markers, among sources of volatile organic compounds. It also reports that several organics average 2 to 5 times higher indoors than outdoors3. Placing the station near a window that opens, choosing washable or water-based products, and closing lids between uses all reduce indoor build-up. Products with strong odors or spray applications belong outdoors or with an adult.
Is an easel or an art table better for a playroom?
The better choice depends on the main activity. An art table suits seated detail work, crafts and two to four children at once. An easel suits standing work, painting and large arm movement, and it takes less floor space. Many families start with a table and add a double-sided easel once painting becomes frequent. Combining both works when the easel sits at the edge of the zone, outside the walking path and next to the drying spot.
How This Guide Was Built
The methodology behind this guide starts with the 17 planned art-station guides in this topic, grouped into five parts by where a home art zone tends to break down. Figures come only from U.S. government sources, CPSC and EPA, and each links to the page that states it. Editorial responsibility sits with founder Oded Feigin, and the guide is updated when a cited source or a recommendation changes.
What This Hub Does Not Cover
- Structural decisions such as mounting fold-down desks, heavy shelving or pegboards on a specific wall; a licensed contractor should evaluate the wall first.
- Developmental or motor-skill advice for a specific child; a pediatric occupational therapist can assess individual needs.
- Toxicity questions about a specific product; the manufacturer’s label and safety data sheet, or Poison Control, are the right sources.
- Sensory bins, homework desks and older-teen hobby studios, which belong to other playroom zones.
References
- U.S. Consumer Product Safety Commission – Small Parts for Toys and Children’s Products business guidance
- U.S. Consumer Product Safety Commission – Art Materials business guidance (LHAMA and ASTM D-4236)
- U.S. Environmental Protection Agency – Volatile Organic Compounds’ Impact on Indoor Air Quality
Next Read
An art and craft station works when placement, surface, supply access, supervision and finished-work flow are planned as one system. Structural reasoning first, decor inspiration second: the spot and the reset path decide more than any product. The work surface is the natural next decision once the spot is chosen.