
Kids artwork arrives faster than any fridge door can hold it, and a pile on the counter is the usual result. Learning how to store kids artwork starts with a flow, not a bin. This article sits under our Art & Craft Stations guide, the overview of planning a home art station. Here the focus is narrower: what happens to each piece after it leaves the table. The flow has four stops, plus one review rule. Storage conditions matter as well, because the National Archives advises keeping stored papers below 65% relative humidity to prevent mold growth1.
Quick Answer
How do you store kids artwork without it becoming another clutter pile?
Give every piece a route through four stops. Use an in-progress tray at the table, a drying and landing zone, a small rotating display, and one archive box per child per school year. Keep the archive flat, in acid-free folders, in a living space below 65% relative humidity1 and out of direct light2. A fixed review date stops the archive from growing without limit.
Key Takeaways
- The EPA’s ideal indoor humidity band of 30% to 50%3 also sits inside the National Archives range for paper, so one well-chosen room serves both goals.
- The National Archives tells families to keep papers out of damp basements, garages and hot attics1. A shelf in a bedroom closet is a better default.
- Scanning flat artwork at 300 dpi4 creates a usable record, so the paper does not have to survive for the memory to survive.
- Polyester sleeves do not suit every medium: polyester film builds a static charge that can lift pastel, charcoal and pencil2.
- The archive fails without a review rule. A fixed date and a fixed keep-count turn finished work from a growing pile into a chosen record.
Before You Begin: How to Store Kids Artwork as a Flow
A kids artwork storage system needs four physical stops and one rule, not a bigger container. An artwork flow is the fixed route a piece of children’s art follows from the table to its final home: in progress, drying, display, then archive or release. Every stop has a size limit, and the limit is what keeps the route moving.
Most families start at the end of that route, with a large bin that fills in a season. The room as a system works the other way around: each stop holds only a few pieces, so nothing piles up. Before setting anything up, walk the room for a week and note where finished work lands today. Those spots are the friction points, and they show where each stop should go.
What you will need:
- One shallow tray or lidded box per child for unfinished work, sized a little larger than the biggest sheet they use.
- A drying spot: a rack, a clothesline with clips, or a clear flat shelf away from the walking path.
- One “finished” landing tray per child, close to the art station.
- A small rotating display, such as a clip rail, a board or a front-opening frame.
- Acid-free folders and one flat document box per child per school year.
- A phone with a scanning app, or a flatbed scanner.
- A repeating calendar reminder for the review.
Time: about one afternoon to set up, then a short weekly sort. Difficulty: beginner. No tools or wall work are needed beyond what a display system requires.
The container is the last decision, not the first: sizing the stops before buying storage avoids a bin that only hides the pile.
Step 1: Set Up an In-Progress Tray for Unfinished Projects
In-progress art project storage works best as one shallow tray per child, kept within reach of the art table. By the end of this step, every unfinished drawing, collage or model has a single home, and a child can find it again without asking. An in-progress tray is a shallow, labeled container that holds only work the child still plans to finish.
Unfinished work tends to linger longer than finished work, because nobody feels allowed to move it. A half-glued collage left on the table blocks the next project. A named tray turns “later” into a place.
Size and place the tray
Choose a tray slightly larger than the largest sheet the child uses, with sides low enough to see into from a seated height. A shallow tray keeps work flat and visible. A deep bin invites stacking, and the piece at the bottom is forgotten within a week.
Place the tray on a shelf or cart the child can reach from the art table without crossing the room. If the station already has built-in shelves, see our art table sizing and storage comparison for how a table’s storage interacts with its working space.
Handle three-dimensional projects
Clay, cardboard builds and egg-carton models do not fit a flat tray. Give them a sturdy box lid or a single shelf section labeled with the child’s name, and nothing spills beyond it.
Set the tray rule
When the tray is full, the child finishes something, declares something done, or lets something go before starting another project. The rule practices one small decision: choosing what is worth finishing.
Verification: ask the child where their unfinished work lives. If they can point to it and lift it out without help, the step is working.
A capacity limit does more for clutter than a larger tray, because it forces a small decision at the table instead of a large one months later.
Step 2: Give Freshly Finished Work a Drying and Landing Zone
Freshly finished artwork needs a drying spot and then a landing tray, in that order, before it reaches any display or archive. Wet paint, glue and glitter stacked too early stick pieces together and trap moisture. The EPA advises drying water-damaged items within 24 to 48 hours to prevent mold growth3, and a stack of damp paintings is a small version of the same problem.
Choose a drying method
A wall-mounted or freestanding drying rack holds the most sheets in the least floor space. A clothesline with clips works well above a table, as long as the line is mounted above head height, kept taut and out of young children’s reach. A flat, clear shelf is the simplest option for thick paint, which can drip or slide if hung.
The drying spot belongs next to the painting area, not across the room. Carrying a wet sheet past furniture is how drips reach the sofa. For the water and wet-media side of the station, our painting station plan covers splash control and the path from easel to drying rack.
Label work before it moves
Once a piece is dry, write the child’s name and the date on the back in pencil. The Library of Congress recommends pencil, not ink, for any marks on works on paper2. Write on a clean, hard surface so the marks do not emboss through to the front.
Use one landing tray per child
Dry, labeled pieces go into a single “finished” tray per child near the station. This tray is a waiting room, not a storage unit. Nothing leaves it for the archive without passing through the weekly sort, where the display picks and the keepers are chosen.
Verification: at the end of a painting session, every wet sheet sits on the rack or shelf, and nothing damp is stacked.
The landing tray is the stop most families skip. Without it, finished work ends up on counters, because a dry piece with no next place stays wherever it was put down.
Step 3: Route the Best Pieces to a Rotating Display
A rotating display shows a small, fixed number of pieces and swaps them on a schedule, so the display is a stop on the route rather than its end. By the end of this step, each child has a set number of display slots, and every piece that leaves the wall goes back through the sort. That sort decides whether a piece moves to the archive or is let go.
The Third Teacher is the idea that the room itself teaches, alongside parents and teachers, by shaping what children notice and how they use the space. A display wall is one of the clearest examples. What hangs there can tell a child which work the family values, and how much hangs there decides whether the wall reads as a gallery or as noise.
Set a fixed number of display slots
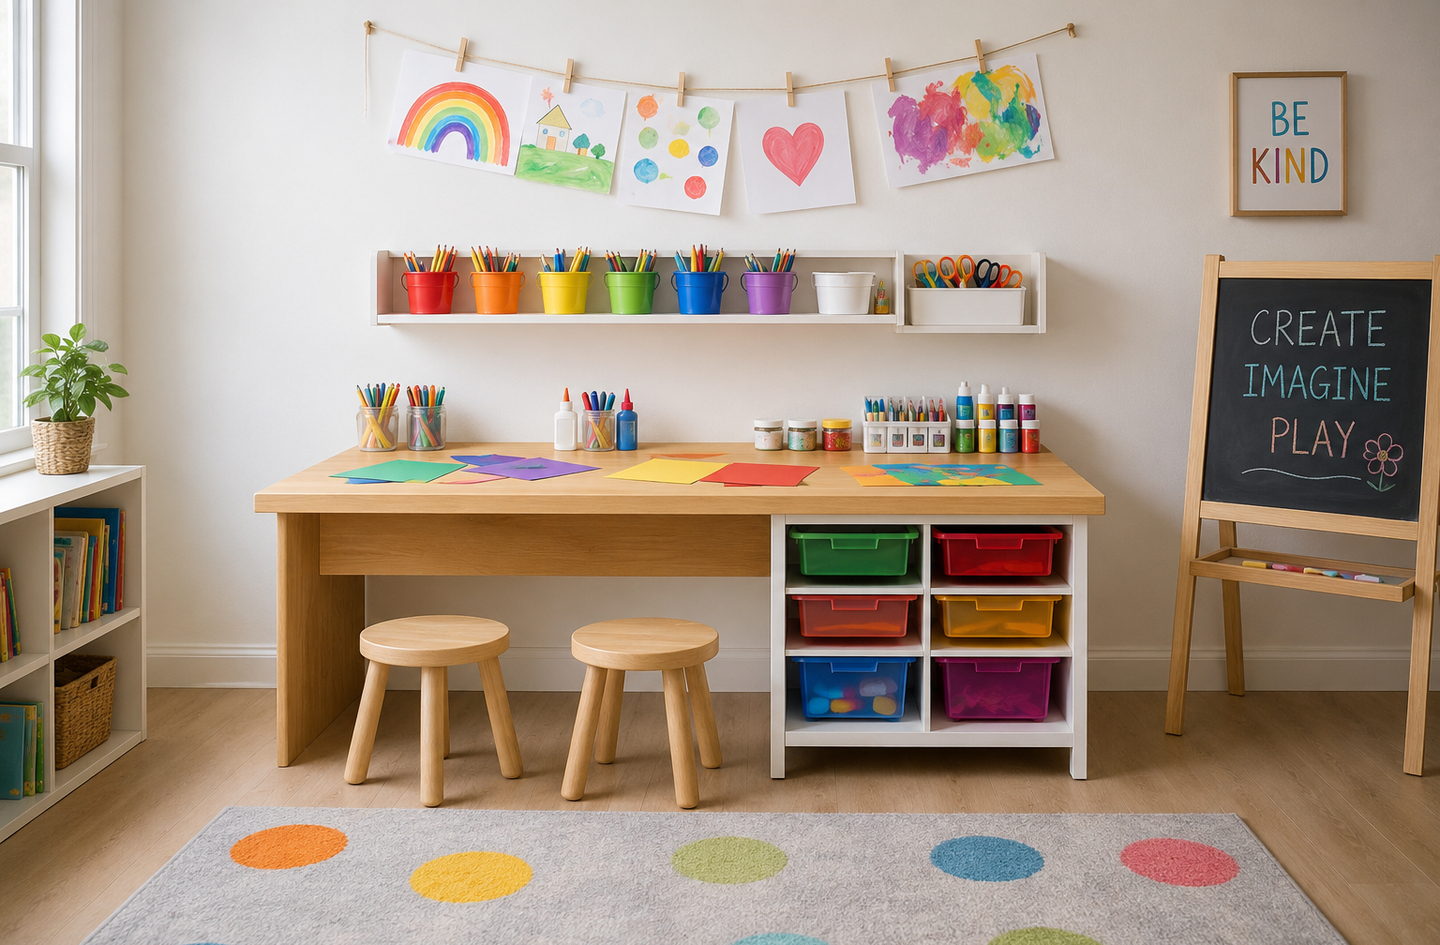
Give each child a fixed number of slots, such as three to five clips on a rail. A new piece goes up only when an old one comes down. The child chooses which piece to swap, which makes the display a regular, small act of judgment instead of a wall that fills until nobody looks at it.
More is not better on a wall. In a Carnegie Mellon study, kindergarten children took six introductory science lessons in a laboratory classroom whose walls were either highly decorated or cleared of decorations5. The researchers summarized the result in a single sentence.
“Children were more distracted by the visual environment, spent more time off task, and demonstrated smaller learning gains when the walls were highly decorated than when the decorations were removed.”
Anna V. Fisher, Karrie E. Godwin and Howard Seltman, Carnegie Mellon University, Psychological Science5
A home is not a classroom, and that study measured lessons, not play. Still, the direction is useful for planning: a display near a work table should stay small and changing, not grow into a wall of paper.
Keep the display near the station, and out of the sun
Mount the display on a wall next to the art station, not in a hallway. A display close to the table keeps the route short: table, rack, landing tray, wall, sort.
Light is the other reason to rotate. The Library of Congress lists minimal exposure to all kinds of light, and no exposure to direct or intense light2, as part of good care for works on paper. A wall that catches direct sun is the wrong place for a gallery. A rotating display also limits how long any single piece sits in the light.
For a side-by-side look at clip rails, front-opening frames, ledges and boards, see our guide to rotating gallery options, which compares them by update speed and wall impact.
Verification: the display holds the same number of pieces it held last month, but different ones.
The swap rule matters more than the display hardware: any rail or board works once each new piece has to replace an old one.
Step 4: Choose Archive Containers (Portfolios, Flat Boxes or Bins)
For most flat kids artwork storage, the best archive container is a flat document box with acid-free folders, one box per child per school year. Portfolios suit oversized sheets, lidded plastic bins suit three-dimensional pieces, and archival tubes suit very large rolls. The National Archives advises containers big enough for originals to lie flat without folding, sized so items do not shift, and never overstuffed1.
Lignin is a natural compound in wood pulp that causes paper and cardboard to yellow and weaken as it ages. Ordinary shoe boxes and moving cartons contain it. Acid-free folders are folders made from board or paper stock with a neutral or alkaline pH, so they do not add acid to the artwork they hold. The National Archives specifies board or folder stock that is lignin-free and acid-free or buffered1.
| Container | Best for | Capacity logic | Watch out for |
|---|---|---|---|
| Flat document box with acid-free folders | Drawings, paintings and worksheets up to standard sheet size | One box per child per school year; one folder per term | Overfilling; a box that bulges no longer protects its contents |
| Artist portfolio (zip or tie closure) | Oversized sheets and easel paintings | One portfolio per child for large work across several years | Storing it upright without enough sheets inside, which lets work slump and crease |
| Lidded polypropylene bin | Clay, cardboard builds and other three-dimensional work | One small bin per child; a full bin means the next piece replaces one | Unknown or PVC plastics; damp locations, since a sealed bin traps moisture |
| Archival paper tube | Very large rolls, such as banner paintings | A few sheets rolled together on one tube | Rolling thick paint, which can crack |
| Binder with polypropylene or polyester sleeves | A child’s “best of” pieces that get viewed often | One binder per child, curated at each review | Pastel, charcoal and soft pencil, which can lift onto polyester sleeves |
Roll only what is too large to lie flat
Some pieces are simply too big for any box. The National Archives advises a buffered, low-lignin paper tube at least 2 inches longer than the widest sheet1. Up to five sheets can be rolled onto one tube at the same time. Wrap the roll in acid-free tissue, then loosely tie it with cotton tape. Rubber bands and self-adhesive tape belong nowhere near the paper2.
Know what a sleeve can and cannot do
Clear sleeves let a child flip through a binder without handling each sheet. The material matters. The National Archives lists polyester, polypropylene and polyethylene as stable plastics, and names polyvinyl chloride (PVC) among the materials to avoid1.
Powdery media are the exception. The Library of Congress notes that polyester film readily builds an electrostatic charge that can lift pastel, charcoal, pencil and flaking paint2. Store those drawings in a folder with a sheet of acid-free tissue on top instead. Keep any paper that has already yellowed or turned brittle in its own folder. The Library of Congress advises isolating acidic papers so the acid does not migrate into other works2.
Verification: every archived sheet lies flat, nothing is folded to fit, and the box lid closes without pressure.
The box size is the archive’s budget: a single flat box per school year makes the keep-or-release question concrete in a way a large bin never does.
Step 5: Store Children’s Artwork in a Room With Stable Humidity
The best place to store children’s artwork is a shelf inside the lived-in part of the home, such as a bedroom closet, not a basement, garage or attic. The National Archives advises keeping stored papers below 75 degrees Fahrenheit and below 65% relative humidity, and warns that humidity under 15% can cause brittleness1. Those limits rule out most unfinished storage spaces.
Relative humidity is the amount of water vapor in the air compared with the most the air could hold at that temperature, written as a percentage. Paper absorbs and releases that moisture. When humidity swings, paper swells and shrinks, paint can crack, and damp corners invite mold.
Pick the room before the shelf
The Library of Congress describes good storage for works on paper as cool, relatively dry at about 35% relative humidity, clean and stable2. It names attics and basements as locations to avoid, along with spots near radiators and vents. The National Archives adds a practical layer: store items on a shelf, away from pipes, windows and known roof leaks1.
In most homes, that points to a high shelf in an interior closet on a main or upper floor: cool, dark and away from the floor. Where no closet fits, a flat box under a bed on a main floor works, once a meter confirms the room stays dry.
Check the room with a humidity meter
Guessing humidity is unreliable, and a closet that feels dry in winter can be damp in August. The EPA notes that relative humidity can be measured with a small, inexpensive meter costing $10 to $50, sold at many hardware stores3. Leave one on the archive shelf through one summer and one winter before trusting the spot.
The EPA’s own target for homes is below 60%, and ideally between 30% and 50%3. Those numbers come from mold prevention, not paper care. Placed side by side with the two paper guidelines, they reveal a useful overlap.
Verification: the archive sits on a shelf off the floor, away from exterior walls and vents, and a meter reading in the humid season stays inside the 30% to 50% band3.
One room choice settles two problems at once: a space comfortable enough to prevent mold in the house is also a space that keeps the archive’s paper stable.
Step 6: Scan or Photograph Artwork Before Letting It Go
A digital record lets a family keep the memory of every piece while keeping the paper of only a few. The Library of Congress advises scanning documents and photos at 300 dpi in general, and at 400 or 600 dpi when a print will be enlarged4. For most children’s drawings, that general 300 dpi setting is a reasonable starting point.
Capture flat work and large pieces differently
Flat sheets that fit the scanner glass go on the scanner. Large paintings and three-dimensional pieces get a phone photo in daylight, square to the camera, against a plain wall. A second photo of the child holding the piece adds the part that paper cannot store: who made it and when.
Name, copy and check the files
Name each file with the date first, using the Library of Congress pattern of year, month and day4, then the child’s name. Keep at least 2 copies on separate media, stored as far apart as practical; check them at least once a year, and make new copies every five years6. One copy on a home computer and one in cloud storage meets that baseline.
Scanning can make letting go feel fairer to a child: the piece is recorded before it leaves, so the decision is about paper, not about the memory.
Step 7: Set a Review Rule to Organize Kids Artwork Each Term
A review rule is what keeps the finished-work system from becoming another clutter pile. A review rule is a fixed date paired with a fixed keep-count, such as “every Friday, keep one piece in five.” Without it, every stop in the flow fills, and the overflow lands back on the counter.
The volume adds up quickly. In 2020, 29 of 51 jurisdictions (the 50 states plus the District of Columbia) listed 180 days as their minimum school year7, or about 36 school weeks. At a planning estimate of five pieces a week, one child brings home roughly 180 pieces a year. The table shows what different rules leave in the archive.
| Review rule | Pieces kept per school year | Pieces kept from kindergarten to grade 12 | What the archive looks like |
|---|---|---|---|
| No rule | 180 | 2,340 | Several unsorted bins a year |
| Weekly sort, keep one in five | 36 | 468 | One flat box per year |
| Term-end edit, keep ten per term (three terms) | 30 | 390 | One box per year, one folder per term |
| Year-end top ten, scan the rest | 10 | 130 | One folder per year plus a full digital record |
Run the sort with the child
Empty the landing tray once a week, with the child beside you. Each piece goes to one of three places: the display, the archive folder, or the scan-and-release pile. Keepers are pieces with a story, a milestone such as a first written name, or the child’s own favorite. Letting the child choose most of the keepers turns the sort into a conversation rather than a purge.
Why the pile matters beyond the counter
Clutter can weigh on adults as well. A UCLA study analyzed home tours by 60 dual-income spouses. Wives whose home tours used more words about clutter and unfinished spaces showed flatter daily cortisol slopes8, a pattern linked to poorer health. The study was correlational and about whole homes, not artwork, but it is a fair reason to treat the pile as a system problem.
The keep-count matters more than the schedule: a weekly or term-end review both work, while a review with no number decides nothing.
Common Mistakes in Kids Art Storage
A frequent mistake in kids art storage is buying the container before setting the route, because a large bin removes the pressure to decide.
Storing the archive where the house is roughest
Basements, garages and attics are convenient and out of sight, which is why they are chosen. The National Archives names damp basements, garages and hot attics as places to keep family papers out of1. Choose a closet shelf in the living space instead.
Fastening work with tape, glue or rubber bands
Grouping a term’s work with a rubber band or a strip of tape feels tidy. The Library of Congress advises against paper clips, rubber bands, self-adhesive tape and glue on paper2. A labeled folder does the same job without damage.
Sealing damp work in plastic
A lidded bin closed over a painting that is not fully dry traps moisture against the paper. Let work dry completely on the rack, then let it wait in the landing tray before it goes anywhere sealed.
What Success Looks Like After One School Year
After one school year, the art table is clear at the end of each session. The display holds the same number of pieces it started with. Each child’s year fits in one flat box on a closet shelf. A dated folder of scans sits in at least 2 places6. The stretch goal is a printed photo book of the year, made from the scans.
Design for the reset, not just the reveal: a system that still works in June, after a full year of inflow, is the one worth keeping.
Frequently Asked Questions
What is the best way to store kids artwork long term?
Store it flat in acid-free, lignin-free folders inside a document box, on a shelf in the lived-in part of the home. The National Archives advises keeping papers below 75 degrees Fahrenheit and below 65% relative humidity1. Basements, garages and attics rarely meet those limits.
How do you store unfinished art projects?
Give each child one shallow tray within reach of the art table, holding only work they still plan to finish. When the tray is full, something gets finished or released before a new project starts. Three-dimensional work gets a box lid or one labeled shelf section.
Are plastic bins good for storing children’s artwork?
Plastic bins suit three-dimensional pieces when the plastic is stable, such as polypropylene or polyethylene, and the room stays dry. The National Archives lists PVC among the materials to avoid1. Flat paper does better in acid-free folders inside a document box.
Limitations and Edge Cases
- Crafts made with food, such as pasta or cereal collages, are better photographed and released than archived, because food attracts insects and rodents1.
- The humidity and storage guidance here is general federal advice for family papers and homes. For a flood-damaged, moldy or fragile heirloom piece, a professional paper conservator is the right person to assess it.
- The five-pieces-a-week volume is a planning estimate. Families with several children or an art-heavy school should lower the keep-count rather than add boxes.
References
Methodology: every figure in this article comes from an independent published source linked here, each source was checked live on October 5, 2026, and the volume table is a Playroom Architect planning estimate built from the NCES school-year data and a stated assumption.
- National Archives – How to Preserve Family Archives: Storing Family Papers and Photographs, U.S. National Archives and Records Administration.
- Library of Congress – Care, Handling, and Storage of Works on Paper, Preservation Directorate.
- U.S. Environmental Protection Agency – A Brief Guide to Mold, Moisture and Your Home.
- Library of Congress Digital Preservation – Scanning Your Personal Collections, Personal Digital Archiving Series.
- Psychological Science – Visual environment, attention allocation, and learning in young children: when too much of a good thing may be bad, Fisher, Godwin and Seltman, 2014.
- Library of Congress Digital Preservation – Personal Archiving: Digital Photographs, archiving tips.
- National Center for Education Statistics – State Education Practices, Table 1.1: Minimum number of instructional days and hours in the school year, by state, 2020.
- Personality and Social Psychology Bulletin – No place like home: home tours correlate with daily patterns of mood and cortisol, Saxbe and Repetti, 2010.
Conclusion
Storing kids artwork well is a routing problem, not a container problem. An in-progress tray, a drying and landing zone, a small rotating display and one flat box per year give every piece a next place. A weekly or term-end review with a fixed keep-count stops the archive from becoming the pile it replaced.
For how this flow fits the station itself, return to the art station planning overview, which covers planning the space where the work begins.