
More than 3.4 million children are homeschooled in the United States today1, and most of those families work with real constraints: a shared bedroom, a living room corner, or an apartment averaging 908 square feet2. Homeschool room ideas for small spaces don’t require a dedicated classroom. They require a system. This guide covers six concrete steps to build a compact learning zone that functions well most days of the week. For the broader overview of planning every zone in a learning space, see the homeschool learning zones guide at Playroom Architect.
Quick Answer
What is the most effective approach for homeschool room ideas for small spaces?
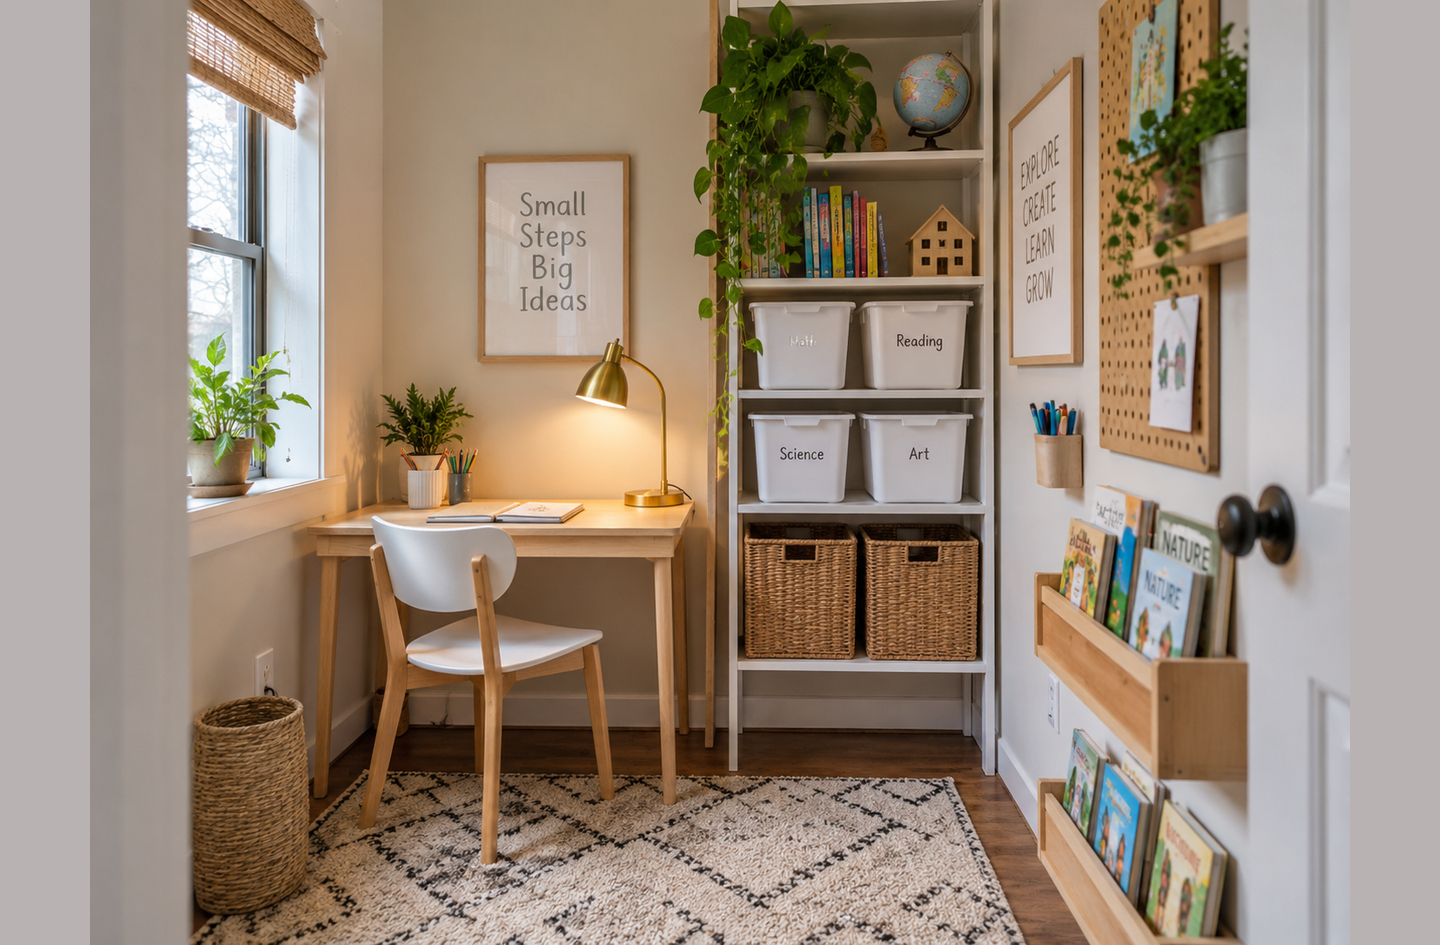
Place the desk against the longest unbroken perimeter wall, not in a corner, to keep floor area open and working reach full. Mount labeled storage directly above it using shelves or pegboard. Assign every supply a fixed home by subject category. A fast-reset routine, where each item returns to its home after each session, keeps the space functional in rooms under 100 square feet as well as larger ones.
Key Takeaways
- A perimeter-first desk position with wall storage directly above keeps floor area free without reducing the usable work surface.
- Children score 13 percentage points higher on learning tasks in sparse spaces than in heavily decorated ones.3
- A fast-reset system with fixed supply homes lets a child clear the entire learning space without adult help, in under five minutes.
What You Need Before You Start
Before moving furniture, gather four things. First, a tape measure. You need the exact dimensions of every wall, door, window, and built-in obstruction. Second, a simple sketch on paper – nothing detailed, just walls, openings, and where heat vents or radiators sit. Third, a written list of the subjects or activities your child works on each week. This list drives the number of storage categories you’ll need. Fourth, your child’s current seated thigh height, which you’ll use to set desk height correctly. You can take this measurement in under a minute with the child seated in a chair.
Know your wall type before mounting anything. Drywall anchors hold general shelf weight; plaster needs specific toggle bolts; concrete requires masonry anchors. If you’re unsure about load capacity for shelves holding books, consult a licensed contractor before installing. A shelf that falls is a real hazard in a space a child uses daily.
Estimated time to complete setup: two to four hours for a room with existing furniture, longer for a room that needs new shelving installed. Difficulty: low to moderate, depending on whether wall mounting is involved.
Step 1: Map Your Floor Space and Perimeter
By the end of this step, you’ll know exactly which wall the desk belongs on and how much clearance you have to work with. That one decision shapes every choice that follows.
Draw the Room to Scale
Take your tape measure and record the full dimensions of the room. Measure each wall, each doorway width, each window sill height, and the distance from any heat vent to the nearest corner. Mark these on a simple sketch. You don’t need software – a hand-drawn rectangle labeled in feet and inches works fine. The goal is a single document you can look at while planning, so you’re not guessing whether the desk will clear the closet door.
Identify the Longest Unbroken Perimeter Wall
A perimeter layout is an arrangement where furniture sits along the room’s walls, keeping the center of the floor clear for circulation and on-floor activity. The desk belongs on the longest wall that has no interruptions below 60 inches: no doorway, no window below sitting eye-level, no vent that would create a heat or cold pocket directly behind the child.
In rooms under 80 square feet, this wall is often the only viable option. In slightly larger rooms, you’ll sometimes have two candidates. Choose the one with the most uninterrupted wall height above desk level, because that’s where your storage goes.
Avoid corners. An L-shape desk arrangement requires the child to rotate between two surfaces during a session. A single straight run against one wall gives full arm reach from one seated position and uses less total floor depth.
Mark Circulation Clearances
A clear 24-inch path in front of the desk is the minimum for a child to push the chair back and stand without hitting an opposing wall or another piece of furniture. In rooms where 24 inches is tight, 18 inches works as an absolute minimum only if no other furniture sits directly opposite the desk. Mark this clearance on your sketch before you place anything. It’s the line you won’t cross when adding a second surface, a bookshelf, or a reading area.
Step 2: Position the Desk Against the Perimeter
By the end of this step, the desk is in its permanent position on the identified wall, at a height that supports correct posture for your child’s current size.
Set Desk Height Before Placing It
Desk height is the most commonly skipped adjustment in small homeschool setups. Parents default to a standard adult desk (29-30 inches) and then wonder why the child slouches or holds their pencil awkwardly.
The rule is simple: the desktop should sit 7 to 8 inches above the top of the child’s thigh when they’re seated correctly.4 For children ages 6 to 8, that means a desk height of 20 to 22 inches. For ages 10 to 12, it moves to 24 to 26 inches.4 The full check uses the 90-90-90 rule: feet flat on the floor, knees bent at 90 degrees, hips at 90 degrees, and elbows at 90 degrees when writing.
An adjustable-height desk is worth considering for children between ages 6 and 12. One adjustment can extend the setup’s useful life by two to three years without buying new furniture.
Place the Desk and Check Clearance
Position the desk centered on your identified wall, with equal wall space on each side when possible. Centering makes the storage zone above the desk feel organized rather than crammed into a corner. Confirm the 24-inch clearance in front is unobstructed. If the door swings into that zone, the desk must shift to the opposite end of the wall, far enough that the door arc clears the chair at full extension.
For children sharing the learning space with a parent who works from home, place the children’s desk on the wall perpendicular to the adult workspace rather than directly facing it. This reduces mutual distraction during sessions. For a dedicated portable setup that moves between rooms, see portable homeschool learning.
Step 3: Build Vertical Storage on the Walls
By the end of this step, every active supply has a labeled home above or beside the desk, and the floor stays clear. This is where most of the room’s capacity actually comes from.
Choose Open Shelves or Pegboard
Vertical storage refers to shelf systems, pegboards, or wall-mounted bins that use wall height rather than floor footprint to hold materials. For a small homeschool zone, this is the only way to add meaningful supply capacity without shrinking the working area.
Open shelves work well for bins, books, and flat items. Install the first shelf 6 to 8 inches above the desk surface, leaving enough clearance to slide a notebook in and out without lifting it over the shelf edge. Space subsequent shelves 10 to 12 inches apart. A three-shelf run above a standard desk reaches roughly 50 inches from the desk surface, which is accessible from a standing position without a step stool for most school-age children.
Pegboard works well for pencil cups, scissors, rulers, and any tool with a hook or loop. A 24-by-24-inch pegboard panel holds eight to ten items and adds no shelf depth to the wall. Many families use a combination: pegboard at desk level for active tools, a shelf tier above for subject bins, and a higher shelf for reference books and backup supplies.
Organize by Frequency of Use
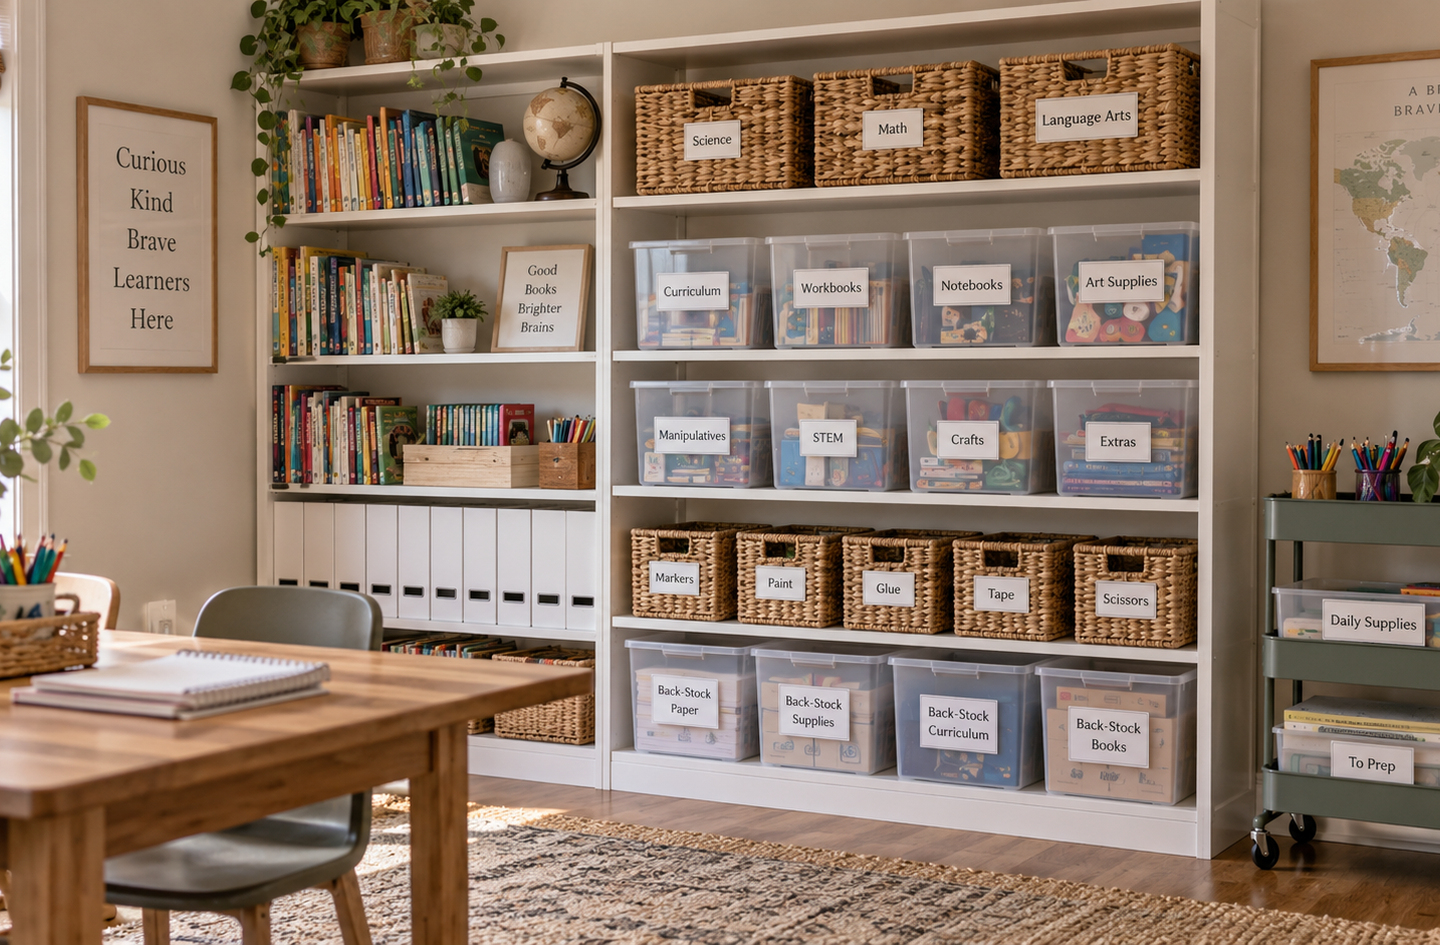
Place daily supplies within arm reach from the seated position: the items the child picks up every session go on the first shelf or pegboard row, no higher than shoulder level when seated. Weekly-use supplies go one shelf higher. Reference materials and backup stock go on the top shelf, where a parent reaches them but the child seldom needs to.
Label every bin at the child’s eye level, not the parent’s. This matters more than the bin’s color or style. A child who has to ask “which bin is math?” every session is a child who will delay starting. A label they read themselves removes one friction point from the reset routine.
Keep the Wall Spare Above the Storage Zone
Research published in Psychological Science found that children’s learning accuracy dropped from 55% in sparse classrooms to 42% in heavily decorated ones, and time spent off-task rose from 28.4% to 38.6%.3 The wall above your storage zone should hold only functional items. A world map used for geography lessons is functional. A decorative banner that never moves is not. When in doubt, leave the wall bare above the top shelf. The storage itself provides enough visual structure.
“Instead of removing all decorations, teachers should consider whether some of their visual displays may be distracting to young children.”
Anna V. Fisher, cognitive psychologist, Carnegie Mellon University3
Step 4: Add a Flexible Work Surface
By the end of this step, you have a second work area for projects, art, and hands-on materials that doesn’t permanently reduce floor space.
Why a Second Surface Matters
A single desk handles written and screen-based work. Hands-on subjects (science experiments, art, building projects) need more horizontal space, and trying to run those on the primary desk often means clearing and resetting between every activity. A second surface eliminates that friction. It doesn’t need to be large: a 24-by-18-inch addition is enough for most elementary project work.
The key constraint in a small room is that the second surface should store against the wall when not in use. Three options work well in tight spaces. A fold-down wall-mounted table closes to roughly 4 inches of depth when folded. A rolling utility table can slide against the wall or into a closet and rolls out in seconds. A drop-leaf extension attached directly to the primary desk adds surface area without any separate footprint when the leaf is down.
Choosing the Right Form for Your Room
If your room has a second wall with 16 or more inches of clear depth when the second surface is in use, a rolling table is the most flexible option. You can reposition it for different activities and store it elsewhere in the home when not needed. If wall space is the main resource and floor depth is truly limited, a fold-down wall-mounted table works better. Mount it at desk height so supplies don’t need to shift between surfaces during a session.
For families whose setup moves between rooms entirely, a rolling cart with a flat top can serve as both the project surface and the supply storage unit. That approach is covered in more detail in portable homeschool learning.
Step 5: Organize Supplies by Subject
By the end of this step, every item in the learning zone has a home in a labeled category, and you know exactly how much storage volume the setup actually needs.
Build the Category List First
Don’t start by buying bins. Start by listing every subject or activity your child works on in a week. Then consolidate into storage categories: one category gets one bin. If a category won’t fit in a single bin, you’re keeping too much on-shelf. The overflow goes in a back-stock box in a closet or on a high shelf, rotated into the desk-level zone each week.
A typical elementary homeschool setup runs five to seven categories. Reading, math, writing, science, and a general supplies tray covers most daily programs. Art and hands-on projects often share one larger bin stored on the mid-wall shelf rather than at desk level, because they’re not pulled out every session.
Reference Table: Subject Categories and Placement
Use this as a starting point. Adjust categories to match your child’s actual curriculum. The placement column follows the frequency-of-use rule from Step 3: highest use at arm reach, lowest use above shoulder height.
| Subject Category | Storage Form | Placement | Rotation Frequency |
|---|---|---|---|
| Reading / Language Arts | 1 bin + 2-3 active books | First shelf (desk-level reach) | Weekly |
| Math | 1 bin (manipulatives, worksheets) | First shelf | Weekly |
| Science / STEM | 1 bin | Second shelf | Weekly |
| Art / Projects | 1 larger bin | Second shelf or rolling cart | As needed |
| Reference materials | 2-4 books, spine-out | Top shelf | Rarely |
| Daily supplies (pencils, eraser, ruler) | Cup or tray on desk surface | Desk surface | Replenish as needed |
The rule for the desk surface: only the cup of daily tools and the active-session materials belong on it. Everything else sits in a bin and comes out when that subject starts. A clear desk surface at the start of each session reduces the setup time and signals to the child that the session is beginning.
Step 6: Design the Fast-Reset System
By the end of this step, every item in the learning zone has a fixed home, and the zone can be reset to its clean starting state in under five minutes without adult direction.
Assign a Home to Every Item
Design for the reset, not just the reveal. A learning zone that photographs well at 9 a.m. but takes 20 minutes to restore after a session has a storage layout problem, not a child behavior problem. The fix is specificity: each item goes to one fixed place, not “somewhere in the math bin” but the exact spot in the math bin.
The test is whether your child can put everything away without asking where something goes. If they ask once a week, the category needs a clearer label. If they ask every session, the category probably needs to be split into smaller, more specific groups. Children between ages 6 and 10 can operate a five-to-seven-category reset independently once the system is established. Give it two weeks of guided resets before calling the system broken.
The End-of-Session Reset Sequence
A short, consistent sequence works better than a general instruction to “clean up.” At the end of each session:
- Return every subject bin to its shelf space.
- Return the active-session books to their slots.
- Clear the desk surface to only the daily-supply cup and anything that lives permanently on the desk.
- Return any project materials to the project bin, on the rolling cart, or in the project box.
The Third Teacher concept, drawn from Loris Malaguzzi’s work in Reggio Emilia education, holds that the space itself teaches: a room with clear organization and visible homes for materials supports a child’s ability to manage their own activity, transitions, and cleanup. When every item has a visible fixed home and the desk surface resets cleanly, the child can start the next session with full focus rather than spending the first five minutes clearing the previous one.
The Five-Minute Reset Test
After the system has been in place for two weeks, time one reset with a clock. If the child clears everything in under five minutes working alone, the system is calibrated correctly. If it takes longer than ten minutes, find the single biggest bottleneck. Usually it’s one category with too many items (the bin is overfull and hard to return things to), or one item type that doesn’t have a clear home. Fix that one thing before changing anything else.
Small rooms benefit from a reset basket, a single open basket on the desk or first shelf where loose items that don’t have a home yet get dropped during the session. At reset time, the basket contents get sorted to their actual homes. This prevents the “where does this go?” pause from slowing the whole sequence.
Common Mistakes to Avoid
Most small homeschool setups fail at one of four points. The errors are predictable, and knowing them before you start saves a re-do.
Placing the Desk in a Corner
The mistake: pushing the desk into a corner to “use dead space.”
Why it happens: Corners look like wasted space from a floor-plan perspective, so the instinct is to fill them.
The fix: A corner requires the child to rotate sideways to reach materials on one side. A straight-wall run gives full bilateral reach from one seated position and usually uses less floor depth than the L-shape a true corner setup demands. Use the corner for a standing book display or a low bin unit, and keep the desk on a straight wall.
Storing All Materials at Desk Level
The mistake: putting every bin, book, and tool within arm reach at desk height.
Why it happens: It feels organized. Everything is visible and reachable.
The fix: Visual complexity at desk level is the most direct way to undermine focus. Children in heavily decorated classrooms spent 38.6% of learning time off-task vs. 28.4% in sparser environments.3 Apply the same logic vertically: only the active session’s materials belong at desk level. Everything else lives one or two shelves up. If you’re worried the child won’t find it, that’s a label problem, not a placement problem.
Skipping the Wall-Anchor Assessment
The mistake: mounting shelves or pegboard without checking the wall type or load.
Why it happens: Wall-mounting looks simple from a product-instruction perspective.
The fix: A 24-inch floating shelf loaded with a reasonable number of books carries 15 to 20 pounds or more. Drywall anchors, plaster, and masonry all require different hardware, and the wrong choice can mean a shelf failure over a seated child. Locate studs for any load-bearing shelf. If the wall is plaster, masonry, or an unusual construction type, consult a licensed contractor before installation. This is a structural safety question, and the cost of getting it right is far lower than the cost of getting it wrong.
Building for the Ideal Session
The mistake: designing a setup that works when everything goes according to plan.
Why it happens: Planning happens during calm moments; real sessions often don’t match them.
The fix: A small homeschool zone needs to work on the difficult days: interrupted sessions, unplanned transitions, a younger sibling in the room. Before committing to a layout, ask whether the reset sequence still works when the child is tired. If the answer is no, simplify the category structure or reduce the number of items kept at desk level until it does. The room as a system works when it functions on Wednesday afternoon, not just Monday morning.
Frequently Asked Questions
How much floor space do you actually need for a small homeschool learning zone?
A functional single-child learning zone can fit in a 6-by-6-foot floor area (36 square feet), provided the desk runs against the wall and storage goes vertical. The minimum working requirement is a desk with 24 inches of clearance in front and at least one shelf tier above. Rooms smaller than this can still work if a fold-down or rolling surface replaces a fixed second piece of furniture.
Can a shared kitchen or dining table replace a dedicated homeschool desk?
Yes, with one condition: the zone needs a portable supply system that sets up and resets without leaving materials spread across a shared surface. A rolling cart or a set of subject caddies that live in a closet or shelf and come out at session start can substitute for a fixed desk in a room that doubles as a dining or kitchen area. The setup and reset steps take slightly longer, but the system can work consistently. See portable homeschool learning for the full portable-system approach.
How high should the first shelf be above a child’s desk?
Install the first shelf 6 to 8 inches above the desk surface. That gap lets the child slide a notebook under the shelf without lifting it over the edge, and it keeps the shelf contents at eye level when seated. For children ages 6 to 8 working at a 20-to-22-inch desk,4 that puts the first shelf at roughly 28 to 30 inches from the floor – well within seated reach.
How do you organize two children at different ages in one small homeschool space?
The primary challenge is separating supply zones and session timing. Assign each child their own set of labeled bins on their own shelf segment. If both children work simultaneously, position the desks so they face the same wall (side by side) rather than face-to-face, which reduces direct distraction. If sessions alternate, the reset routine becomes the transition: one child clears before the next begins. Age-range differences affect desk height, so adjustable-height desks matter more in multi-child setups.
What lighting works best for a compact homeschool corner?
A task lamp with an adjustable arm placed at the non-dominant hand side of the desk eliminates glare from the writing hand’s shadow. Natural light from a window to the side (not directly in front of or behind the screen) is the best ambient source. For rooms with no window near the learning zone, a daylight-spectrum overhead lamp (5,000 to 6,500 Kelvin) combined with a desk task lamp covers most lighting needs without the eyestrain associated with a single harsh overhead source.
Limitations and Edge Cases
- Apartment size figures (908 square feet average) are US-based data from 2024.2 Regional and international patterns differ; apply the layout principles regardless of exact square footage.
- The classroom decoration study (Fisher et al.) used 24 kindergarten students in a controlled laboratory setting, not a home environment.3 The direction of the effect (sparse favors focus) is directionally applicable to home setups, but exact percentages should not be treated as home-environment benchmarks.
- This guide covers a single-child primary desk setup. Multi-child rooms with simultaneous sessions involve zone-separation and noise-management decisions that go beyond what one desk and one wall can solve. Those decisions belong under the broader topic of shared and multi-age learning spaces.
References
The methodology for this article draws every cited figure from an independent published source, with each URL verified live before publication and a verbatim supporting sentence recorded per reference.
- National Home Education Research Institute – How Many Homeschool Students Are There in the United States During the 2024-2025 School Year? NHERI, 2025.
- Multifamily Executive – U.S. Apartment Sizes Inch Upward in 2024. Multifamily Executive, 2025.
- Association for Psychological Science – Heavily Decorated Classrooms Disrupt Attention and Learning in Young Children. Fisher AV, Godwin KE, Seltman H; Psychological Science, 2014.
- Autonomous – Children’s Desk Height Chart for Every Age. Autonomous.ai, 2024.
- Pew Research Center – A Look at Homeschooling in the US. Pew Research Center, February 2025.
Conclusion
A compact homeschool learning zone in a small room comes down to three decisions made in the right order: which wall the desk belongs on, how high the storage goes above it, and how consistently the space resets after each session. Get those three right and the room size becomes less of a constraint. Structural reasoning first, decor inspiration second.
For the broader framework covering every learning zone type and how they connect, see the homeschool learning zones guide at Playroom Architect.