
Preschool-aged children need at least three hours of physical activity every day, yet indoor play time often falls short when the space hasn’t been designed to support it.2 Indoor gross motor games for preschoolers close that gap when each zone has a clear start point, a defined movement path, safe spacing between stations, and a rule simple enough for a four-year-old to follow. This guide covers all six setup steps. For the broader context on active-play zone design, see the overview in Indoor Active-Play Zones.
Quick Answer
How do you set up indoor gross motor game zones for preschoolers?
Clear a minimum of 42 square feet of usable floor per child,3 mark a single start point and a one-way movement path, space every station at least 6 feet apart with a 9-foot gap between tall structures, assign one clear rule per game, and store all equipment at the zone’s edge so the circuit resets in under two minutes. That combination turns a loose collection of activities into a system children can follow without constant adult direction.
Key Takeaways
- Preschool-aged children need at least three hours of physical activity per day,2 yet only about 60% of preschoolers currently meet that target.4 A structured indoor zone is one of the most reliable tools to close that gap.
- Structured gross motor programs produce an effect size (Hedges’ g) of 0.50 on total motor skill, nearly four times higher than unstructured free play at g = 0.13.5
- CFOC guidelines set 42 square feet of usable indoor floor per child as the minimum for childcare settings; that number sets the practical ceiling on how many stations your zone can hold.3
- Design for the reset, not just the reveal: a zone that clears in two minutes will be set up every day; one that takes 20 minutes won’t.
What You Need Before Setting Up a Zone
This guide applies to any indoor space used for preschool gross motor games: a dedicated playroom, a classroom cleared of furniture, a living-room corner, or a cleared garage area. Before the first step, have the following ready.
- Floor dimensions: a rough sketch of the room with measurements in feet, including the location of doors, windows, and any fixed furniture that can’t be moved.
- Equipment list: a written inventory of what you plan to use – foam balance beams, stepping spots, cones, tunnels, or similar items – along with the footprint of each piece.
- Floor tape or floor spots: for marking paths and start points. Painter’s tape and vinyl floor dots both remove cleanly from most hard surfaces.
- Age group: this guide is designed for children ages 3 to 5. For toddlers aged 1 to 2, see the lower-scale approach in zones for 1-2 year olds. For 4-year-old specific progressions, see zones for 4-year-olds.
- Estimated setup time: 30 to 45 minutes for the initial configuration. Later resets take 2 to 5 minutes once the storage system is in place.
- Scope note: this guide covers layout, spacing, rules, and storage for freestanding floor equipment. Decisions about structural changes to a specific room, wall-mounted equipment, or a specific child’s developmental needs belong with a licensed contractor, a structural engineer, or a pediatric occupational therapist.
Step 1: Measure and Clear the Floor Area
By the end of this step, you have a floor sketch showing how much usable area you actually have for active play, and every piece of furniture or loose obstacle inside that area has been removed or shifted to the perimeter.
Why the floor area calculation matters
Gross motor skill is the ability to coordinate large muscle groups for whole-body movements such as running, jumping, crawling, and throwing. Developing it requires enough unobstructed space for a child to complete the movement fully, not just begin it. The Caring for Our Children (CFOC) national guidelines, published by the American Academy of Pediatrics (AAP), recommend a minimum of 42 square feet of usable indoor floor space per child in a childcare setting.3 That figure excludes bathrooms, kitchens, hallways, and storage. It sets the practical ceiling on how many children can safely use a zone at the same time.
To calculate your zone capacity, sketch the room and subtract all fixed obstacles, door-swing arcs, and hard-edge buffer zones of at least 36 inches from any wall, door frame, or sharp-cornered furniture. Divide the remaining usable area by 42. That quotient is the maximum number of children who should be in the zone simultaneously.
How to clear the space step by step
- Move portable furniture to the perimeter. Chairs, low tables, toy bins on wheels, and anything a child could trip over should go to the wall or to an adjacent space.
- Mark door-swing arcs. A door opening inward removes 9 to 14 square feet of floor arc from the usable area. Mark the arc with tape if a door falls inside the zone boundary.
- Identify and buffer hard edges. Wall corners, window ledges, and baseboards with exposed hardware need a buffer of at least 36 inches. For safe clearance details, see active play off hard edges.
- Check sightlines. Walk the cleared space at a low crouch to approximate a child’s eye level. You should be able to see every station clearly from every other station. A blind corner is a setup condition for collisions; close it by adjusting the zone boundary or adding a visual marker.
Verification
Walk the perimeter without stepping over anything, then walk a diagonal. If either pass isn’t clean, the zone still has obstacles to move before equipment goes in.
Step 2: Mark the Start Point and Movement Path
By the end of this step, every child who enters the zone has exactly one place to start and one direction to travel. Two children moving toward each other from opposite directions is the setup condition for most minor collisions in indoor gross motor play.
Choose a circuit shape first
A movement path is the defined route children follow from one station to the next, usually marked on the floor with tape or floor spots to prevent two children from approaching the same point from opposite directions. Two practical shapes exist for a preschool circuit.
A linear path runs from a single start point through each station to a single finish. Children wait at the start for the previous child to reach the second station before entering. This shape works well in hallways or long, narrow rooms. It requires a clearly marked return route on the opposite side of the space.
A loop path runs counterclockwise in a closed circuit. Children enter at one designated spot and follow the loop in one direction only. This shape works better in square or wide rectangular rooms. It handles self-pacing naturally: a faster child stays further ahead on the loop, so there is no bottleneck at a single finish point.
Mark the path on the floor
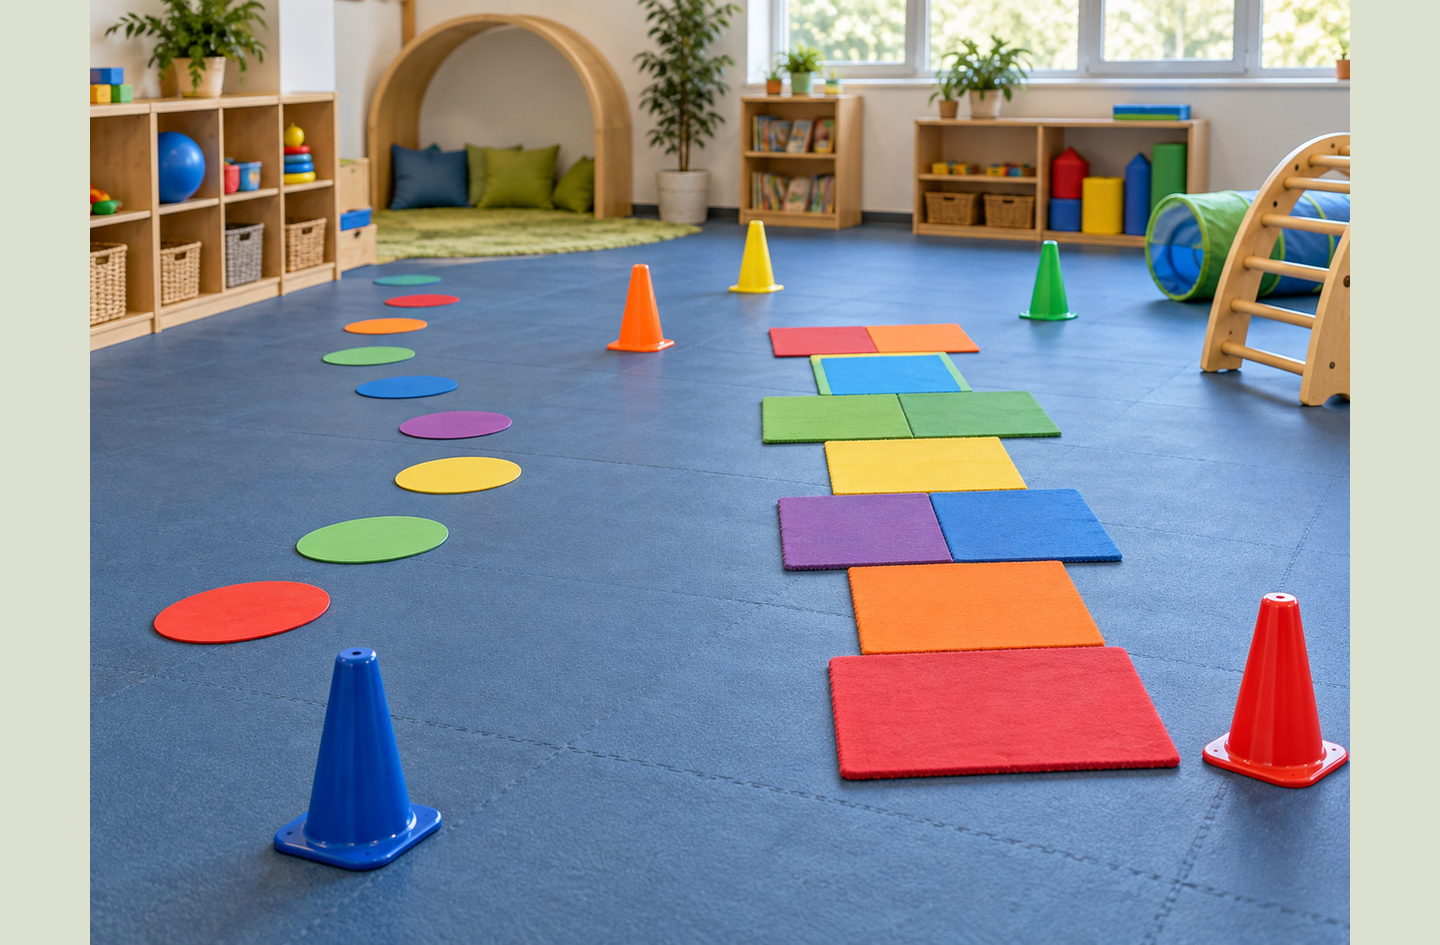
- Place a colored start marker. A bright color – red or yellow – works better than a neutral one. Children can identify “start” immediately without relying on a remembered instruction.
- Add directional markers at each transition. Lay spots or arrows pointing to the next station in sequence. Spots should be 8 to 12 inches in diameter so a child can stand on them. Tape arrows supplement spots in longer open stretches.
- Set the path width to 24 to 30 inches. That is wide enough for a running child and narrow enough to prevent two children from traveling side by side in opposite directions. Mark both path edges in spaces where children might stray off-center.
Test the path before adding equipment
Walk the path yourself, then crouch to a child’s eye level and repeat. If any marker is ambiguous or the next station isn’t visible, adjust before equipment goes in. Moving a marker takes ten seconds; moving it around a foam block takes considerably longer.
“Children 3-4 years of age should spend at least 180 minutes in a variety of types of physical activities at any intensity, of which at least 60 minutes is moderate- to vigorous-intensity physical activity, spread throughout the day; more is better.”
World Health Organization, Guidelines on Physical Activity, Sedentary Behaviour and Sleep for Children Under 5 Years of Age (2019)1
That guideline is the reason path design matters: the 60-minute moderate-to-vigorous target is only reachable indoors when the layout keeps children moving rather than waiting, redirecting, or colliding. A clear path removes the friction that cuts active time short.
Step 3: Set Safe Spacing Between Stations
By the end of this step, every station in the circuit has a minimum 6-foot clearance buffer on all sides, and any equipment taller than 30 inches is spaced at least 9 feet from its neighbors.
The fall zone rule
A fall zone is the clear, impact-absorbing area around a piece of play equipment where a child can land safely if they slip, stumble, or misjudge a step. For indoor preschool active play, the fall zone is the horizontal buffer measured from the outermost point of each station to the nearest wall, hard surface, or adjacent piece of equipment.
CPSC playground safety guidance calls for at least 6 feet of protective surfacing in all directions from play equipment.7 That figure is the starting benchmark for indoor station clearance: leave at least 6 feet between the edge of any station and the edge of the next. For equipment taller than 30 inches – climbing blocks, foam ramps, or step platforms – the CPSC standard calls for a minimum 9-foot separation between structures.7
Applying spacing to a real floor plan
Lay out your equipment on paper first. Draw each piece as a rectangle using its actual footprint, then draw a 6-foot boundary around each one. Where two boundaries overlap, the stations are too close. Shift one piece until all boundaries clear.
In a tight room, this paper exercise often reveals a smaller station count than expected. A 10 by 12-foot area accommodates at most two properly spaced stations with adequate fall zones on all sides. Hard edges – walls, door frames, window ledges – count as boundaries too. No station should sit closer than 36 inches to a wall and no closer than 6 feet to a corner, where impact forces from two directions converge.
This guide covers freestanding floor equipment only. Wall-mounted hardware has different installation requirements; consult a licensed installer before adding any fixed structures.
Soft surfaces inside the fall zone
Foam puzzle mats, rubber-backed area rugs, and interlocking gym tiles all reduce the impact of a fall compared to bare hardwood or tile. Place them inside the full fall zone, not just under the equipment footprint. A child who falls to the side lands outside the equipment footprint – which is exactly where the mat matters most. Verify that mat edges don’t curl (a trip hazard) and that adjacent sections lock tightly without gaps.
“Make sure play structures more than 30 inches high are spaced at least 9 feet apart.”
U.S. Consumer Product Safety Commission, Public Playground Safety Checklist (2024)7
Step 4: Select and Limit Equipment for Each Station
By the end of this step, each station contains one to three pieces of equipment with a single, clear purpose matched to what a 3-to-5-year-old can complete without adult guidance on each attempt.
One skill focus per station
The most common equipment mistake is assigning too many skills to one station. A station with a balance beam, two stepping stones, a tunnel entrance, and a bean bag toss is not a station – it is four stations compressed into one footprint. Children stop moving through it and start exploring it, breaking the circuit and creating a traffic jam behind them.
Each station should target exactly one fundamental movement skill: jumping, crawling, balancing, throwing, or climbing. A throwing station has a target and a bin of soft balls. A crawling station has a tunnel or a low arch to pass under. A balance station has a low beam or a row of textured stepping pods. One skill per station keeps the circuit moving and lets children practice the movement cleanly, without switching between different motor demands in the same 6-foot footprint.
Why limiting equipment improves skill outcomes
A 2024 meta-analysis of 23 studies and 4,068 preschool-aged children found that structured motor interventions produced an effect size of Hedges’ g = 0.50 on total fundamental motor skills.5 Unstructured play scored g = 0.13 on the same measure – roughly four times lower. Structured programs deliver focused, repeated practice of specific movements. Unstructured play is broader but shallower. An indoor zone that assigns one movement skill per station IS a structured program. The equipment limits enforce the structure. They prevent children from skipping the target movement in favor of a different one at the same station.
This is the core logic behind treating the room as a system. The zone doesn’t just contain play – the arrangement of the space shapes what kind of movement happens and how much motor skill development it produces over time.
Equipment selection by age within the 3-to-5 range
For age 3, keep station heights at floor level to 12 inches: stepping spots, low balance beams 2 to 3 inches off the ground, soft foam mats for rolling, and short tunnels. Three-year-olds are still developing depth perception and lateral balance; jumping from a height reliably exceeds what most of them can land safely at this stage.
For ages 4 to 5, equipment up to 18 to 24 inches is appropriate for most children: a two-step foam climbing block, a slightly elevated balance beam, and target throws at chest height. For age-specific progressions, see the 4-year-old zone guide. For children with specific developmental needs, consult a pediatric occupational therapist.
Step 5: Write a Simple Rule Card for Each Zone
By the end of this step, each station has one posted rule in picture-plus-word format that a child can read and follow without waiting for an adult to explain it.
Why one rule per station works
Preschoolers typically follow one-step or two-step directions reliably. Instructions with three or more conditions tend to collapse after the first condition is met. A zone rule that says “walk on the balance beam, arms out, without stepping off” has three conditions. A rule that says “walk the beam” has one. The simpler version gets followed. Keep each rule to one observable action that the child can verify themselves: did I do it or not?
Rules with a visual component work better than spoken rules for this age group. A rule card showing a picture of the expected action – a child walking on a beam – alongside two or three words is visible, persistent, and independent of memory. The picture stays at the station for the whole session. The spoken instruction given at the start of the session does not.
How to make a rule card
- Print or draw the action on card stock. Show the correct movement, not a prohibition. A picture of a child jumping into a hoop works better than a picture of jumping with an X through it. The positive image shows what to do rather than what to avoid.
- Write three words or fewer. “JUMP IN THE HOOP” is four words; trim to “JUMP IN” with an arrow pointing to the hoop. The rule triggers the movement – it doesn’t describe it.
- Laminate and mount at child eye level. That is approximately 36 to 40 inches from the floor. A rule posted at adult eye level will not be read by a child who is 3 feet tall.
Introducing the rules before the first session
Before the first circuit run, walk children through each station while they are standing at it. Demonstrate the rule once, then ask each child to repeat the action before moving on. This pre-loading reduces mid-circuit confusion and the number of times an adult needs to redirect a child during the session itself.
After two or three sessions, most 4-to-5-year-olds navigate independently. Three-year-olds typically need one adult nearby for the first 5 to 8 sessions. Plan for this in the first week.
Step 6: Organize Storage for a Fast Reset
By the end of this step, every piece of equipment has a labeled storage spot at the edge of the zone, the storage is reachable in one step from the equipment itself, and the entire circuit clears and packs away in under two minutes.
Why reset speed determines zone frequency
Design for the reset, not just the reveal. A zone that takes 30 minutes to set up runs twice a week at best. A zone that takes 2 minutes to reset runs every morning. In a preschool setting where at least 15 minutes of active movement per care hour is the recommended target,6 frequency matters as much as design quality. A carefully built zone that runs twice a week contributes less to motor development than a simpler zone that runs every day.
Plan the storage system at the same time as the zone layout, not as an afterthought. Equipment without a home ends up stacked in a corner, which slows the next setup, which makes setup less likely to happen at all. This is the friction point the “room as a system” approach removes.
Storage placement and labeling
Place storage bins or a shelf at the edge of the active zone, not in a separate closet or hallway. Every step between equipment and storage is friction that slows the reset. A low storage shelf 12 to 18 inches deep along one wall keeps foam mats, tunnels, stepping spots, and soft balls within arm’s reach of where they’re used.
Label each storage spot with a picture and a quantity marker: “4 BEAMS,” “1 TUNNEL,” “10 SPOTS.” This tells adults where to return items and lets children help with the reset. A child matching the foam beam to its labeled spot is practicing sorting while doing something useful – the reset becomes part of the session.
The two-minute test
Once storage is set up, run a timed reset. Clear the zone from active configuration to fully stored in a single pass. If it takes longer than two minutes, the storage system has a bottleneck. Common causes: bins too small for the equipment, bins placed too far from where equipment naturally lands after use, or more equipment than the designated storage space can hold. Fix the storage before the first session. A broken storage system defeats the value of all five steps that came before it.
| Step | Action | Key Metric | Verification |
|---|---|---|---|
| 1 | Measure and clear the floor | 42 sq ft per child minimum | Perimeter walk: no obstacles |
| 2 | Mark start point and path | 24-30 in. width, one direction | Full circuit walk: no ambiguous transitions |
| 3 | Set station spacing | 6 ft minimum; 9 ft for tall equipment | Paper floor plan: no overlapping fall zones |
| 4 | Select and limit equipment | 1 skill focus and 1-3 pieces per station | One observable movement per station |
| 5 | Write a rule card | 1 rule, 3 words max, picture included | Child follows the rule without adult help |
| 6 | Organize storage | Full reset under 2 minutes | Timed reset: everything stored, zone clear |
Common Setup Mistakes to Avoid
Most indoor gross motor zones fail the same way: not because of bad intentions, but because planning decisions that seem reasonable at the sketching stage create real friction once children are moving through the space.
Mistake 1: Too many stations for the available floor
What goes wrong: a 300-square-foot room with 8 children has roughly 37 square feet of usable space per child – below the 42-square-foot minimum.3 Adding 6 stations with 6-foot fall zones on a floor that can’t accommodate them produces overlapping boundaries and a zone that looks organized on paper but generates collisions in practice. The fix: run the floor calculation before deciding how many stations to include. Three well-spaced stations produce better movement outcomes than six cramped ones.
Mistake 2: No clear one-way path
What goes wrong: without a defined direction, children navigate organically and two arrive at the same station from opposite directions. The fix: lay path markers before the first session and reinforce one direction for the first three to five sessions. Most 4-to-5-year-olds internalize the circuit direction within a week.
Mistake 3: Rules that require adult enforcement
What goes wrong: a rule like “jump into the hoop, then clap twice, then run to the next station” is a three-step sequence. Three-year-olds execute step one and head for the next station, pausing the circuit for every child behind them. The fix: one observable action per rule, posted at eye level. If every station needs adult enforcement, the rule is too complex.
Mistake 4: Storing equipment in a separate room
What goes wrong: equipment stored in a closet or hallway creates a multi-step setup process. Every piece must be retrieved, carried, and positioned. The same process runs in reverse at the end. A session that runs 45 minutes but requires 40 minutes of setup and breakdown gets dropped within two weeks. The fix: dedicate a shelf or labeled bin cart at the zone perimeter. Even a low storage cart positioned at the wall cuts setup time from 20 minutes to 2.
Mistake 5: Placing an active station next to a quiet zone
What goes wrong: a jumping station next to a puzzle table is a sound and motion disruption for children concentrating at the table, and the table itself becomes a hard-edge collision risk for a child who misjudges the landing. The fix: separate active zones from quiet or focus zones by at least 6 feet of clear floor, or by a low physical divider such as a storage shelf. The general principle from indoor active play off hard edges applies directly: active play away from hard edges, and quiet activities away from movement corridors.
Frequently Asked Questions
How much floor space do indoor gross motor zones need for preschoolers?
CFOC guidelines recommend a minimum of 42 square feet of usable indoor floor per child in childcare settings, excluding bathrooms, storage, and hallways.3 That number sets the practical ceiling on how many children and stations a zone can hold simultaneously. A room with less than that per child is undersized for active-play circuits, regardless of how the equipment is arranged.
How many stations should a preschool gross motor circuit have?
For most home and classroom spaces, 4 to 6 stations is a practical range. Each station needs its own fall-zone clearance of at least 6 feet on all sides,7 so the available floor area determines the real limit – not a fixed number. Fewer well-spaced stations produce better outcomes than more cramped ones.
What is the safest surface for an indoor preschool gross motor zone?
Interlocking foam puzzle mats or rubber-backed gym tiles reduce fall impact better than bare hardwood or tile. Place mats inside the full fall zone, not only under the equipment footprint – the edge of the mat is where the most important protection sits. Secure mat edges to prevent curling, which creates a trip hazard greater than uncovered flooring.
How do you introduce zone rules to preschoolers using a circuit for the first time?
Walk children through each station before the first session, demonstrate the rule once, and ask them to repeat the action immediately. Post a picture-plus-word rule card at each station at eye level (36 to 40 inches from the floor). Most 4-to-5-year-olds self-direct after 2 to 3 sessions. Three-year-olds typically need one adult nearby for the first 5 to 8 sessions.
How often should the equipment in a preschool gross motor circuit be rotated?
A 2024 meta-analysis found that structured programs running longer than 3,000 total minutes produced the largest motor skill improvements.5 Consistency over time matters more than novelty. Rotate equipment when children have clearly mastered the movement at every station, not on a fixed calendar – usually every 4 to 6 weeks for active learners.
Limitations and Edge Cases
- This guide covers freestanding floor equipment only. Wall-mounted active-play hardware – climbing walls, hanging rings, overhead bars – has different installation and structural requirements. Consult a licensed installer and a structural engineer before mounting any equipment to walls or ceilings in a specific space.
- The 42 sq ft CFOC standard applies to licensed childcare contexts. Home play spaces are not licensed, but the floor-space calculation still provides a useful safety benchmark; a home room below that threshold is undersized for the number of children using it simultaneously.
- The age range here is 3 to 5 years. For toddlers under 3, the spacing and height recommendations apply at a smaller scale; the 1-2 year zone guide covers those adjustments.
References
Methodology: every figure in this article is drawn from an independent published source linked to its original page; the content is reviewed against current WHO, CPSC, and AAP guidance each revision cycle.
- World Health Organization – Guidelines on Physical Activity, Sedentary Behaviour and Sleep for Children Under 5 Years of Age, 2019.
- U.S. Department of Health and Human Services, ODPHP – Physical Activity Guidelines for Americans, 2nd edition, 2018 (current).
- American Academy of Pediatrics – Caring for Our Children: National Health and Safety Performance Standards, 4th Edition, 2019.
- PMC / International Journal of Behavioral Nutrition and Physical Activity – Systematic review and meta-analysis on preschooler physical activity guideline adherence, 48 studies, n = 20,078, 2023.
- PMC / Frontiers in Public Health – Meta-analysis of structured vs. unstructured motor interventions in preschoolers, 23 studies, n = 4,068, 2024.
- CHOICES Project, Harvard T.H. Chan School of Public Health – Physical Activity Is Key for Young Kids’ Health, 2022.
- U.S. Consumer Product Safety Commission – Public Playground Safety Checklist, 2024.
Conclusion
A preschool gross motor zone that works isn’t the one with the most equipment or the most colorful floor tape. It’s the one where the floor area is sized correctly, each station has one clear movement to practice, and the whole circuit resets in under two minutes. Structure is what separates a busy, noisy space from a zone that builds real motor skill. See the broader overview in Indoor Active-Play Zones for how this kind of active-play design fits within a full room plan.