
When a 4-year-old runs out of room indoors, the furniture pays the price. Designing indoor gross motor activities for 4 year olds means building a purposeful zone calibrated to what children can actually do at this age and structured to support the five movement types their development calls for. For context on how active-play zones fit into a full room plan, see the overview in Indoor Active-Play Zones: Everything You Need to Know. According to a 2025 University of Bristol accelerometer study of 419 preschool children, only 23% met the WHO recommendation of 180 minutes of daily physical activity.2 A structured indoor zone closes that gap on days when going outside is not possible.
Quick Answer
How do you set up an indoor gross motor zone for a 4-year-old?
Clear at least 42 square feet of unobstructed floor, identify the five movement types for this age (jumping, balancing, throwing, climbing, and obstacle play), assign each a distinct micro-zone, add foam or rubber mat landings under every elevated surface, and link the zones into a short obstacle circuit that rotates every two to three weeks. Start with the floor plan before selecting any equipment.7
Key Takeaways
- The WHO recommends 180 minutes of total daily physical activity for children ages 3-4, including at least 60 minutes at moderate-to-vigorous intensity.1
- Only 23% of preschoolers currently meet those guidelines – making a dedicated indoor movement zone one of the most practical responses available to families on days when outdoor play is not possible.2
- At age 4, children can hop on one foot, throw overhand, catch a bounced ball, and climb on and off low structures – these milestones define the appropriate challenge level and equipment choice for the zone.4
- Structured indoor movement produces measurably better outcomes than unstructured free play alone: a 2024 study found a 29.42% improvement in obstacle course performance when preschoolers followed a structured activity program.6
Before You Begin: What Your Space Needs
Confirm these baselines before moving a single piece of furniture. Setting up equipment in a space that cannot support the movement pattern produces friction, not play.
- Usable floor area: At least 42 square feet of unobstructed floor space per child, per the joint AAP, APHA, and National Resource Center preschool health and safety standard.7 For one 4-year-old with a five-zone layout, plan for 150-200 square feet of clear floor.
- Ceiling height: At least 7 feet in the jumping and climbing zones. No ceiling fans in the active path.
- Surface condition: Identify the existing floor type before purchasing any mats. Hard floors (hardwood, tile, concrete) need foam or rubber coverage across the full zone, not just under equipment.
- Sightlines: You should see the entire zone from one supervision position. Blind spots are a layout problem to solve at the planning stage, not at the supervision stage.
- Setup time and difficulty: One afternoon for the initial build. Any wall-mounted or ceiling-anchored hardware falls outside this guide’s scope – consult a licensed installer and a structural engineer for your specific wall and ceiling type before adding anchored equipment.
Step 1: Clear and Measure the Movement Floor
By the end of this step, you will have a mapped movement floor with exact dimensions and a clear picture of what the space can support before any equipment enters it.
Begin with a complete clear-out of the candidate area. Move furniture, storage, and loose objects to the perimeter or out of the room. This is not a permanent decision – it is an observation pass. Families consistently underestimate how much a room’s usable area shrinks once furniture returns. A 12×14 room is 168 square feet on paper; after a couch, shelving unit, and toy bins, the clear area often falls below 80 square feet. Measure the actual open space with a tape measure and mark the corners with painter’s tape before anything comes back in.
What to record in your measurement pass
Note where doors swing, where fixed radiators or heating vents sit, and where electrical outlets are located. These are non-negotiable constraints that override zone placement preferences. Also record where natural light falls – adequate visibility is a supervision requirement, not a decor preference. Preschoolers spend only 12% of indoor play time at moderate-to-vigorous intensity compared to 31% of outdoor play time.5 Good zone design addresses that gap by building movement prompts directly into the room’s layout, so the space encourages the child to move rather than drift toward sedentary activity.
Confirm the supervision position
Stand at the point where an adult will typically be during active sessions. Can you see all five planned zones from that single position? If columns, half-walls, or furniture create blind spots, reorganize the zone placement until all areas are visible. A supervision blind spot is a layout failure, not a behavior problem. Solve it at the planning stage, not through constant active scanning during sessions. For a full treatment of how to plan open floor space and traffic flow in a preschool movement zone, the indoor gross motor planning guide for preschoolers covers each step in detail.
Step 2: Indoor Gross Motor Activities for 4 Year Olds and the Right Challenge Level
By the end of this step, you will have matched each of the five movement types to the specific milestones a typical 4-year-old has reached, so every zone is set at a challenge level the child can succeed at most of the time while still working to do so.
A 4-year-old is not a scaled-up 2-year-old and not a scaled-down 6-year-old. The milestone profile at this age is specific. According to the CDC’s 2022 revised checklist, endorsed by the American Academy of Pediatrics, a 4-year-old can typically hop and stand on one foot for up to 5 seconds, throw a ball overhand, catch a bounced ball most of the time, go up and down stairs without support, and climb on and off furniture.4
| Movement Type | 4-Year-Old Milestone | Zone Footprint | Appropriate Challenge Level |
|---|---|---|---|
| Jumping | Jumps on two feet; beginning one-foot hops | 6 x 6 ft minimum | Low platforms (4-6 in.), floor targets |
| Balancing | Stands on one foot 2-5 seconds; moves with agility | 4 x 6 ft minimum | Balance board, tape lines, low beam (2-4 in.) |
| Throwing and catching | Throws overhand; catches bounced ball most of the time | 8 x 6 ft minimum | Foam balls, basket target, 4-6 ft toss distance |
| Climbing | Climbs on and off low structures; navigates stairs | 6 x 8 ft minimum | Arch climber, low ramp (under 36 in. height) |
| Obstacle play | Sequences all four skills in a linked circuit | Full zone width | 4-6 station circuit connecting the zones above |
Why challenge level matters more than equipment choice
An obstacle too easy produces boredom. One pitched at the wrong developmental level produces avoidance or unsafe improvisation as the child tries to brute-force a problem their current skill cannot handle cleanly. For 4-year-olds, this means one-foot balance challenges lasting a few seconds (not 30), throwing distances where the ball reaches the target more than half the time, and climbing structures low enough that a fall from the top is a tumble and recover situation rather than a height-risk scenario. If you are transitioning a room from a younger sibling’s zone, the indoor gross motor setup for 2-year-olds describes what to retire and why – the two age groups need meaningfully different layouts and equipment scales.
Step 3: Assign Micro-Zones and Plan Traffic Flow
By the end of this step, you will have a floor-tape layout showing where each of the five movement types sits, how the child moves between them, and where the supervision position is relative to all zones.
Arrange the five zones so the child’s natural movement path forms a loop rather than a dead-end scatter. A circuit keeps momentum going. A disconnected grid of stations generates transition fatigue and shortens sessions. Position the highest-energy zones (jumping, climbing) at the far end of the space, away from the room’s entrance. Place the throwing zone with its back to a wall so targets are stable and the child is throwing away from traffic paths. Balance activities sit well adjacent to jumping because the transition between the two is a natural sequence for this age. Obstacle play connects the zones into the circuit and wraps the loop.
Testing the layout with painter’s tape before equipment arrives
Use painter’s tape or colored floor tape to mark each zone boundary before moving any equipment in. Move through the circuit yourself at a child’s pace. Note every transition point where you had to pause, re-orient, or squeeze through a gap. A child running the same path will improvise a shortcut past any station that breaks their momentum. Fix the physical gap – widen a transition path, move a mat boundary, shift a station – before the child attempts it. The floor plan is the product worth investing in first. For parents managing a shared space with a younger sibling, the zone planning guide for 1 and 2-year-olds covers how to separate risk levels within one room.
Step 4: Set Surfaces, Mats, and Landing Zones
By the end of this step, every movement zone will have an appropriate surface beneath it, landing zones will be positioned under all elevated elements, and you will have confirmed that no mat edge creates a new trip hazard at the perimeter.
Surface selection is the most safety-relevant decision in the zone setup, and it is also the one most frequently skipped. Parents tend to focus on equipment and reach surfaces last. The sequence should be reversed: surfaces first, equipment second. A climbing structure placed on a hard floor without landing coverage is a known risk. A crash mat placed only directly beneath the structure and not extending outward from its edges is not fully covering the fall zone.
Surface requirements by zone type
For the jumping zone, hard floors need a minimum of 1.5 to 2 inches of foam or rubber mat coverage across the full area where the child lands – not just under a step or platform. Jumping involves unpredictable lateral landing patterns. The mat must cover the realistic landing radius in all directions, not just the theoretical center. For the climbing zone, place a crash mat of at least 2 inches thickness directly under and around the climbing structure’s footprint, extending at least 24 inches beyond the structure’s edges on every side a child might fall from. For the balance zone, a low-pile non-slip rug or mat is sufficient since the fall height is essentially zero. For the throwing zone, a rug defines the station visually and keeps the child oriented to their lane; deep cushioning is not required.
Preventing mat-edge trip hazards
The edges of foam puzzle mats are among the most common incidental hazards in home active-play zones. A curled edge becomes a trip point for a running child. Tape all mat edges flat, choose beveled-border mats, or lay mats edge-to-edge across the full zone so no border catches a moving foot. Check mat position before each session – a gap that starts at one inch can reach four inches after vigorous play without being noticed. Build the mat-check into the room reset routine.
Step 5: Select and Place Equipment for Each Movement Type
By the end of this step, every micro-zone will have its primary equipment in place, positioned for the movement pattern it supports, and checked for stability before the child uses it.
Equipment for a 4-year-old gross motor zone does not need to be elaborate. Each of the five movement types can be served by one or two pieces, and simpler setups tend to produce more sustained and creative play than over-equipped ones. A zone with too many options generates decision fatigue and often results in the child gravitating to the single easiest activity rather than cycling through the range. SHAPE America’s Active Start guidelines recommend at least 60 minutes of structured physical activity per day for preschoolers, on top of additional unstructured movement time.3 The zone’s job is to make those structured minutes available on the floor of your home.
Jumping zone
A low foam step or platform (4-6 inches high) plus a strip of floor tape marking jump targets is sufficient. The platform gives the child a launch point; the floor targets (circles, X marks, numbered spots) give the jump a purpose and a measurable outcome, which sustains engagement longer than open jumping alone. If space allows, a small indoor rebounder with a safety enclosure net can supplement the platform – confirm the manufacturer’s stated age and weight rating matches the child before use, and position it fully within the padded mat zone.
Balancing zone
A wobble board or balance board at preschool grade (low-profile, wide base) is the core piece. A line of floor tape in two configurations (one straight line and one curved line) provides two balance challenges at different skill levels. An optional low wooden balance beam that sits 3-4 inches off the ground rounds out the zone. The goal is graduated challenge: a 4-year-old is building toward sustained single-foot balance and directional stability, and each piece should let the child succeed while requiring real effort to do so.
Throwing and catching zone
Stock the throwing zone with foam balls in two or three sizes. Soft foam balls reduce the consequence of a missed catch or an off-target throw contacting a wall or sibling. Set a basket or laundry bin as the primary target, placed 4-6 feet from the throwing line. This is the range where a 4-year-old’s overhand throw is accurate enough to be rewarding but still requires effort and aim. For catching, set up a floor-bounce catch drill using a larger foam ball with a predictable bounce path – this matches the developmental milestone for this age.
Climbing zone
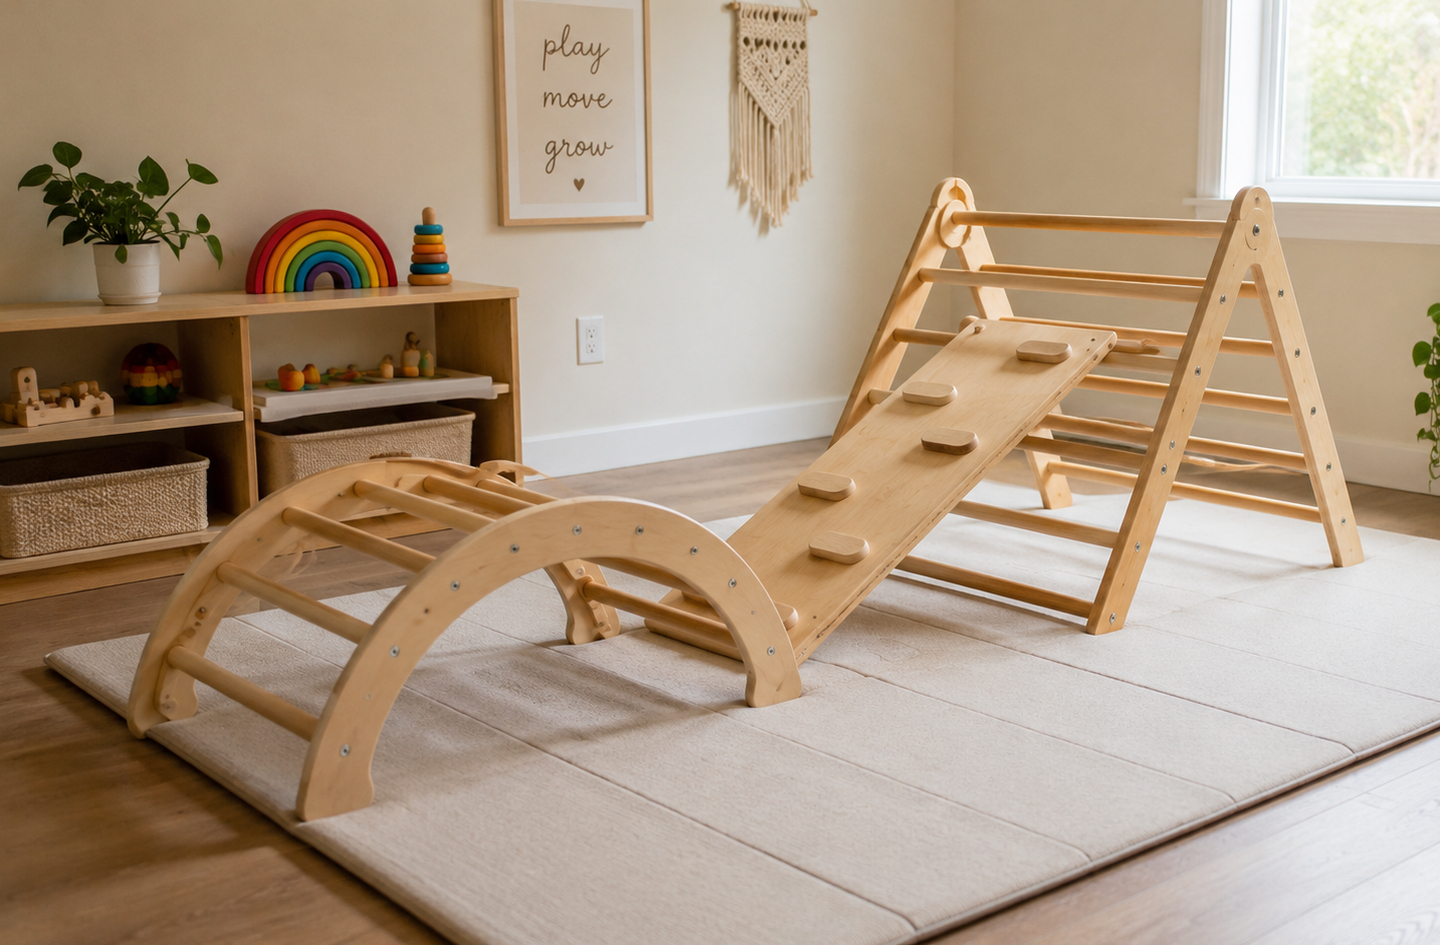
A low wooden arch climber with a connected ramp, designed and rated for indoor preschool-age use, is the most space-efficient piece for the climbing zone. Look for structures with no sharp edges and stable flat feet (not curved rockers that shift during use). The arch height appropriate for a 4-year-old sits at roughly 24-36 inches at peak. Any climbing structure requires the landing mat setup from Step 4 before the child approaches it. For any wall-mounted version, consult a licensed installer and, where structural anchoring is involved, a structural engineer – this guide covers freestanding setups only.
Step 6: Build the Obstacle Circuit and Test the Flow
By the end of this step, you will have a four-to-six station obstacle circuit linking all five movement types, and you will have moved through it yourself to confirm the sequence works physically before the child attempts it.
The obstacle circuit is the zone’s integrating layer. Individual stations build isolated skills; the circuit builds sequencing, transitions, and sustained effort. A 2024 study tracking 53 preschool children over six months found that a structured movement activity program produced a 29.42% improvement in obstacle course performance compared to a free-play control group.6 The mechanism is the structured sequence and the repetition – not the equipment. A home circuit produces the same training effect when it has clear movement prompts at each station and a consistent entry and exit point.
How to sequence the stations
A functional 4-year-old obstacle circuit begins with a lower-demand movement (balance beam walk), escalates to a moderate-demand activity (jump from the low platform onto a floor target), continues to a bilateral skill (two throws at the basket target), reaches the most demanding station (up and over the arch climber), adds a recovery movement (crawl under a stretched rope or through a tunnel), and closes with a sprint return path to the start. Each station should take 15-30 seconds. The full circuit at this pace runs 90-180 seconds – an appropriate effort window for a preschooler before needing a reset.
Marking the circuit and preparing for the first session
Colored floor tape, numbered foam circles, or picture cards at each station mark the sequence clearly. A 4-year-old follows a color-coded or numbered path with minimal verbal prompting after two or three practice runs. The visual cues are part of the room’s teaching system: they let the child read the space and self-direct movement, which is the independence-building function of a well-designed play environment. Before the child’s first attempt, move through the circuit yourself and fix every transition point that required a pause, a re-orientation, or a squeeze past an unexpected gap. A first session that flows builds the circuit as a positive pattern. A first session that frustrates builds avoidance. For wider context on how obstacle and active-play zones interact with the rest of a preschool room’s design, the indoor gross motor play guide for preschool covers zoning and reset strategy in full.
Common Mistakes to Avoid
These four setup errors appear consistently in home gross motor zones. Each reduces either the safety margin or the developmental value without being visually obvious at setup time.
Buying equipment before mapping the floor
The most common sequencing error is buying a climbing or jumping piece before confirming the available space and surface situation. Equipment chosen before the floor plan is laid out frequently does not fit the actual usable area once furniture returns to the room, or occupies a position that blocks supervision sightlines. Nothing should be purchased until the tape layout of all five zones is on the floor and the circuit flows without dead-ends. The observation-before-buying principle is the single highest-value change in playroom planning sequencing.
Setting challenge level for the wrong age
A zone built with 2-year-old equipment (very low platforms, push-only activities, no throwing distance) will be abandoned by a 4-year-old within a week. Conversely, a zone set to aspirational challenge levels (taller structures, longer throws, deeper balance challenges) produces avoidance as the child encounters problems their current skill cannot yet solve. Use the milestone table in Step 2 as the calibration reference, not the equipment’s stated upper age limit, which is a safety ceiling rather than a developmental recommendation.
Mat coverage that does not match the real fall zone
Parents routinely place a crash mat directly beneath a climbing structure and consider the job done. A child falling from the side, front, or rotating backward will land outside that footprint. Extend mats at least 24 inches beyond the structure’s edges in every direction a child might fall. Check mat position weekly; foam mats migrate during active use and a gap that starts at one inch can reach four inches between sessions without being noticed.
A circuit that never changes
A static obstacle course loses novelty within two to three weeks for most 4-year-olds. Rotate at least two stations every two to three weeks: change the throwing distance, reverse the circuit direction, or swap the balance beam for the balance board. The equipment does not need to change – the sequence and challenge parameters do. Design for the reset, not just the reveal.
What Success Looks Like
A well-functioning indoor gross motor zone for a 4-year-old produces three observable outcomes.
First, the child initiates movement there independently, without prompting, during free time. When a room works, children gravitate toward it. Avoidance of a zone or reliance on a single station signals a design problem – usually a challenge level mismatch or a circuit flow issue – not a child behavior problem.
Second, sessions extend past 15 minutes without engagement loss. Research on indoor free play found that only 33% of preschoolers reached 15 minutes of physical activity during a full 60-minute indoor free-play session.9 A structured zone with a linked circuit reliably extends that window because movement has direction and sequence, not just availability.
Third, you can observe visible skill progression over four to six weeks. A child who could not reliably stand on one foot at setup should sustain it for longer after regular practice. A throwing distance that required maximum effort initially should feel controlled and repeatable. These are the normal outcomes of adequate practice volume at appropriate challenge levels – and a cross-sectional study of 394 preschool children averaging 4 years of age found motor skill proficiency and executive function to be moderately correlated (r = 0.33).8 Track progress informally: a weekly observation of the balance and throwing stations tells you when to raise the challenge.
“Low levels of physical activity in early childhood can impact on children’s healthy development and increase the risk of a range of chronic conditions in later life.”
Professor Ruth Kipping, University of Bristol2
Frequently Asked Questions
How much floor space do I need for indoor gross motor activities for 4-year-olds?
The joint AAP, APHA, and National Resource Center standard recommends 42 square feet of usable floor space per child for preschool-age children.7 For a five-zone home layout with one 4-year-old, plan for 150-200 square feet of clear floor. Smaller spaces work but require tighter zone planning and fewer simultaneous stations.
What equipment is age-appropriate for a 4-year-old movement zone?
At 4, children can hop, throw overhand, catch bounced balls, and climb low structures.4 Appropriate equipment includes a low foam step (4-6 inches), a balance board or floor-level beam (2-3 inches), foam balls at 4-6 feet throwing distance, and a low arch climber under 36 inches at peak height. Avoid equipment rated for older children – structures at heights appropriate for 6-year-olds carry fall risks a 4-year-old’s balance skill does not yet manage reliably.
How long should indoor gross motor sessions last for a 4-year-old?
WHO guidelines recommend 180 minutes of total daily physical activity for children ages 3-4, including at least 60 minutes at moderate-to-vigorous intensity.1 Two or three 20-30 minute structured zone sessions across the day more reliably meets that target than one long session that loses engagement mid-way. A short linked circuit typically holds a 4-year-old’s focused engagement for 15-25 minutes before a natural break.
How often should I change the obstacle circuit?
Rotate at least two stations every two to three weeks as skills visibly improve. Change the throwing distance, reverse the circuit direction, or swap a balance tool for a different one. A 2024 study found a 29.42% improvement in obstacle course performance when preschoolers followed a structured progression over six months.6 Consistent adjustment prevents the circuit from becoming routine and keeps the developmental challenge alive.
When should I consult a professional about my child’s gross motor development?
If a 4-year-old consistently cannot jump on two feet, catch a bounced ball after regular practice, or avoids all climbing and balance activities over several months of appropriate exposure, consult a pediatric occupational therapist. These are individual developmental questions that general planning content cannot answer. A pediatric OT can assess the specific child and recommend an approach calibrated to their needs.
Limitations and Edge Cases
- This guide applies to a 4-year-old following a broadly typical developmental trajectory. For children with sensory sensitivities, motor delays, or specific physical needs, zone design should be guided by a pediatric occupational therapist with direct knowledge of that child.
- Space standards and guidelines referenced here are US-based (AAP, APHA, CDC, SHAPE America). Verify against national equivalents if outside the US.
- This guide covers freestanding equipment only. Wall-anchored or ceiling-mounted hardware requires a structural engineer’s evaluation and a licensed installer before any work begins.
References
- World Health Organization – Guidelines on Physical Activity, Sedentary Behaviour and Sleep for Children under 5 Years of Age, NCBI Bookshelf, 2019.
- University of Bristol – Preschoolers Failing to Meet Daily Physical Activity Guideline, Hannam K. and Kipping R. et al., Journal of Physical Activity and Health, November 2025.
- SHAPE America – Active Start: Physical Activity Guidelines for Children Birth to Five Years, 2nd Edition, 2020.
- American Academy of Pediatrics – HealthyChildren.org – Developmental Milestones: 3 to 4 Year Olds, aligned with CDC 2022 revised checklist.
- National Institutes of Health – PubMed Central – Tandon P.S., Saelens B.E., Zhou C., Christakis D.A., A Comparison of Preschoolers’ Physical Activity Indoors versus Outdoors at Child Care, International Journal of Environmental Research and Public Health, 2018.
- National Institutes of Health – PubMed Central – Kojic F., Arsenijevic R., Grujic G., Toskic L., Simenko J., Effects of Structured Physical Activity on Motor Fitness in Preschool Children, Children (Basel), 2024.
- ChildCareComp – Facility Requirements: Square Footage Per Child, citing Caring for Our Children 4th Edition (AAP, APHA, National Resource Center for Health and Safety in Child Care).
- National Institutes of Health – PubMed Central – Han X., Zhao M., Kong Z., Xie J., Association between Fundamental Motor Skills and Executive Function in Preschool Children: A Cross-Sectional Study, Frontiers in Psychology, 2022.
- National Institutes of Health – PubMed Central – Koepp A.E., Gershoff E.T., Castelli D.M., Bryan A.E., Total Play Time Needed for Preschoolers to Reach Recommended Amount of Non-Sedentary Activity, International Journal of Environmental Research and Public Health, 2022.
Conclusion
A functional indoor gross motor activities zone for 4-year-olds follows a clear sequence: floor survey first, zone assignment second, surfaces before equipment, obstacle circuit last. The five movement types (jumping, balancing, throwing and catching, climbing, and obstacle play) map directly to what a 4-year-old’s gross motor development calls for, and calibrating the challenge level to this age is what keeps the zone in active use. The room as a system – with intentional zones, safe surfaces, and a circuit that rotates – consistently outperforms a room full of individual equipment with no planned flow.
For the broader active-play zone planning framework this zone fits into, see the overview in Indoor Active-Play Zones: Everything You Need to Know for context on zone sequencing, traffic flow, and how movement placement interacts with the rest of the room.