
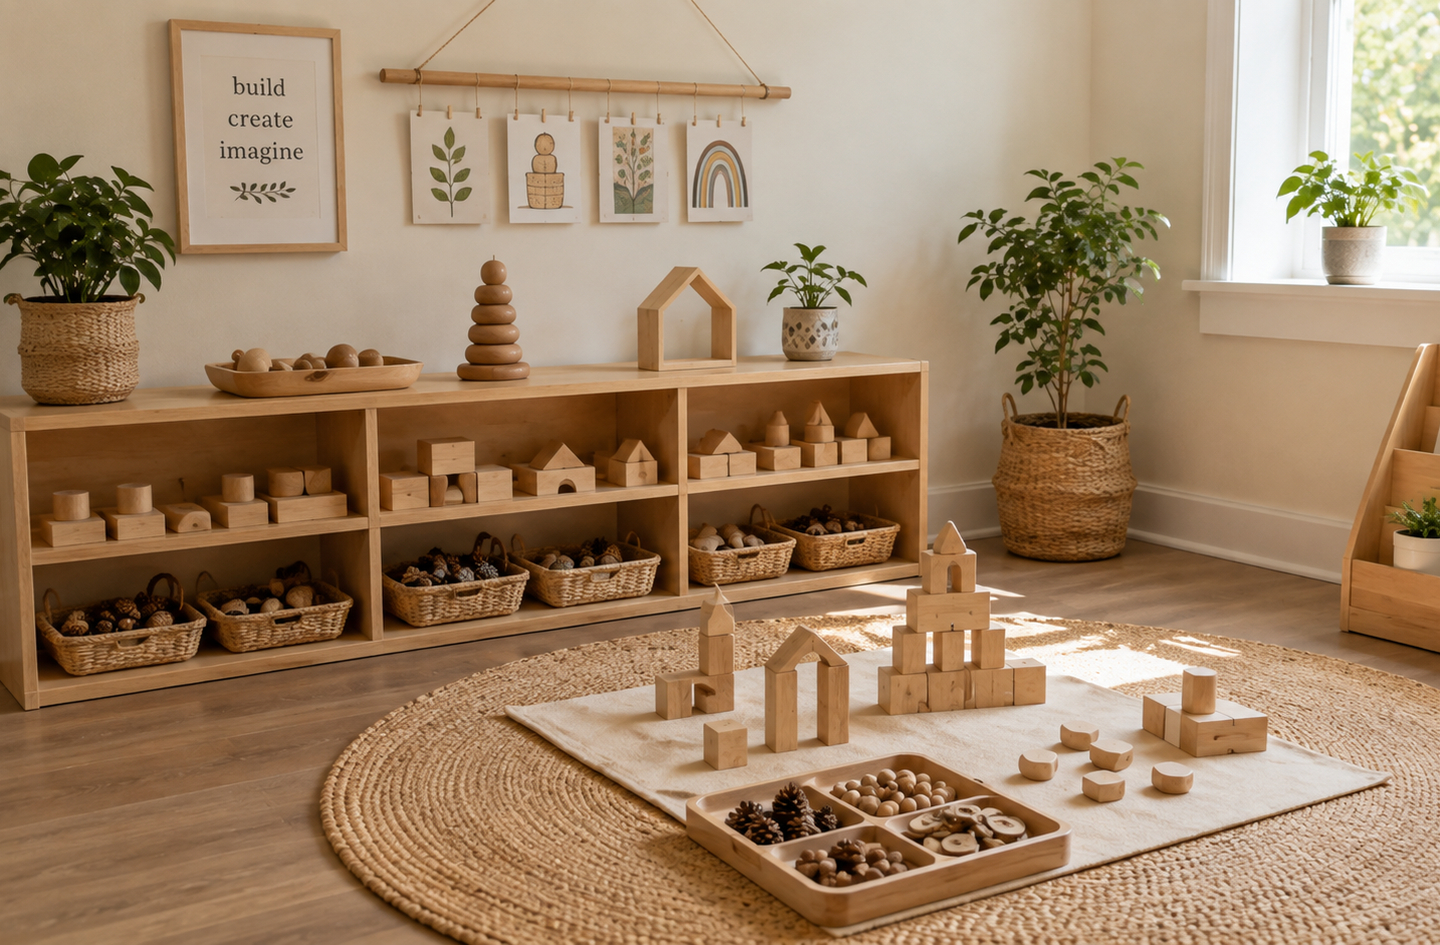
The most common playroom storage problem is not having too little storage. It is having all the storage visible to the child at once. Montessori-based Montessori playroom setup resolves this by separating what the child sees from what the parent manages: a small, calm open display layer the child works from, and a concealed back-stock layer only adults access for rotation. Research on toy count and toddler play quality finds that fewer visible items lead to significantly longer and deeper focused engagement with individual activities.1 This guide builds that two-layer playroom storage system from the shelf outward, covering display configuration, container logic, back-stock design, categories, labels, overflow rules, rotation scheduling, and safety anchoring.
Quick Answer
What does a Montessori playroom storage system include?
A Montessori playroom storage system divides into two layers: an open display layer (a low, child-height shelf holding 6-10 complete activities in baskets or on trays, with each item clearly visible and accessible)4 and a concealed back-stock layer (a closed cabinet, closet, or high shelf the parent manages for rotation). Roughly 25 to 35 percent of total toy inventory is visible at any one time. All freestanding storage units are wall-anchored. The back-stock holds approximately 2 to 2.5 times the display count, giving the rotation system enough inventory to stay fresh for six weeks or more without repeating.
Key Takeaways
- Keeping 6-10 activities on the open shelf – fewer for younger children – supports significantly longer, more focused play than displaying the full toy inventory.1
- The two-layer model separates a child-accessible display zone from an adult-managed, out-of-sight back-stock zone – this is the defining logic of Montessori storage.
- Visual clutter from too many items competes directly for children’s attention: research in primary school classrooms found that children in visually busy environments spent 38.6 percent of time off-task compared to 28.4 percent in simpler environments, even when the materials themselves were identical.2
- Wall-anchoring any freestanding storage unit taller than roughly 24 inches is a practical baseline requirement, not optional decor – furniture tip-overs are one of the most consistent sources of serious injuries in young children.3
- Rotation works best when triggered by observation (five or more days of ignoring an item), not by a calendar, with a rough cycle of every two to four weeks as a practical guideline.
Step 1: Map the Two-Layer System Before You Buy Anything
By the end of this step, you will have a clear picture of which storage belongs in the child’s active environment and which belongs in adult-managed back-stock – and a rough inventory count for both.
Most families treat playroom storage as one system – every bin and shelf in the same room, everything visible at once. The Montessori model separates storage into two layers with different rules: the display layer (child-accessible, child-managed) and the back-stock layer (adult-only, out of sight).
How to map your layers
Before touching a single bin, do these four things in order:
- Sketch the room. A rough drawing on paper is enough. Mark where the child enters, where they naturally settle to play, and where the natural focal point of the room is. This is where the display shelf will live.
- Designate the display zone. The display zone is the floor area within three or four steps of where the child typically starts play. This zone holds the low open shelf and nothing else that competes for the child’s attention.
- Designate the back-stock zone. Back-stock lives somewhere the child cannot access without adult involvement: a closet, a locking cabinet, a high shelf above 48 inches, or a storage space in another room. If the back-stock is visible from the play area, the system loses half its value.
- Count your current inventory. Pull everything out. Separate items into two piles: display candidates (complete, in-use activities the child currently engages with) and back-stock candidates (duplicates, seasonal items, developmentally mismatched toys, items missing pieces). The ratio of those two piles tells you immediately how much storage work lies ahead.
The ratio check
Once you have your count, check the back-stock-to-display ratio. A well-functioning Montessori storage system typically holds about 2 to 2.5 times the display count in back-stock: for every 8 activities on the shelf, about 16 to 20 more live in rotation.7 Below 1.5x, rotation feels repetitive within a few weeks.4 Above 4x, inventory becomes unmanageable and items pile up unrotated at the back of bins.
Step 2: Set Up Your Open Display Shelf
By the end of this step, you will have a correctly configured open shelf: the right height, the right item count, appropriate spacing, and a clear rule about what does not belong on it.
The open display shelf is the most documented element of the Montessori storage approach – a functional tool that shapes how a child interacts with their environment. Maria Montessori described the principle directly:
“The environment must be rich in motives which lend interest to activity and invite the child to conduct his own experiences.”
Maria Montessori, educator and founder of the Montessori method5
A shelf that is too tall, too full, or too cluttered fails that test even if the materials on it are excellent.
Height
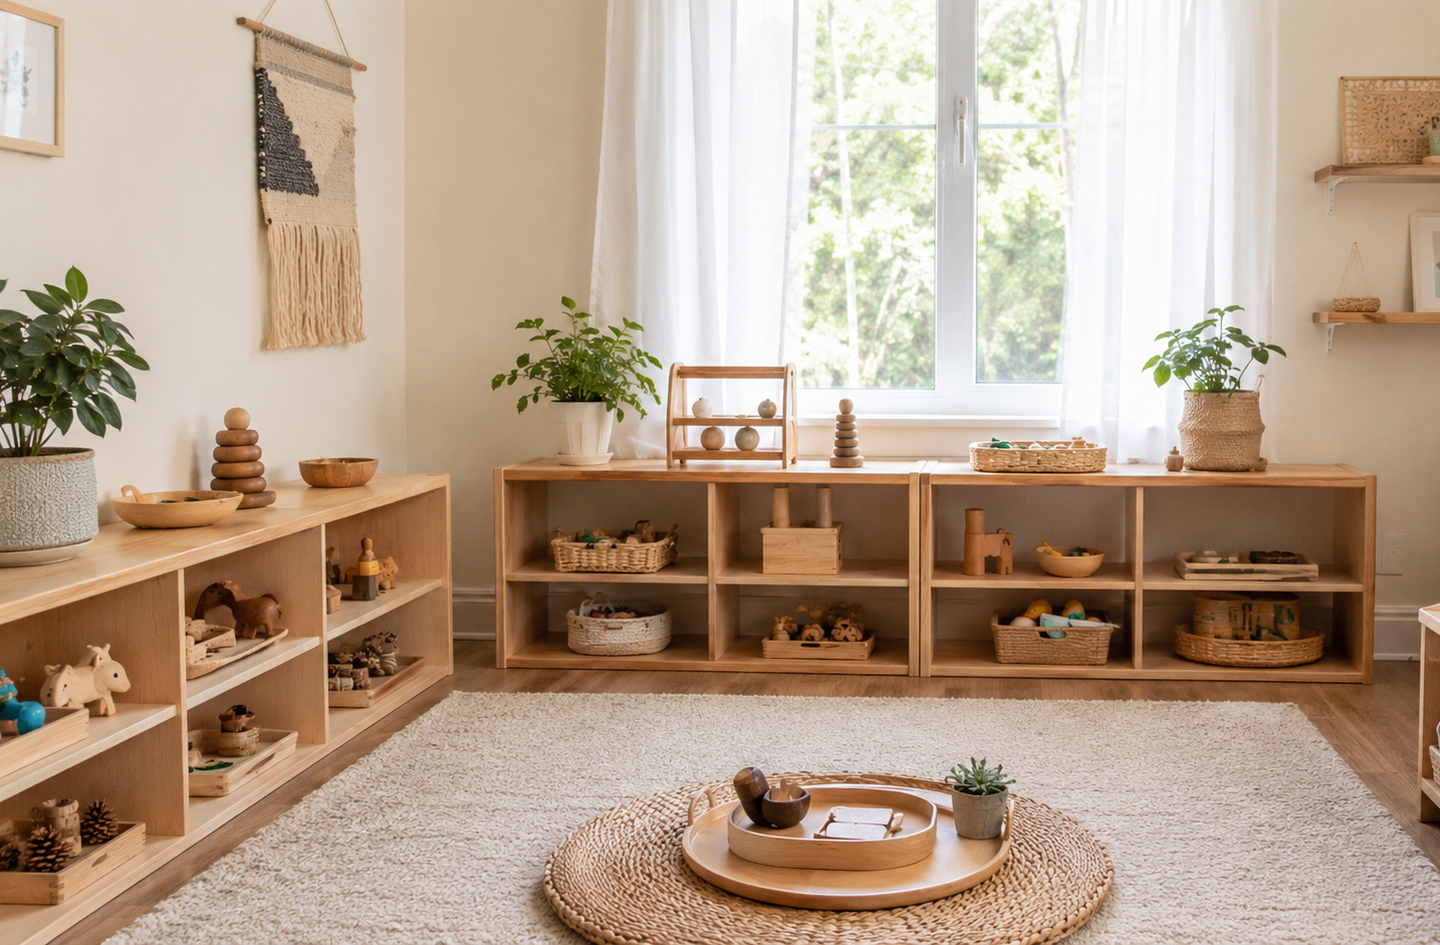
The top displayed item should be reachable by the child at comfortable full-arm extension while standing. For toddlers (1-3), that puts the shelf top between 18 and 24 inches from the floor. Preschool-age children (3-6) can manage shelves up to 30-36 inches. When in doubt, calibrate to your specific child’s standing reach, not their age.
Item count
Display 6-8 activities for toddlers and up to 10-12 activities for children aged 3-6 at any one time.4 Each shelf position holds exactly one complete activity – not a pile of two options, not a basket with two half-activities combined. Empty shelf space between items is intentional. It is not a gap to fill. It is a visual rest that lets the child clearly see what is available without scanning a crowd of objects.
What does not belong on the display shelf
Books (on a separate forward-facing rack), decorative items, non-functional objects, stuffed animals not tied to a specific activity, and mixed-content containers. If an item is not a complete, self-contained activity, it does not earn a slot. For which activities to display and how to sequence them by age, see the Montessori toy shelf layout guide.
Step 3: Fit Each Activity with a Basket or Tray
By the end of this step, every displayed activity has a defined container that groups all its pieces, signals its location on the shelf, and makes the reset a single motion.
Container types and when to use them
Each type of container suits a different category of activity content:
- Wicker or cotton basket (shallow, open top): Best for activities with a small number of larger pieces – simple wooden toys, fabric items, a few sensory objects. The child can see the contents without tipping the basket. Natural materials (wicker, cotton, wood-fiber) are preferred over plastic for aesthetic consistency and tactile variety.
- Wooden or bamboo tray: Best for activities with multiple components that should stay separated but accessible – pouring exercises, small sorting items, three-part puzzle cards, a practical-life activity with several tools. The tray contains spread without requiring the child to manage a lid or dig.
- Shallow bowl or small dish: Best for single-object or loose-part activities – a collection of polished stones, a small set of animal figures, counting objects. The bowl provides containment with maximum visibility.
- Small box with a fitted lid: Appropriate for back-stock items and sparingly on the display shelf. A lidded container adds one step for the child (open, then access) and one more step for the reset (close properly). Use this only when very small pieces require containment and a tray would allow them to spill.
Container sizing and visual consistency
Size the container so contents fit neatly with visible air at the top – not crammed, not cavernously oversize. Limit the shelf to two or three neutral materials (wicker, wood, cotton) with no competing patterns. The container is a functional frame, not a decorative element.
Step 4: Build the Concealed Back-Stock Storage
By the end of this step, you will have a dedicated back-stock zone: organized, invisible from the play area, sized correctly, and ready to support regular rotation.
The back-stock zone is the engine of the Montessori rotation system. Without it, rotation is conceptual at best. With it, refreshing the display shelf takes five minutes instead of a major reorganization effort.
Where to put back-stock
Good back-stock locations in order of preference for most home setups:
- A closet in or adjacent to the playroom, shelved at adult height, with the door kept closed.
- A high shelf above 48 inches inside the playroom, behind a solid or semi-opaque cabinet door.
- A closed ottoman or under-bed storage in a separate room.
- Labeled bins in a dedicated storage room or hallway closet outside the play space.
The one firm rule: the back-stock zone must be invisible or inaccessible from the child’s play area. A child who can see it will constantly request items from it, defeating the display layer entirely.
What goes in back-stock
Back-stock holds activities currently off-rotation from the display shelf; seasonal or holiday toys; items the child has developmentally outgrown (kept separate so they do not re-enter the cycle accidentally); activities too complex for the child’s current stage but worth preserving; and replacement pieces for items currently on display.
How much back-stock to maintain
A well-functioning system typically holds about 2 to 2.5 times the display count in back-stock across all categories combined.7 For a display shelf of 8 activities, that means 16 to 20 additional activities in active rotation storage. The chart below synthesizes this ratio across age bands, combining Montessori classroom environment guidelines with standard home-rotation practice.
Keeping back-stock lean
Below 1.5x, rotation feels repetitive within a few cycles. Above 4x, inventory piles up at the back of bins unrotated for months. The 2-2.5x range keeps the system manageable and the environment genuinely fresh.7
Step 5: Sort by Category and Add Simple Labels
By the end of this step, every back-stock bin has a category label, every back-stock item has a category dot, and the display shelf runs without text labels on any shelf position.
Category logic is what makes rotation fast enough to actually happen. When a parent can open the playroom closet and immediately know which bin holds sensory rotation candidates, the swap takes five minutes. High-quality early childhood environments share the feature of materials organized in predictable, accessible ways that both children and caregivers can navigate efficiently.6
Montessori categories for a home playroom
Adapt this list to what your child actually uses. You do not need every category on day one:
- Practical Life: pouring, spooning, threading, dressing frames, child-scaled real tools.
- Sensory: materials that isolate one quality – texture, weight, size, temperature, sound, or color.
- Language: alphabet materials, reading games, storytelling figures, three-part cards.
- Math: counting materials, sorting activities, number matching, simple math manipulatives.
- Creative/Art: drawing supplies, clay, open-ended materials. These typically live on a separate art-zone shelf rather than the main activity shelf.
- Nature and Science: magnifying glass, nature collections, observation tools, seed sorting.
- Physical/Gross Motor: balls, balance materials, simple movement activities. These live in the active zone, not on the display shelf.
Start with four or five categories that reflect what your child currently engages with. Add categories as activities accumulate.
Label format and placement
Where labels go and what they look like matters:
- Display shelf positions: no labels. The container and its visible contents are the label. Adding text to shelf positions introduces visual noise and implies the child needs adult annotation to navigate their own environment.
- Back-stock bins: a clear text label on the face of each bin – category name, nothing else. For a pre-reading household, add a 2×2-inch printed photo or simple line drawing inside the label. The goal is fast adult retrieval, not decorative color-coding.
- Individual back-stock items: a small adhesive dot on the base or handle of each container – one dot color per category. This tells you at a glance which bin an item returns to without requiring a label on every surface. Six categories need six dot colors; a small sheet of colored dot stickers from any office supply store is sufficient.
Step 6: Set Your Overflow Rules and Rotation Schedule
By the end of this step, you will have two written rules – an overflow rule and a rotation trigger – that keep the system running without requiring constant active maintenance.
A Montessori storage system that has no overflow rule and no explicit rotation trigger will drift back toward clutter within a few months. New toys arrive as gifts, the back-stock fills past capacity, and the display shelf gradually expands item by item. The two rules below are the system’s self-correcting mechanisms.
The overflow rule
Every category has a maximum display slot count and a maximum back-stock bin count. When a new item enters the home, the oldest or least-engaged item in that category moves from the display shelf to back-stock first. If the back-stock for that category is already at its maximum, the oldest item moves out entirely – to donation or discard. One item in means one item out at every level of the system.
The rotation trigger
The most reliable trigger is observation. The signal to rotate an item from the display shelf to back-stock and replace it is any one of these:
- The child has ignored a displayed activity for five or more consecutive days.
- The child asks to find something from the back-stock (they remember a specific item and are ready to re-engage with it).
- The child is cycling through all shelf items quickly without settling into any one for more than a minute or two.
A two-to-four-week interval is a practical guideline for families still building the observation habit.7 Some activities hold interest for six weeks; others exhaust in ten days. The calendar interval is a backstop, not the primary trigger.
Step 7: Anchor Every Piece of Storage
By the end of this step, every freestanding shelf or cabinet in the playroom is secured to the wall with an anti-tip strap or bracket, and you have confirmed the anchor method is appropriate for the specific wall type.
Furniture tip-overs are a consistent source of serious injuries for young children. The U.S. Consumer Product Safety Commission has documented furniture and appliance tip-overs as responsible for thousands of emergency room-treated injuries annually among children under 18.3 A low, lightly loaded Montessori display shelf is more stable than a tall bookcase, but no freestanding unit in a room with active young children should be considered permanently stable without wall anchoring.
Anchoring method basics
The right anchoring method depends on wall type, unit construction, and the loads involved. The general principles applicable to most residential playrooms:
- Locate wall studs. Use a stud finder or a small rare-earth magnet passed slowly across the drywall surface to find metal screws in studs. Anchor into studs wherever possible. Drywall anchors alone are not reliable for furniture tip-over loads.
- Use an anti-tip strap or L-bracket. Anti-tip strap kits (available at hardware and child-safety retailers) attach the top of the unit to a wall stud via a screw through a small strap and anchor plate. L-brackets work similarly and may distribute the load better for units with a thin or hollow back panel – common on lightweight Montessori-style open shelves. For a thin back panel, use a wider bracket footprint to spread the load across more surface area.
- Confirm anchoring before the room is in use. Anchoring after a child has already explored the room and learned to pull on storage is harder to accomplish safely. Build anchoring into the setup sequence, not as an afterthought.
When to bring in a professional
The principles above cover standard residential drywall over wood-stud framing. If your playroom has plaster walls (common in older homes), concrete block, tile, angled ceilings, or any atypical substrate, the hardware selection and anchoring method require professional evaluation for that specific wall and unit combination. A licensed contractor or qualified installer can determine the right anchor type and confirm load capacity for your situation. The guidance here is general and educational; decisions specific to your room and wall structure belong with a licensed professional.
Common Montessori Playroom Storage Mistakes to Avoid
These are the most frequent reasons a well-set-up Montessori storage system drifts back toward clutter or stops supporting independent play. Each has a root cause and a direct fix.
Too many items on the display shelf
When the display layer contains more activities than a child can meaningfully survey in a single glance, they scan rather than settle. Research in primary classrooms found that children in visually decorated environments spent 38.6 percent of their time off-task, compared to 28.4 percent for children in spare, organized environments – even when the learning materials were identical in both settings.2 The display shelf is subject to the same effect. The fix: cap the display count at what the child can take in without needing to search – 6-8 items for toddlers, 10-12 for preschoolers.
Lumping categories in one container
Placing two activities in one basket because they are related (“these are both sensory”) removes the clean category logic the child relies on to predict the environment. Mixed containers create mixed resets: the child takes both items out together, plays with one, and the other sits loose on the floor. The fix: one container, one complete activity, one shelf slot – no exceptions on the display layer.
Using the display shelf as decor storage
Non-functional items on the display shelf – decorative bowls, small ornaments, framed photos, stuffed animals with no associated play activity – consume shelf positions and visual attention without offering anything for the child to engage with. The fix: remove every item from the display shelf that is not a complete, accessible, self-contained activity. Decor belongs on surfaces the child does not manage.
Skipping the back-stock zone entirely
Without a designated back-stock area, there is no rotation, and without rotation the display shelf calcifies. The activities that were interesting in March are still sitting in the same positions in August. The child’s engagement with them drops, and the parent compensates by adding more items to the shelf rather than cycling out the stale ones. The fix: designate a back-stock location before setting up the display shelf. Even a single labeled bin in a closet is enough to start.
Anchoring after the fact
Families often plan to anchor storage units “eventually” and then find that the room is fully in use and anchoring becomes a project that keeps being postponed. The fix: anchor before the room is introduced to the child. It is one 20-30 minute task during setup versus a disruptive mid-use project later.
What the System Looks Like When It Works
A Montessori playroom storage system that is functioning correctly is quiet to observe. The child enters the space, walks to the shelf, selects an activity without prompting, carries it to a floor rug or the table, engages with it – completing the activity or abandoning it freely based on their own interest – and returns the container to its slot without an adult asking them to.
The room resets in under ten minutes at the end of the day. The display shelf looks approximately the same at 8 p.m. as it did at 8 a.m. The back-stock zone has enough depth to support a swap every two to three weeks without repeating an activity within a six-week cycle.
Frequently Asked Questions
How many items should be on a Montessori display shelf?
For toddlers (age 1-3), start with 6-8 activities on the display shelf. Preschool-age children (3-6) can manage 8-12 items without losing focus. Fewer is consistently better than more: research on play environments finds that children engage more deeply and for significantly longer bouts when the item count is lower and each activity is clearly visible.1 Recalibrate the count every few months as the child develops.
What is back-stock in a Montessori playroom?
Back-stock is the adult-managed storage layer outside the child’s active environment, typically in a closed cabinet or closet. It holds the rotation pool of activities not currently on the display shelf. The child does not access it. Back-stock makes regular rotation possible: when back-stock holds 2 to 2.5 times the display count,7 swaps every two to four weeks keep the environment genuinely fresh for months.
How often should you rotate toys in a Montessori setup?
Every two to four weeks is a practical baseline interval, but the most reliable trigger is observation rather than a calendar.7 When a child ignores a displayed activity for five or more consecutive days, or begins cycling through the shelf quickly without settling, that is the signal to rotate. Some activities hold interest for six weeks; others exhaust in ten days. The calendar interval is a backstop for families still building the observation habit.
Do all storage units need to be anchored in a Montessori playroom?
Any freestanding unit taller than roughly 24 inches in a room with young children should be wall-anchored as a practical baseline. The U.S. Consumer Product Safety Commission has documented furniture tip-overs as a consistent source of thousands of emergency room-treated injuries annually for children under 18.3 For plaster, concrete, or other atypical walls, consult a licensed contractor – the right anchor hardware and method require professional evaluation for that specific wall type.
Should labels go on the display shelf or only on back-stock?
Labels belong on back-stock storage bins, not on the display shelf itself. On the display shelf, the container and its visible contents serve as the label – the child can read the environment without text. Adding text labels to shelf positions introduces visual noise and implies the child cannot identify their own activities. For back-stock, clear category labels on bin faces (plus a color dot on individual items) make adult rotation fast without requiring a key or memory of where everything lives.
Limitations and Edge Cases
- This guide covers the standard two-layer storage model for a dedicated Montessori-style home playroom. In very small or shared spaces (a bedroom corner, a living room alcove), the back-stock zone may need to live in a different room entirely – the display logic is the same, but the logistics of where to put the back-stock require room-specific adaptation.
- Mixed-age sibling rooms introduce complexity: the display item count, shelf height, and category logic all become more nuanced when children at different developmental stages share one shelf. the Montessori design principles guide addresses multi-age considerations within a shared environment.
- Anchoring guidance here assumes standard residential drywall over wood-stud framing. For plaster, concrete block, or any atypical wall structure, the right anchoring method requires professional evaluation – what works for drywall may not hold in other substrates.
References
- Infant Behavior and Development – Dauch, C., Imwalle, M., Ocasio, B., & Metz, A.E. “The Influence of the Number of Toys in the Environment on Toddlers’ Play.” Vol. 50, pp. 78-87, 2018.
- Psychological Science – Fisher, A.V., Godwin, K.E., & Seltman, H. “Visual Environment, Attention Allocation, and Learning in Young Children: When Too Much of a Good Thing May Be Bad.” Vol. 25(7), pp. 1362-1370, 2014.
- U.S. Consumer Product Safety Commission – “Tip-Over Dangers to Children.” Furniture, TVs, and Appliances Safety Guide. cpsc.gov.
- American Montessori Society – “What Is Montessori? The Prepared Environment.” amshq.org.
- Open Library – Montessori, M. The Absorbent Mind. Translated by Claude Claremont. Clio Press, 1988 ed. (Originally published 1949).
- National Association for the Education of Young Children – “NAEYC Accreditation Standards for Early Learning Programs.” naeyc.org.
- Workman Publishing – Davies, S. The Montessori Toddler. Workman Publishing, 2019.
Conclusion
Montessori playroom storage is not a single organizational style. It is a two-layer system: a small, calm display layer the child owns and a rotating back-stock the adult manages out of sight. When those two layers are properly separated, sized to the right ratio, labeled for fast adult retrieval, and anchored safely to the wall, the room resets faster, the child focuses longer, and the weekly storage burden on the adult decreases. The system earns its value on an ordinary Thursday afternoon, not just when the room is fresh.
For the broader context of how this storage approach connects to the room layout, zoning, and visual principles that make a Montessori environment function as a whole, see the overview in Montessori playroom setup.