
A Montessori playroom setup is a home play space arranged so a young child can choose, use and return materials without adult help. Low open shelves, a small set of visible activities, clear zones and a simple reset routine do most of the work. The case for fewer visible choices is measurable: with 75% fewer toys (4 instead of 16), toddlers played longer with each one1. This guide is for parents of children roughly ages 1 to 5, and it covers the whole setup, from layout to daily reset.
Quick Answer
What is a Montessori playroom setup?
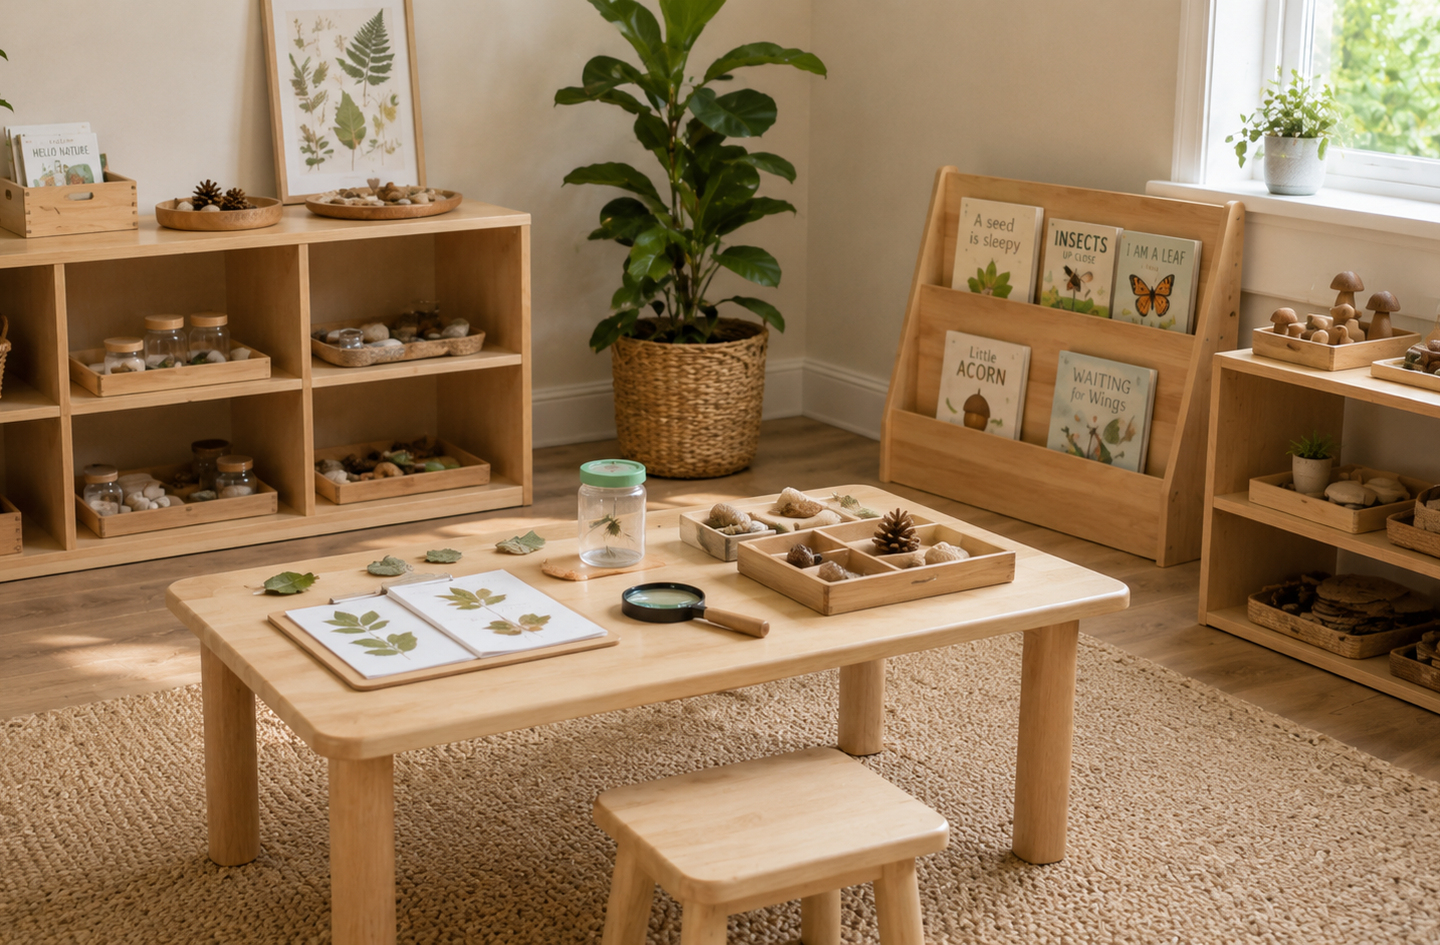
A Montessori playroom setup is a room arranged around the child’s reach and choices. Materials sit on low open shelves, each in its own tray or basket, with space around it. Only a few activities stay out at once; the rest wait in adult-managed storage. In one controlled study of 36 toddlers, a room with 75% fewer toys (4 instead of 16) produced longer, more varied play1.
Why it matters:
A room a child can read at a glance supports independent play and a faster reset. The structure does the guiding, so adults direct less.
Key Takeaways
- Visible choice count is the main lever: with 75% fewer toys (4 instead of 16), toddlers stayed longer with each toy1.
- The setup has six parts: room plan, shelves and furniture, activity zones, materials and rotation, visual calm, and age-stage changes.
- Every displayed item needs one home the child can see and reach, which turns the daily reset into a child-sized job.
- The most common misconception is that Montessori needs special furniture or a large room; one low shelf and a floor rug cover the core of it.
Montessori Playroom Setup in 30 Seconds
| If you are… | Do this |
|---|---|
| Starting from a cluttered playroom | Move most toys to closed storage first, then lower what stays. |
| Setting up for a 1-year-old | Prioritize open floor, one stable low shelf and a few graspable objects. |
| Setting up for a 3- to 5-year-old | Add reading, art and practical-life zones with a short child-led reset. |
| Working without a dedicated playroom | Define one corner with a low shelf, a work rug and a book basket. |
| Seeing toys pile up every day | Cut the visible activities and give each a fixed tray or basket spot. |
What Is a Montessori Playroom Setup?
A Montessori playroom setup is the home version of the classroom prepared environment, scaled to one family and one room. A prepared environment is a space arranged so children can find, use and return materials on their own, while adults manage what is offered. Montessori schools group children in multi-age bands, with infant and toddler programs for ages 0 to 3 and early childhood for ages 3 to 62. Early childhood classrooms average 20 to 30 students spanning 3 years of age2. A home playroom borrows that logic, not the school’s materials list.
The setup covers layout, child-height furniture, activity zones, curated materials, storage and a daily reset. It leaves out formal curriculum, teacher training and the specialized materials used in accredited classrooms. Those belong to schools. The home version is simpler: fewer things, lower shelves and clearer homes for each item.
The approach treats the room as a system. Circulation, storage and reset logic come first, and decor follows, which matches the broader Montessori style playroom design principles of order, child scale and limited choice. The Third Teacher is the idea that the room itself guides a child, alongside parents and teachers, by making the next right action obvious. A shelf with open space around each tray tells a child what to take and where it goes back.
Why Montessori Playroom Setup Matters
Montessori playroom setup matters because a room’s visual load and choice count shape how long a child stays with one activity. In a Carnegie Mellon study, kindergarten children took 6 introductory science lessons in a lab classroom. They spent more time off task and learned less when the walls were heavily decorated3. The toddler toy study points the same way at home scale, where fewer toys produced longer and more varied play1.
Three daily friction points explain why parents look for a different setup:
- “There are toys everywhere”: too many visible items and no fixed homes.
- “We bought storage, but it still doesn’t work”: bins sized for adults, lids and deep piles.
- “The kids don’t use the room the way I thought they would”: zones that ignore real behavior.
The American Montessori Society describes the classroom goal in plain terms:
You will see children working independently and in groups, often with specially designed learning materials; deeply engaged in their work.
A home playroom cannot copy a classroom of mixed ages. It can borrow the conditions behind that engagement: reachable materials, limited choice and visible order2. Those conditions cost little and work in small rooms as well as large ones.
The Six-Part Montessori Playroom Setup Framework
The Six-Part Montessori Playroom Setup Framework splits the setup into six decisions. They were grouped from recurring friction points in real playrooms into the smallest set that covers the whole room. The parts run in build order: plan, furnish, zone, curate, calm, then adjust for age.
1. Room Plan and Layout
The room plan decides where movement, floor work and quiet activities happen before anything is bought. Observation before shopping is the rule: walk the room, note where toys pile up and where a child stalls, then place zones around that behavior. Low shelves go against walls and out of the main walking path. An open floor area stays clear for building and movement. A living-room corner uses the same logic with one shelf, one rug and a visible boundary. A makeover of an existing room starts with removal, not purchases.
The plan matters more than the furniture, because a well-chosen shelf in the wrong spot still creates a traffic jam and a daily pile-up.
Deeper read: Montessori playroom makeover: a before-and-after setup plan.
Deeper read: how to set up a Montessori playroom at home, step by step.
Deeper read: the complete Montessori playroom setup checklist.
Deeper read: creating a Montessori playroom: a step-by-step home plan.
Deeper read: designing a Montessori playroom: layout, zones, shelves and flow.
Deeper read: how to make a Montessori playroom for independent play.
Deeper read: how to create a Montessori playroom: layout, shelves and daily use.
Deeper read: Montessori play space setup for a living room or small corner.
Deeper read: Montessori playroom set up: essential zones, shelves and storage.
2. Low Shelves and Child-Scale Furniture
A low open shelf is the center of a Montessori room. Its top should sit where a child can see across it and reach every compartment without climbing. Each activity gets its own tray or basket with clear space on both sides. A child-size table and chair, a floor rug and a front-facing book display complete the essentials. A mirror is optional and supports movement and self-observation for younger children. Stability is part of the spec: anchor any shelf or dresser to the wall per the manufacturer’s instructions, and ask a licensed installer about unusual walls.
Fewer, sturdier and lower pieces beat a full furniture set, because every extra piece takes floor space away from play.
Deeper read: Montessori open toy shelf display for independent choice.
Deeper read: combining books and activities on a Montessori book and toy shelf.
Deeper read: Montessori toy shelf height, layout and toy rotation.
Deeper read: Montessori playroom shelves: low-shelf layout and spacing.
Deeper read: Montessori-style toy shelf features that support independent play.
Deeper read: Montessori playroom furniture and child-safe sizing.
Deeper read: Montessori playroom mirror placement, height and purpose.
3. Activity Zones
An activity zone is a defined area of the room with one job, such as reading, art, building or movement. Zones work when each has a boundary a child can see: a rug edge, a shelf back or a change of surface. A reading corner needs front-facing books, soft floor seating and good light. An art area needs a wipeable table and supplies within reach. The CDC says children ages 3 to 5 should be active throughout the day, and from age 6 the guideline is 60 minutes or more a day4. A movement zone is a working part of the room, not an extra.
Zones are what make independent play possible, because a child who knows where an activity happens also knows where it ends.
Deeper read: encouraging independent play with a Montessori playroom setup.
Deeper read: practical ideas for a Montessori-inspired prepared environment.
Deeper read: Montessori playroom layout, shelf and activity-zone ideas.
Deeper read: setting up a child-led Montessori reading corner.
4. Materials, Storage and Rotation
Toy rotation is the practice of displaying a small set of materials and storing the rest out of sight. Items are swapped based on what the child actually uses. Selection favors hands-on, purposeful materials balanced across fine motor, language, practical life, construction and pretend play. Practical life refers to real everyday tasks, such as pouring, wiping or dressing, adapted to a child’s size. Back-stock lives in closed, adult-managed storage, grouped by category and labeled. Each displayed item has one fixed home, so the reset becomes a matter of matching objects to places.
Design for the reset, not just the reveal: a shelf a child can restore alone is worth more than a fuller shelf that looks richer on day one.
Deeper read: Montessori playroom storage, back-stock and toy rotation.
Deeper read: Montessori playroom toys: what to put out and what to store away.
Deeper read: how to organize a Montessori playroom for a daily reset.
5. Visual Calm: Color, Materials and Walls
Visual calm means the walls, colors and textiles stay quieter than the materials on the shelf. A muted or warm palette, natural materials, soft lighting and a small amount of wall art at the child’s eye level keep attention on the activity. The Carnegie Mellon finding on decorated classrooms is the clearest evidence that visual load affects attention3. Color is not banned. One accent wall or a few pieces of the child’s own art add warmth without competing with the shelf. Frames should be light, secured and away from the movement area.
Decor earns its place only when it supports the shelf; anything that pulls the eye away from the materials adds work, not warmth.
Deeper read: design principles for a calm, child-led Montessori space.
Deeper read: Montessori playroom decor: colors, materials and visual simplicity.
Deeper read: Montessori playroom wall art: what to hang and how high.
6. Age-Stage Adjustments
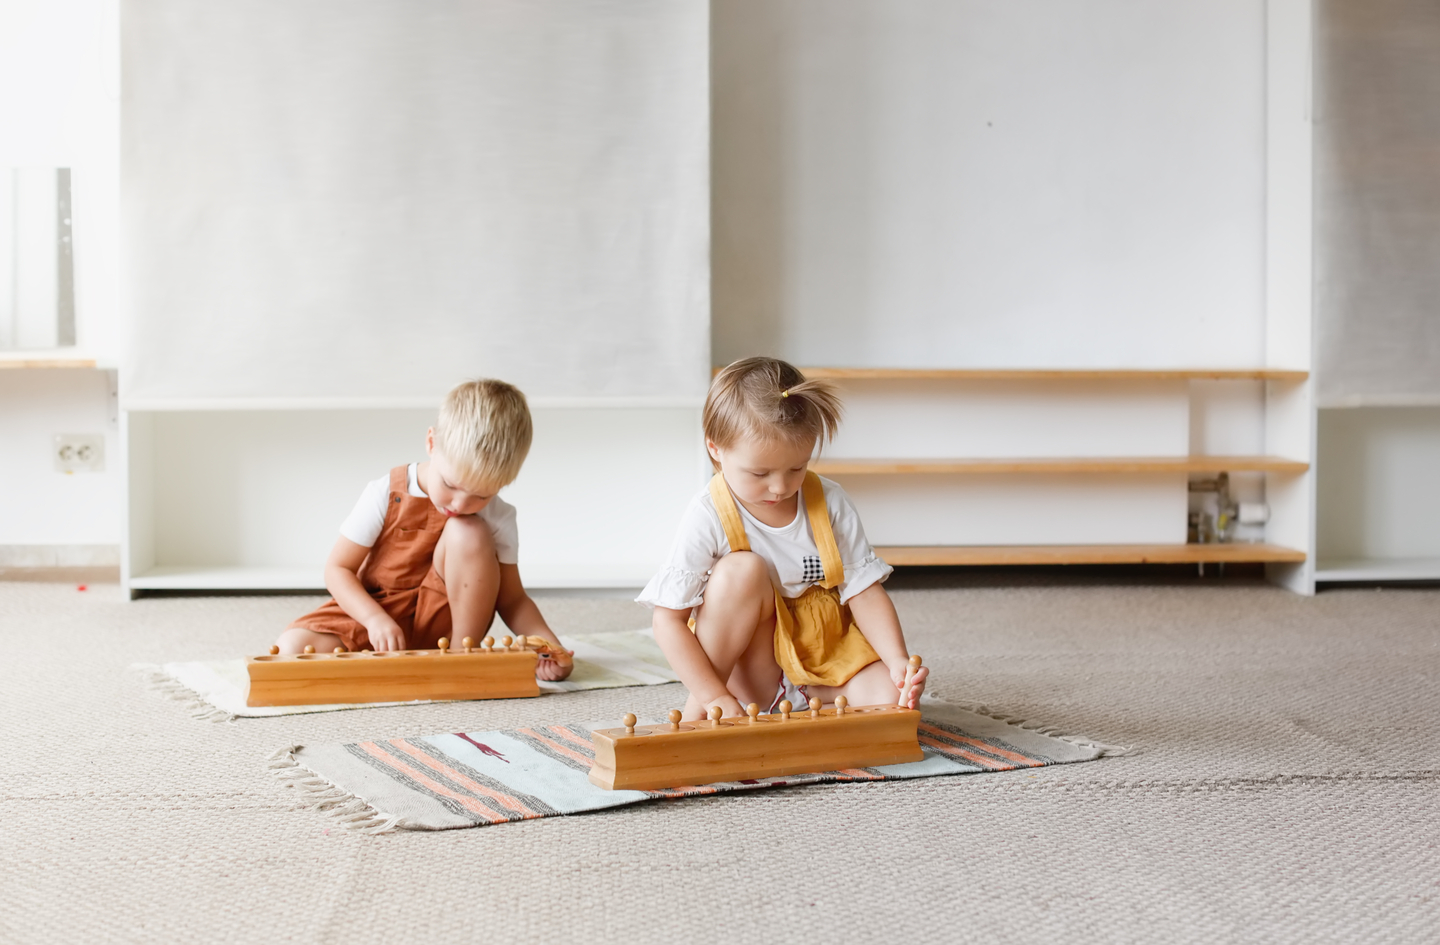
Age-stage adjustment means changing shelf content, activity complexity and reset expectations as the child grows. Montessori schools split early learning into bands for ages 0 to 3 and 3 to 62, which also works as a map for a home room. A 1-year-old needs safe floor movement, a stable shelf and a few graspable objects, with small parts kept out of reach. A 2-year-old handles simple one-step activities. From about age 3 to 5, longer work periods, open art access, practical-life trays and a fuller reset routine fit. A room that works at age 2 does not work unchanged at age 5.
Plan each room for the next stage as well, so shelves and zones can absorb more complex work without a rebuild.
Deeper read: Montessori playroom for a 3-year-old.
Deeper read: Montessori playroom setup by age for toddlers and preschoolers.
Deeper read: Montessori playroom for a 2-year-old.
Deeper read: Montessori playroom for a 5-year-old.
Deeper read: Montessori playroom for a 1-year-old.
Deeper read: Montessori playroom for a 4-year-old.
How to Choose the Right Setup
The most important decision in a Montessori playroom setup is how many items a child can see and reach at once. Everything else follows from that count. A setup that keeps visible choice small and every item reachable works in a bedroom corner or a full basement.
- Observe first. Note where play happens, where toys collect and where the child gets stuck.
- Remove before adding. Move most toys to closed storage and keep out only what gets used.
- Fix the shelf. Choose a low, open, stable shelf and anchor it to the wall.
- Define zones. Give reading, art, building and movement their own visible boundaries.
- Curate and rotate. Display a small set in trays or baskets and swap items based on interest.
- Teach the reset. Show the child where each item lives and keep the routine short.
| Decision | Ages 1 to 2 | Ages 3 to 5 |
|---|---|---|
| Visible activities | A handful of single-object activities | A small rotating set, including multi-step trays |
| Shelving | One low, open, anchored shelf | One or two low shelves plus a book display |
| Zones | Floor movement and a book basket | Reading, art, building, practical life and movement |
| Reset owner | Adult leads, child helps | Child leads a short routine |
| Rotation trigger | Lost interest or mastery | Lost interest, mastery or a new project |
Red flags include lidded bins a child cannot open, shelves that invite climbing, toys stacked behind other toys and a room with no empty floor. The same order of decisions applies to a step-by-step Montessori playroom setup at home, whatever the room size.
Compare All Montessori Playroom Setups
Montessori playroom setups differ mainly by space and by the child’s age. The table compares the five situations parents face most.
| Criteria | Full playroom | Playroom makeover | Living-room corner | Toddler-first room | Preschool room |
|---|---|---|---|---|---|
| Space | Dedicated room | Existing room, existing toys | One wall or corner | Any room with open floor | Dedicated room or large corner |
| Shelving | One or two low shelves | Lower or replace tall units | One low shelf | One stable low shelf | Two low shelves plus books |
| Zones | Reading, art, building, movement | Add zones after decluttering | Work rug and book basket | Movement and books | All zones plus practical life |
| First step | Map traffic flow | Remove most toys | Define the boundary | Clear the floor | Set up the reset routine |
| Reset owner | Child, with modeling | Adult, then child | Child, fast reset | Adult, child helps | Child leads |
Choose a full playroom if: a spare room exists and several zones need separation.
Choose a makeover if: the room already exists but stays cluttered after every cleanup.
Choose a living-room corner if: play must share space with adults every day.
Choose a toddler-first room if: the child is just starting to crawl, cruise or walk.
Choose a preschool room if: the child sustains longer work and can own the reset.
Deeper read: designing a Montessori playroom layout and flow.
Common Mistakes
Mistake 1: Buying Storage Before Removing Toys
Why it is a mistake: Storage adds capacity, not order. New bins in a crowded room keep the visible count high and hide items where a child cannot find them.
What to do instead: Remove first, then size storage for what stays. Observation before shopping keeps the budget on the pieces that solve a real friction point.
Read more: Montessori playroom makeover plan.
Mistake 2: Putting Every Toy Out at Once
Why it is a mistake: In the University of Toledo study, a room with 75% fewer toys led to longer and more varied play1. A full shelf invites dumping and quick switching.
What to do instead: Display a small set and keep the rest in rotation storage.
Read more: choosing Montessori playroom toys to display.
Mistake 3: Decorating the Walls Before Zoning the Floor
Why it is a mistake: Heavily decorated walls increased off-task time across 6 lessons in the Carnegie Mellon classroom study3. Wall decor also pulls attention up and away from the shelf.
What to do instead: Zone the floor first, then add a small amount of art at the child’s eye level.
Read more: how much Montessori playroom wall art is enough.
Mistake 4: Expecting a Toddler to Reset Alone
Why it is a mistake: Reset ability grows with age. A young toddler needs the routine modeled many times before it sticks.
What to do instead: Start with an adult-led reset where the child helps, then hand over one step at a time.
Read more: organizing a Montessori playroom daily reset.
Best Setup by Use Case
Best for a First Setup With a Toddler
A toddler room starts with open floor, one stable low shelf and a few graspable objects. Movement comes first, so furniture stays minimal and corners stay clear.
Deeper read: a safe, low, movement-friendly setup for a 1-year-old.
Best for Preschoolers
A preschool room adds reading, art and practical-life zones and hands the reset to the child. Shelf activities can run longer and include more steps.
Deeper read: Montessori playroom setup by age.
Best for Small Spaces and Living Rooms
A shared-room setup uses one low shelf, a work rug, a compact book display and hidden back-stock elsewhere. The boundary and a fast reset protect the rest of the room.
Deeper read: a Montessori play space in a living room or small corner.
Best for Encouraging Independent Play
Independent play grows from limited visible choice, predictable homes for every item and rotation guided by observation. The room invites focus without forcing it.
Deeper read: encouraging independent play through the setup.
Frequently Asked Questions
How many toys should be out in a Montessori playroom?
A small number, few enough that each activity has its own space and the child can see every option at once. A University of Toledo study of 36 toddlers compared 4 toys with 16. With 75% fewer toys, children played longer with each toy and in more varied ways1. No single count fits every child. Watch for overload signs, such as dumping and quick switching, and remove items until play settles. Rotate the rest from closed storage.
What furniture does a Montessori playroom need?
The essentials are one low, open, stable shelf, a child-size table and chair, a floor rug for work and a front-facing book display. Optional pieces include a mirror for younger children, an easel and a floor cushion for reading. Every piece should be reachable without climbing and anchored wherever it could tip. Extra furniture reduces open floor, which young children need for movement. In a small room, a shelf, a rug and a book basket cover most of the method.
Can a Montessori play space work without a dedicated playroom?
Yes. A living-room or bedroom corner works when it has a clear boundary and a fast reset. The minimum is one low shelf with a few activities, a work rug or floor mat, a compact book display and closed storage elsewhere for rotation. The boundary matters more than floor area: a rug edge or the back of a shelf tells the child where play happens. The corner should reset in a few minutes so it does not take over the shared room.
At what age can a Montessori playroom setup start?
A setup can start as soon as a baby begins moving across the floor. Montessori schools run infant and toddler programs for ages 0 to 3 and early childhood programs for ages 3 to 62. A home room can follow the same bands. For a 1-year-old, the focus is safe floor space, a stable shelf and a few graspable objects. From age 3 onward, art, practical-life trays and a fuller child-led reset fit well.
Does a Montessori playroom need a movement area?
Yes, especially for younger children. The CDC says children ages 3 to 5 should be active throughout the day. Children ages 6 to 17 need 60 minutes or more of moderate-to-vigorous activity each day4. A movement area can be a clear patch of floor, a soft mat or a low balance piece, kept away from shelf corners and walking paths. Climbing hardware fixed to walls or ceilings needs evaluation by a structural engineer or licensed installer first.
How This Guide Was Built
The methodology behind this guide combines published research on toddler play and classroom visual environments with Montessori organization guidance and federal activity guidelines. Figures come from peer-reviewed journals indexed in PubMed, the American Montessori Society and the CDC, and each links to the page that carries it. The six-part framework was derived by grouping the parent questions in this topic into build-order decisions. Oded Feigin reviewed and edited the guide on October 1, 2026, and it is re-checked whenever a cited source changes.
What This Hub Does Not Cover
- Formal Montessori curriculum, teacher training or school accreditation – these belong with an accredited Montessori school or training program.
- Developmental, motor or sensory concerns for a specific child – consult a pediatrician or a pediatric occupational therapist.
- Wall-mounted climbing or active-play hardware – before installation, evaluate with a structural engineer or licensed installer.
- Safety certification of a specific product – check the manufacturer’s documentation and current recall notices.
References
- Dauch, Imwalle, Ocasio and Metz, Infant Behavior and Development (2018) – The influence of the number of toys in the environment on toddlers’ play
- American Montessori Society – Inside the Montessori Classroom
- Fisher, Godwin and Seltman, Psychological Science (2014) – Visual environment, attention allocation, and learning in young children
- Centers for Disease Control and Prevention – Physical Activity Guidelines for Children
Next Read
A Montessori playroom setup succeeds when a child can see, choose and return every item without help. Treat the room as a system: plan the layout, furnish low, zone clearly, curate a small set, keep the walls calm and adjust by age. The shelf carries most of that work, so it is the best place to go next.