
A kids painting station is not a drawing table with a water cup placed nearby. Wet media – watercolors, tempera, and liquid paint – create friction points that dry media does not. Spills spread, paint colors get contaminated by an unwashed brush, and finished work has nowhere to dry. A fine motor study found 73.33% of preschoolers improved through structured activities1 – gains that depend on a station designed to reduce friction, not generate it.
Quick Answer
What makes a kids painting station work for wet media?
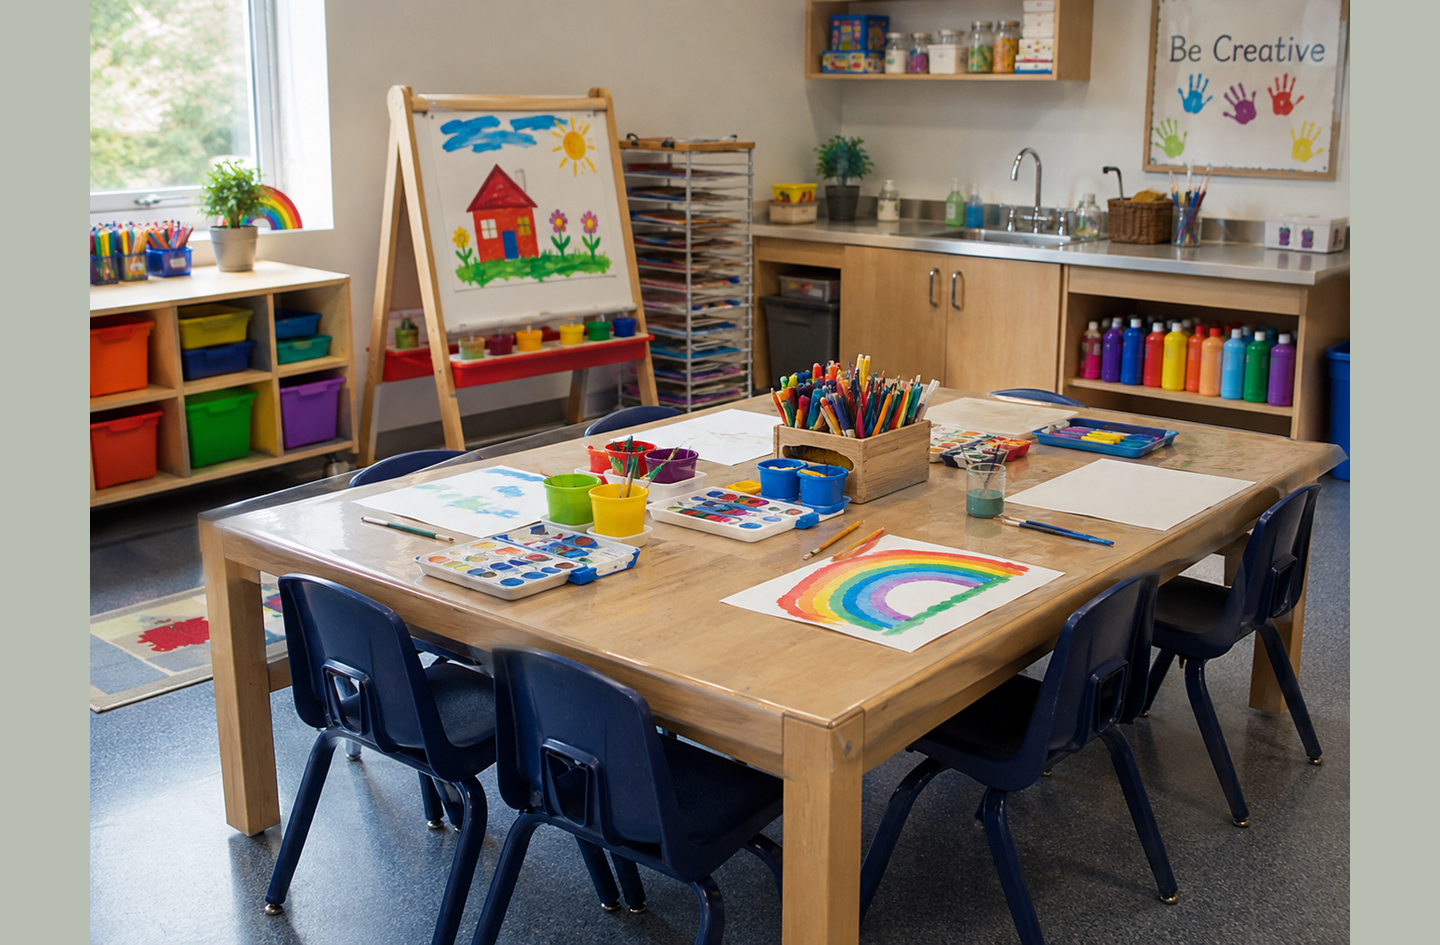
Build it around the water first. Use a small, tip-resistant water cup (3 to 4 oz) and a splash-containment mat under the full work area. Brushes should rest flat on a tray during active sessions, with a drying rack within 5 steps of the table. A painting station for kids handles wet media well when those four systems are in place before the first brush stroke.
Key Takeaways
- Work surface height matters more for painting than for dry media: recommended ranges for school-age children are 22 to 28 inches by age, not the standard 30-inch desk height.2
- Water cup size is both a safety and a quality issue – use 3 to 4 oz, tip-resistant cups, not standard drinking glasses or deep containers.
- The drying path – the physical route from painting table to drying area – needs to be short and direct, ideally 3 to 5 steps, to limit drips and reduce session friction.
- Washable surfaces protect the table; a splash mat under the work area protects everything around it.
What You’ll Need Before You Start
Wet media is any painting material that uses water as a carrier or solvent, including watercolors, tempera, gouache, and liquid acrylics. This guide covers station planning specific to those materials. Dry media – colored pencils, crayons, markers – share some setup logic but do not face the same water and containment challenges addressed here.
Before working through the six steps below, establish three baseline conditions:
- Child age: 2 to 3 years (toddler, often standing use), 3 to 5 years (preschool, seated or standing), or 5 to 10 years (early school age, seated). Age determines table height, water cup size, and how close adult supervision needs to be.
- Available footprint: A minimum work surface of 24 by 18 inches. Smaller forces brushes, cups, and palette into each other’s path, which creates spills.
- Proximity to a water source: A sink within 10 to 15 steps makes rinse-water changes and brush washing practical. Without one nearby, plan a rinse basin and a schedule for water changes during longer sessions.
If you are working over carpet, a splash mat – at least 3 by 3 feet – under the station is not optional; it is the first item to acquire. Bare floor or vinyl tolerates spills far better and makes cleanup straightforward.
Step 1: Set the Table Height for Wet Work
By the end of this step, you will have a work surface at the right height for the child. They will paint with a relaxed shoulder, a neutral wrist, and a controlled brush hold – without hunching or stretching toward the cup.
Table height matters more for painting than for drawing. With a pencil, a child tolerates a surface a few inches too high. With a wet brush, the same mismatch causes the elbow to lift and the arm to sweep rather than guide – which means spills. A peer-reviewed analysis of school furniture found the standard school desk at 76 cm (30 inches) fits none of the Grade 1 through Grade 5 children studied. Recommended surface heights ran from 56.5 to 71.2 cm (22.2 to 28.0 inches) across those grades.2 A 2021 systematic review found only 18.9% of students aged 11 to 13 in one study fit their school furniture within accepted ergonomic tolerances.3
Correct table height is itself a containment measure: a body in the right position keeps arm movement controlled, which keeps the water cup stable and the brush path predictable.
Surface Height Ranges by Child Age
The working rule: the surface should sit at or just below the child’s elbow height in their normal painting posture. For seated painting, forearms rest on the surface with shoulders level. For standing painting (common for toddlers), the surface sits near hip height or just above.
Recommended surface height ranges by school grade, from Sejdiu et al. 2023:2
| Approximate Age | Grade | Recommended Surface Height |
|---|---|---|
| 6 to 7 years | Grade 1 | 22.2 to 26.3 in (57 to 67 cm) |
| 7 to 8 years | Grade 2 | 23.0 to 26.7 in (58 to 68 cm) |
| 8 to 9 years | Grade 3 | 24.1 to 26.9 in (61 to 68 cm) |
| 9 to 10 years | Grade 4 | 25.2 to 27.3 in (64 to 69 cm) |
| 10 to 11 years | Grade 5 | 26.5 to 28.0 in (67 to 71 cm) |
For children under 6, large-scale ergonomic studies are less available. Early childhood furniture design uses 18 to 22 inches for standing toddlers (ages 2 to 3) and 20 to 24 inches for seated preschoolers (ages 3 to 5). For a child whose motor or postural development is outside the typical range, check with a pediatric occupational therapist before committing to a fixed-height table.
Fixed vs. Adjustable Tables
A fixed-height table works if you buy at the right height for the child’s current age. An adjustable table works across a wider age range but costs more and adds a mechanical variable: confirm the height-locking mechanism holds firmly before the first wet session. A table that shifts mid-session creates a spill opportunity.
For a deeper look at art table selection criteria – footprint, seating fit, and cleanability – see the kids art table guide.
Verify this step: Seat the child at the table with arms resting on the surface. Shoulders should be level or nearly level, not raised. Elbows should be close to a 90-degree angle. If either is off, adjust the table or seat before moving to Step 2.
Step 2: Plan Water Containment Before the First Session
By the end of this step, you will have a water system – cup size, placement, and surface protection – that limits where water can spread before a spill happens, not after.
Splash containment refers to a physical boundary – a raised tray, silicone mat, or rimmed surface – that limits how far water and wet paint can spread during an active session. It is active during the session; cleanup happens after. Most painting station setups rely on cleanup rather than containment, which means every session ends with more effort than it needs to.
Water management is the single decision that separates a painting station from a recurring spill problem – and it costs less than a good brush set to get right.
Water Cup Size and Stability
Use a cup that holds 3 to 4 oz of water – roughly the size of a small medicine cup or a school art room rinse cup. That is enough water to rinse a brush between colors without enough volume to create a significant spill if tipped. A standard drinking glass holds 8 to 12 oz: two to three times that volume and a much larger spill when knocked over.
Deep containers create an additional hazard for toddlers and young preschoolers. The U.S. Consumer Product Safety Commission documented 228 child drowning incidents and 30 near-drowning incidents between 1984 and 1994 in 5-gallon buckets.4 The containers were ordinary household items. The same principle applies at a painting station: keep water volume small and containers shallow.
“A child can drown in a small amount of water in a few minutes.”
Ann Brown, Chair, U.S. Consumer Product Safety Commission4
Choose a cup with a weighted base or a holder that resists tipping. A rinse cup that is hard to tip is also a cup the child can reach, adjust, and return to without adult help at every brush change. That is what independence at the station actually looks like.
Placement and the Splash Mat
Place the water cup on the same side as the child’s dominant hand, within 6 to 8 inches of the paint palette. The shorter the path from brush to rinse cup, the less the wet brush travels across the work surface – and the less paint it deposits in transit.
Under the entire work area, use a silicone mat, a vinyl tray, or a large piece of oilcloth. The surface should extend at least 2 to 3 inches past each table edge. Paint that runs off the edge lands on the containment surface rather than the floor or furniture. For a painting station over carpet, extend the mat to the floor below the table edge as well.
One rinse cup works for single-color sessions or watercolor work where the child rinses fully between colors. For multi-color tempera or gouache work, two cups work better: one for an initial rinse, one for a clean final rinse. This keeps the water usable longer and reduces color contamination in the palette.
Step 3: Set Up Paint and Wet Media Organization
By the end of this step, paint cups, palette, and materials will be positioned so the child can reach, use, and return each item. No water cup gets knocked over in the process.
The spatial logic for a wet-media station follows a simple sequence: water cup nearest to the dominant hand, palette or paint cups just beyond it, painting surface in the center. This keeps the brush path short and predictable. A palette placed on the far side of the water cup means the brush crosses the cup every time – which creates a drip opportunity at every color change.
Organizing paint around the water cup, rather than around the painting surface, is the layout decision that makes a kids painting station reusable rather than just cleanable after each session.
Palette vs. Individual Paint Cups
A flat palette works well for watercolors because the pigment stays where it dries and reconstitutes with a damp brush. Individual small cups (1 to 2 oz, the kind used in school art programs) work better for tempera and liquid acrylics. These materials stay wetter and can contaminate adjacent colors on a flat palette if the brush carries water across them.
For children under 5, limit the colors visible at once. Two to four colors at a time is enough for most painting sessions. More colors means more containers to navigate and more accidental contacts.
Material Safety: The AP Seal
The AP Seal is the Art and Creative Materials Institute’s certification mark, indicating a product contains no materials in quantities sufficient to be toxic or injurious to humans, including children. The ACMI requires products intended for children through Grade 6 to carry this seal.5 Look for the AP Seal when choosing watercolors, tempera, gouache, and liquid acrylics. It does not mean the material is non-staining – many AP Seal products stain surfaces and clothing – but it addresses ingestion safety, which matters when the station is used by toddlers and preschoolers.
Keep a small dry cloth within arm’s reach at the station. A cloth that lives at the station makes mid-session hand wiping natural rather than an interruption, which reduces the chance of a paint-covered hand reaching something it should not.
Step 4: Arrange Brush and Tool Storage for a Wet Session
By the end of this step, brushes and tools will have a defined position during use and a defined resting position between sessions. The child can find what they need without searching, and wet brushes will not damage their bristles while waiting.
Brush position during a session is different from brush storage between sessions. Most setups treat them the same. The result: brushes standing tip-down in a jar during a session (which pushes paint into the ferrule), and laid flat in a drawer between sessions (which is correct). Reverse the two.
A flat brush rest during the session costs almost nothing and eliminates one of the most common bristle-damage patterns in a children’s painting station.
During-Session Brush Position
During an active session, brushes in use should rest flat on a brush holder, a tray lip, or a folded cloth beside the painting surface. Not standing tip-down in the water cup (which softens the ferrule glue over time) and not balanced on the palette edge (which sends them rolling onto the wet painting).
For children under 5, one or two brushes in use at a time is practical. A wider flat brush for wash work and a thinner round brush for line work covers most sessions. The CDC notes that drawing a circle is a developmental milestone for most children by age 3.6 Fine brush control builds progressively from that foundation, so a very fine brush does not add value before the motor pattern is in place.
Between-Session Brush Storage
After a session, rinse brushes, reshape the bristles, and store flat or bristle-up in a container where air can circulate around them. Bristle-down storage bends the tips and holds moisture against the ferrule. A simple brush roll or a wide-mouth jar with bristles pointing up works well.
Keep painting brushes separate from dry-media brushes. Residual pigment from dry media can contaminate rinse water and muddy colors faster than a child expects.
Step 5: Design a Direct Drying Path
By the end of this step, finished work will have a clear, short, drip-tolerant route from the painting surface to the drying area. Completed pieces move off the table without becoming an obstacle or leaving a trail across the room.
The drying path is one of the most neglected planning elements in a kids painting station. Most setups place a drying rack wherever there is space rather than where it fits the session’s natural flow. When the drying area is far from the table, wet work travels across the room. When it sits near storage without a drip-tolerant surface below, the storage gets the spill.
A drying area more than 5 steps from the painting table changes the child’s task. Instead of “finish the painting,” it becomes “carry wet work across the room without dripping” – a harder demand for a young child.
Drying Zone Placement
Place the drying zone adjacent to or directly beside the painting station – within 3 to 5 steps. The route between them should not pass through high-traffic areas, and the floor below the drying zone should be easy to wipe clean.
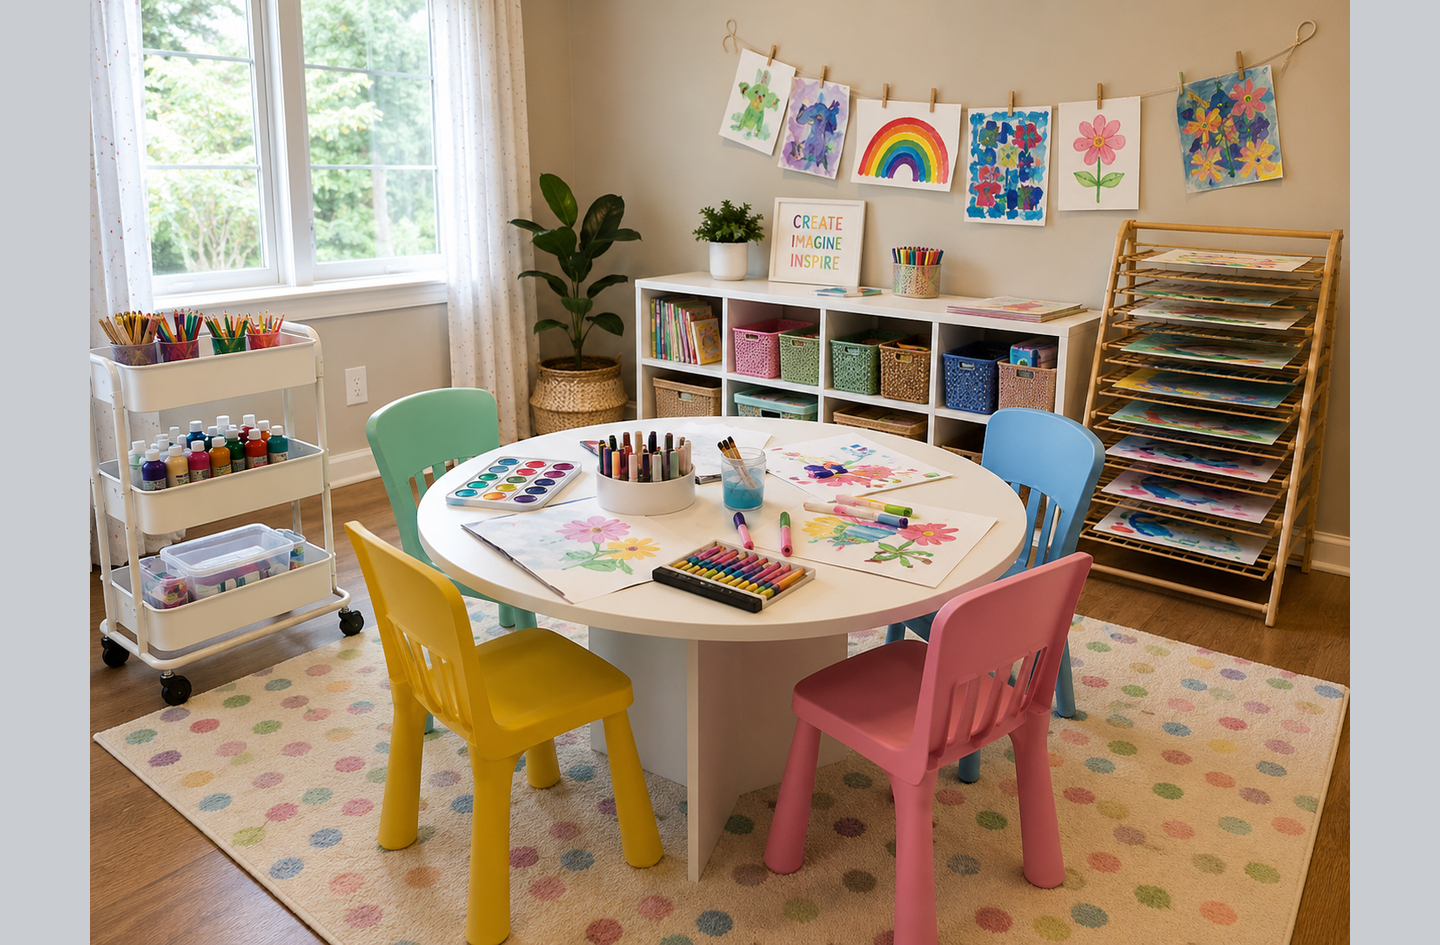
A drying rack – clip-wire, mesh shelf, or a clothesline at the child’s reach height – works better than a flat surface for most paper paintings. Flat storage while wet risks sticking and smearing. A rack lets air circulate on both sides and speeds drying without contact surfaces below the painting.
For organizing and displaying what comes off the rack, see the kids artwork storage guide, which covers the full flow from drying to display to long-term archive.
Art Activity and Development
Across 10 kindergartens, a 2025 study of 538 preschool children found structured art activities produced an eta-squared of 0.25 for emotional well-being and 0.21 for listening skills.7 Those were the largest effects observed across all developmental dimensions in the study.
“Each instructional type was closely related to specific dimensions of children’s performance, helping them to develop cognitively, emotionally and skillfully in an all-round way.”
Zhang, Yang, and Li, Frontiers in Psychology, 20257
That research context matters for planning. A session that ends in frustration because wet work had to travel across the room competes with the activity rather than supporting it. “Design for the reset, not just the reveal” applies directly here: the drying path is part of the session’s structure.
Step 6: Build the Reset Routine Into the Station
By the end of this step, the end-of-session routine will be built into the station’s physical layout. The sequence from last brush stroke to cleaned station becomes part of the design, not a separate adult task.
The room as a system means setup and teardown are part of the system, not separate from it. A painting station that requires 20 minutes of adult cleanup after every 30-minute session is not a sustainable design. The reset should take 5 to 10 minutes, with the child participating as much as their age allows.
A reset the child can partly own – rinsing the brush, capping the paint cup, moving work to the rack – builds the station independence that makes it worth having long-term.
The Reset Sequence for Wet Media
End every session in this order: brushes first, water cups second, paint containers third, surface last. The sequence matters because brushes rinsed before the water is discarded use the existing rinse water rather than requiring fresh water. Paint containers capped before the surface is wiped cannot be knocked into a wet surface. The surface, wiped last, faces nothing that can re-contaminate it.
For children ages 4 and up, the rinse step and the drying rack step are manageable with light adult support. Younger children handle lower-risk steps: returning brushes to the storage holder, placing paint caps, wiping the splash mat with a damp cloth.
Washable Surfaces: What the Label Actually Means
“Washable” on a painting station surface is a spectrum, not a binary. Silicone mats are fully non-porous and release dried tempera and gouache with a damp cloth. Laminate surfaces handle most washable paints but can be stained by permanent inks or acrylic formulations if not wiped promptly. Solid-surface countertop materials are the most durable but also the most expensive and least common in home children’s painting stations.
Across 18 structured painting sessions of 20 minutes each, researchers found significant improvement in children’s fine motor coordination (P less than 0.001).8 Reductions in stereotyped movements and improved hand-and-finger coordination were both measured. That is the frequency a well-designed station should sustain. A surface that cannot handle frequent, regular cleaning will fail well before the child outgrows the station.
Choose the surface material before choosing the station furniture. It is far easier to adjust a furniture selection than to retrofit a surface after purchase.
What a Working Kids Painting Station Looks Like
When the six steps are in place, the painting station runs with minimal friction. The child paints, sets the brush on the flat rest, and moves the finished piece to the drying rack three steps away. Then they return to the table without needing adult help for the basic mechanics. Cleanup takes 5 to 10 minutes, with most steps the child can do independently by age 5.
The test that matters is not whether the station looks organized. It is whether the station can be reset by the child for the next session without adult effort. A painting station that requires full adult cleanup after every use is a station that will be used less and less over time.
Common Mistakes to Avoid
Most friction in a kids painting station comes from one of four planning errors. Each is straightforward to avoid once the system logic is clear.
Using a Water Container That Is Too Large
The mistake: Setting out a standard drinking glass or a yogurt container because it holds more and needs changing less often.
Why it fails: A larger container tips harder, spills more, and creates a deeper water level – a surface-area problem as well as a safety concern for toddlers and preschoolers.
The fix: Use a 3 to 4 oz cup with a weighted base. Two quick water changes during a longer session take less time than one large spill cleanup.
Skipping the Splash Mat
The mistake: Working directly on the table surface or on a tablecloth that does not extend past the table edge.
Why it fails: Paint and water that reach the table edge fall to the floor. A short mat catches the work surface but not the floor below it.
The fix: Use a mat that extends past all four table edges. For stations over carpet, run the mat to the floor below the table edge as well. Silicone or vinyl works; a cloth mat absorbs paint and becomes a permanent stain record.
Placing Wet Work to Dry on Storage Surfaces
The mistake: Using a shelf or supply bin as a temporary drying surface because it is nearby.
Why it fails: Wet work placed on stored paper, supply bins, or books transfers moisture and paint. The damage to stored materials often exceeds the painting session’s mess.
The fix: Give drying its own dedicated zone, physically separate from storage. A two-clip wire rack beside the table, used only for drying, solves this completely. For ideas on what to do with finished work beyond the drying rack, see the kids art rotating gallery guide.
Setting the Drying Area Too Far Away
The mistake: Placing the drying rack across the room because that is where the open wall space is.
Why it fails: A child carrying a wet painting 15 feet across a playroom will drip. The path between station and rack is part of the containment system, not separate from it.
The fix: Position the drying zone within 5 steps of the painting table. If the only available wall space is farther away, use a freestanding clip rack beside the table instead of a wall-mounted solution.
Frequently Asked Questions
What table height works for a 3-year-old at a kids painting station?
For standing use, which is common at this age, aim for 18 to 20 inches – near hip height. For seated painting, 20 to 22 inches. Confirm by having the child stand at the surface and checking that their elbows are at or just above surface height with shoulders relaxed. For a child whose motor development is outside the typical range, a pediatric occupational therapist can advise on the specific fit.2
How many water cups does a kids painting station need?
One cup handles watercolor sessions and single-color tempera work, where the child rinses fully between colors. Two cups work better for multi-color tempera or gouache: one for an initial rinse, one for a clean final rinse. Either way, use 3 to 4 oz cups with weighted bases – not drinking glasses – to keep volume small and tipping risk low.4
What is the easiest surface to clean under a kids painting station?
A silicone mat over the work surface is the most practical option: fully non-porous, it releases dried tempera with a damp cloth. Under the station, a vinyl floor mat handles spills that run off the edge. Together, those two surfaces cover most cleanup in a regular painting session. Cloth mats absorb paint and become permanent stain records; avoid them under wet media stations.
How far should the drying rack be from the painting table?
Within 3 to 5 steps is the target. Beyond 5 steps, a child carrying wet paper has to navigate the room, which creates a drip trail and breaks the session’s momentum. If open wall space is only available farther away, use a freestanding clip rack placed beside the table instead of a wall-mounted solution. The rack’s location matters as much as its type.
Can a regular activity table work as a painting station for kids?
Yes, if the height is right. Many children’s activity tables sit at 19 to 21 inches, which suits ages 3 to 5 reasonably well.2 Add a silicone surface mat and a splash mat below for containment. The table itself cannot supply a brush rest or a drying rack – those are layout decisions around the table, not features built into it.
Limitations and Edge Cases
- This guide covers flat-surface painting only. Easel-based painting has different water-handling and drip-management logic, and the table height rules in Step 1 do not apply directly.
- Table height ranges reference school-age ergonomic research (Sejdiu et al. 2023); anthropometric data for children under age 3 is less standardized in published peer-reviewed sources. The toddler ranges given are drawn from early childhood furniture design practice, not from a single large study.
- This article is planning guidance, not a substitute for a professional evaluation. For a child whose postural or motor development is outside the typical range, consult a pediatric occupational therapist before making table height and seating decisions.
References
Methodology: every figure below is drawn from an independent published source and links to the specific page that carries it; no self-citation or competitor sources are used, and the article is reviewed for accuracy as new research becomes available.
- PMC / Occupational Therapy International – Lersilp S et al., “Pilot Implementation of a Fine Motor Intervention Program for Preschoolers,” 2025.
- PMC / Wiley – Sejdiu B et al., “Discrepancy between pupils’ body and classroom furniture in elementary schools: Kosovo,” 2023.
- PMC / Iranian journal – Systematic review: “Investigating the match between anthropometric measures and classroom furniture in Iranian students,” 2021.
- U.S. Consumer Product Safety Commission – “CPSC Votes To Begin Rulemaking On Plastic 5-Gallon Buckets,” 1994.
- Art and Creative Materials Institute (ACMI) – Materials Safety program and AP Seal certification, current.
- U.S. Centers for Disease Control and Prevention – “Learn the Signs, Act Early: Milestones by Age 3,” 2022.
- Frontiers in Psychology – Zhang H, Yang Y, Li J, “Effective strategies for teachers to guide children’s art activities,” Vol. 16, 2025.
- International Journal of Applied Behavioral Sciences – Sabet M et al., “Art therapy and fine motor skills in children,” 2022.
Conclusion
A kids painting station built for wet media starts with four decisions. Table height for the child’s age, small and stable water containment, a direct drying path within 5 steps, and a reset routine in the layout – those four determine whether the station works on a regular Tuesday afternoon, not just setup day.
For the broader context on planning the full art and craft area, see the overview in Art and Craft Stations overview for how the painting station fits into the wider craft zone.