Sensory Play Safety Tips: A Pre-Activity Check for Small Parts, Water, Surfaces and Supervision

Author: Oded Feigin · Created On: October 16, 2026 · Last Updated: October 16, 2026

Most sensory play problems start before play does: a filler nobody checked, a cup of water left on the floor, a blind cord within reach. Sensory play safety tips work best as a short check you run before the bin comes out. Our sensory play spaces guide is the broader overview of the topic. This article goes deep on one angle: the pre-activity screen for mouthing, small parts, batteries, water, cords, surfaces, materials and supervision. For toddlers, the first line is federal: small parts are banned in toys intended for children younger than 3 years of age1.
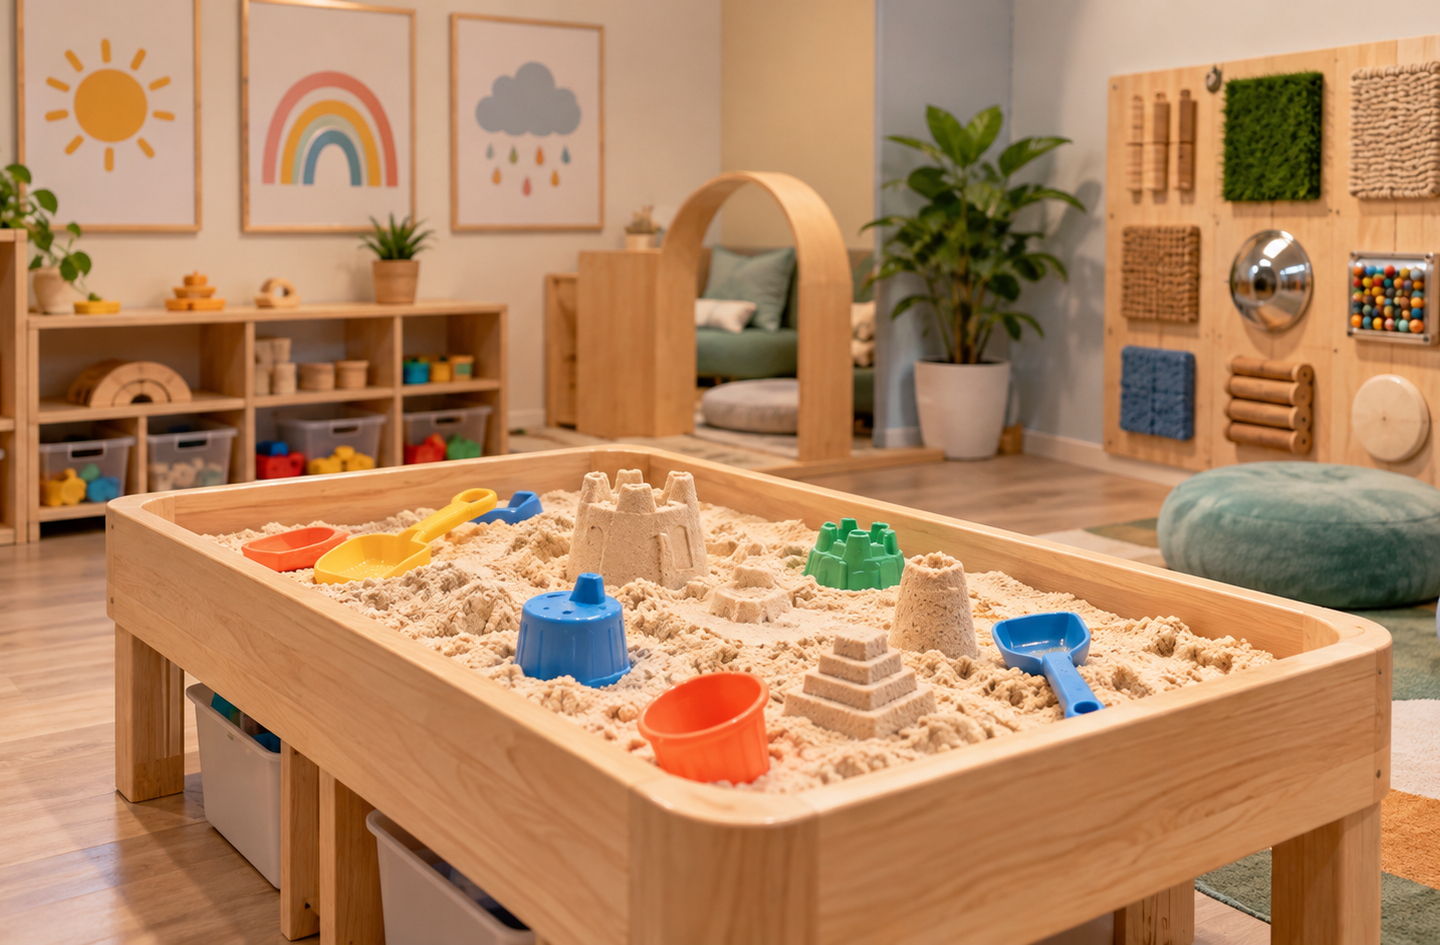
A child-sized sensory table filled with kinetic sand and equipped with molds and tools, in an indoor play space with wall-mounted sensory activities and a reading nook.
A child-sized sensory table filled with kinetic sand, with molds and tools, sits in an indoor play space beside wall-mounted sensory activities.

Quick Answer

What should you check before sensory play?

Check the youngest child’s age first, then every small part, any batteries or magnets, the water, nearby cords, the surface and the material labels. Small parts matter most for toddlers: federal rules ban small parts in toys intended for children younger than 3 years of age1. Finish by choosing the supervision level and counting the pieces back in.

  1. Start with the youngest child present.
  2. Check every small component.
  3. Remove button batteries and loose magnets.
  4. Set water limits before filling anything.
  5. Clear cords and check the play surface.
  6. Read material labels and plan for skin contact.
  7. Set the supervision level and count the reset.

Key Takeaways

  • Mouthing drives the whole screen. The CPSC describes mouthing non-food items as a normal part of children’s exploratory behavior that contributes to incidents of choking and poisoning1.
  • The small parts cylinder in the ASTM F963 toy standard has a 31.7 mm diameter opening1, about 1.25 inches. Any loose piece that fits inside it comes out of a toddler’s bin.
  • Water needs an adult within reach. Worldwide, WHO reports that children aged under 5 years account for nearly a quarter of all drowning deaths5. That figure covers every setting, not sensory play, and it is why we recommend arm’s-reach supervision for any water activity.
  • Supervision has gaps. Research cited by the CPSC found toddlers and preschoolers out of view of a supervisor for about 20 percent of their awake time at home1.
  • A non-toxic label is not a mouthing clearance. The CPSC’s art and craft guide notes that even products labeled non-toxic can have harmful effects when used in an unintended manner8.
  • Design for the reset, not just the reveal: counting small pieces out and back in is the step that closes the check.

Before You Begin: What a Pre-Activity Screen Is and Is Not

A pre-activity screen is a fixed sequence of checks run before any sensory material reaches the table, so the setup is reviewed once, calmly, instead of during play. It treats the activity as a system: the child, the materials, the water, the room and the adult all get checked in the same order every time.

Sensory play is hands-on play built around touch, sight, sound and movement, such as scooping rice, pouring water or squeezing dough. Mouthing is a young child’s habit of exploring objects by putting them in the mouth. The CPSC treats mouthing as normal exploratory behavior1, which is why the screen plans around it instead of trying to stop it.

What you need:

  • A small parts tester, sold as a choke tube or small parts cylinder.
  • A tray or towel to lay out every loose piece before play.
  • The labels or packaging for each material you plan to use.
  • A clear view of the play spot, including the window, outlets and floor.
  • Time: a few minutes for a new activity, less for a repeat.

The screen is general guidance, not an individualized child-safety assessment. It reduces avoidable risk for a typical activity. It cannot account for a specific child’s swallowing, allergies or development, and the last section of this article explains when to bring in a professional.

Run the same seven checks in the same order every time: a fixed sequence is what stops a busy afternoon from skipping the one check that mattered.

Step 1: Start With the Youngest Child Present

The youngest child in the room sets the screen for the whole activity, because younger children mouth objects most and choking risk is highest early. The American Academy of Pediatrics (AAP) calls choking a leading cause of morbidity and mortality among children, especially those aged 3 years or younger6.

By the end of this step, you know which age band you are screening for. Write it down if several children will join, because the answer is the youngest child, not the average age of the group.

How the published age bands line up

Federal toy rules draw two age lines around small parts. They ban small parts in toys intended for children younger than 3 years of age1. They also require a small-parts warning on toys and games for ages 3 years old to 6 years old1. Reese’s Law aims to protect children six years old and younger against button cell and coin battery ingestion2.

Other hazards reach older children. The federal window covering rule addresses strangulation risk to children 8 years old and younger3. For water, WHO reports that, worldwide, children aged under 5 years account for nearly a quarter of all drowning deaths5. The AAP’s choking focus is children aged 3 years or younger6.

Age Groups Named by Each Source Age group named by each source, in its own wording, drawn to the next birthday when the wording includes the stated age. Small parts ban for toys: children younger than 3 years, Federal Register water bead rule. Choking focus: children aged 3 years or younger, American Academy of Pediatrics. Small parts warning: ages 3 years old to 6 years old, Federal Register water bead rule. Drowning: children aged under 5 years account for nearly a quarter of drowning deaths worldwide, WHO. Button battery rule: children six years old and younger, Federal Register Reese’s Law rule. Window cord rule: children 8 years old and younger, Federal Register window covering rule. Age Groups Named by Each Source Small parts ban, toys Choking focus, AAP Small parts warning Drowning share, WHO Button battery rule Window cord rule Under 3 3 or younger 3 to 6 Under 5 6 or younger 8 or younger 0 2 4 6 8 10 Age in years, to the next birthday Source: Playroom Architect analysis of Federal Register, WHO and AAP data, 2026
Every source here names an age group that includes the toddler years, and the battery and window cord rules reach through ages 6 and 8, so an older child in the room does not end the screen. The bars mix legal scopes, an AAP emphasis and a worldwide share of drowning deaths, so they show where attention belongs, not equal risk. Compiled by Playroom Architect from Federal Register rules and the WHO drowning fact sheet.

Mixed ages in one sensory session

In a mixed-age room, the screen follows the youngest child, not the oldest. An older sibling’s bead kit, magnet set or slime belongs in a separate session, or at a separate table out of the toddler’s reach. That keeps the older child’s play intact without lowering the screen for the younger one.

Age is a starting point, not a verdict. A four-year-old who still mouths everything needs the toddler screen, and a child’s own pediatrician is the right person to ask about that pattern.

Name the youngest child before choosing a single material: that one decision rules items in or out faster than any later check.

Step 2: Check Every Small Component

Every loose piece in a sensory bin gets checked against the small parts standard before play, including anything that could break off. The ASTM F963 toy standard uses a small parts cylinder with a 31.7 mm diameter opening1, which works out to about 1.25 inches.
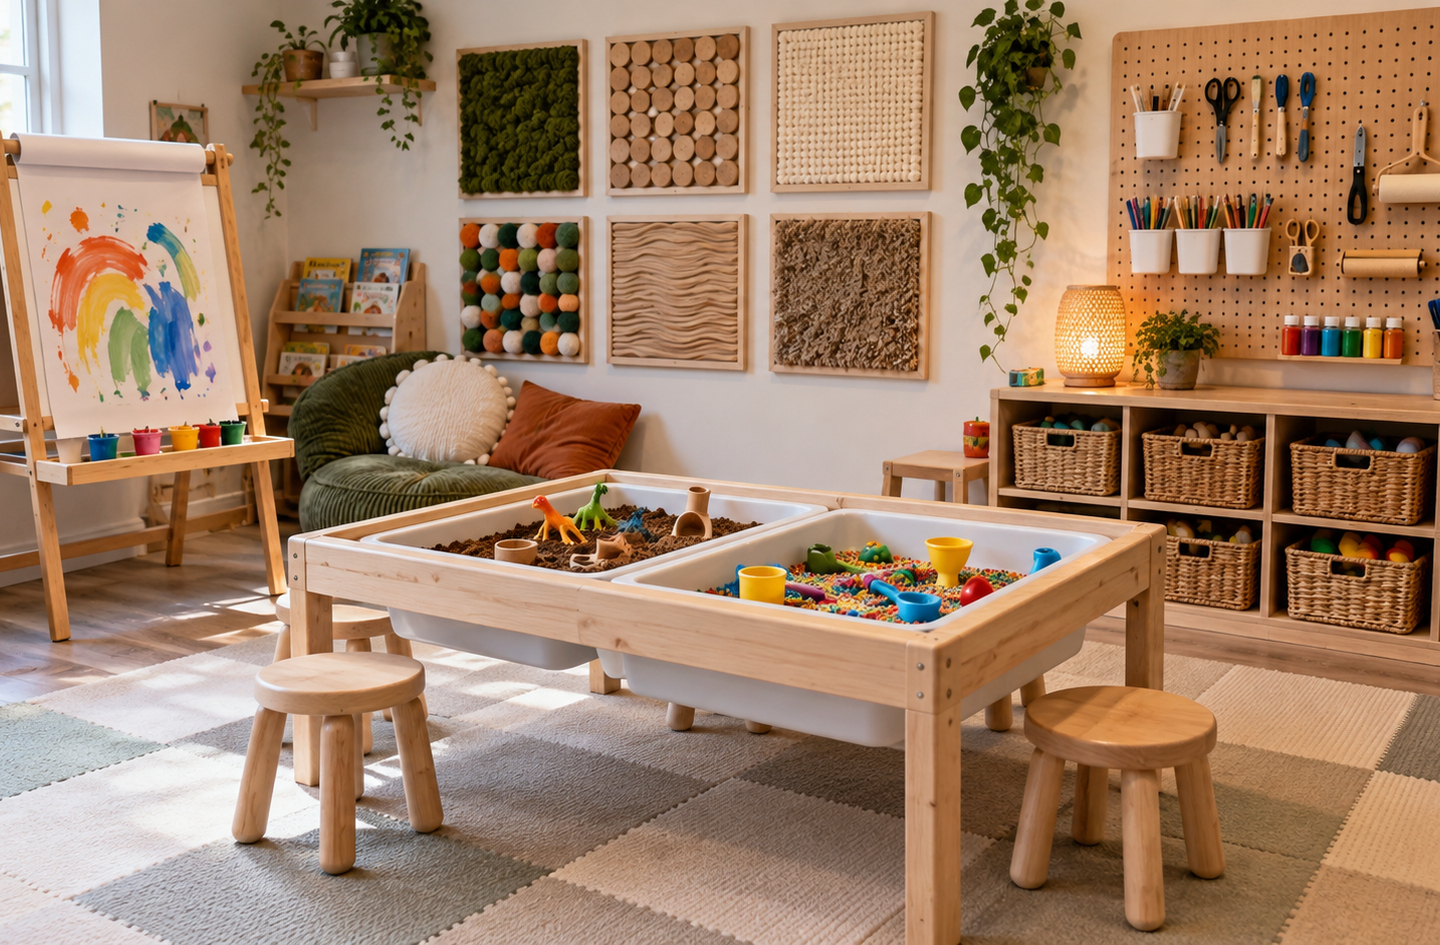
A wooden sensory table with dual bins on a checkered rug, one side filled with dirt and toy dinosaurs and the other with colorful sensory rice.
A wooden sensory table with two bins holds dirt and toy dinosaurs on one side and colorful sensory rice on the other.

A small parts cylinder is a test gauge used to simulate the throat size of a child under 3 years old1. It shows which objects or pieces a toddler could potentially choke on. A piece that fits entirely inside it, without being squeezed, counts as a small part.

What the emergency department data show

An estimated 759,074 children younger than 6 were evaluated in U.S. emergency departments for foreign-body ingestions from 1995 to 20157. That study covers swallowed objects of every kind, not sensory play specifically. In the same study of children younger than 6, the annual rate of foreign-body ingestion per 10,000 children rose from 9.5 in 1995 to 18 in 20157.

Coins were the most frequent object in that study, at 61.7%7. Toys followed at 10.3%, then jewelry at 7.0% and batteries at 6.8%7. Coins and loose batteries are exactly the kind of item that drifts into a homemade bin from a junk drawer.

How to run the small parts check

  1. Empty the bin onto a tray: lay out every scoop, filler and figure so nothing hides under the rice.
  2. Drop each item into the tester: do not push or squeeze it. Anything that slides fully inside is a small part.
  3. Check what could come loose: eyes on figures, caps on bottles, shell fragments, beads on string and stickers that peel.
  4. Sort into two piles: pieces that pass stay; pieces that fit the tester leave the bin while a toddler is present.
  5. Repeat with every new filler: dried beans, pasta shapes, pebbles and acorns vary piece by piece, so one large bean does not clear the bag.

For a toddler bin, the tester is the minimum check, not a clearance. The AAP links choking risk to shape, size and consistency6, so a round or squashable piece that passes still deserves caution.

Step 3: Remove Button Batteries and Loose Magnets

Button batteries and small powerful magnets get their own check, separate from the small parts check, because federal rules treat each as its own ingestion hazard. CPSC staff identified 32 reported deaths in the United States from button cell or coin battery ingestion from January 1, 2011 through March 31, 20232.

A button cell is a small, flat, round battery of the kind used in light-up toys, sound buttons, remote controls and flameless candles. Reese’s Law requires warning labels that tell consumers to keep new and used batteries out of the reach of children2. The labels also tell consumers to seek immediate medical attention if a battery is ingested2.

Why magnets need a separate look

Magnets are a different hazard from an ordinary small part. CPSC reports an estimated 26,600 (2,800 in 2021) ED-treated magnet ingestions involving magnet products of various types from 2010 through 20214. ED-treated means seen in a hospital emergency department, and the count covers magnet products of every kind, not only toys. When more than one is swallowed, the magnets are attracted to each other in the digestive system and can trap intestinal tissue between them4.

Magnetic building tiles and fridge-letter sets are common in sensory corners. In magnetic tiles the magnets sit inside a plastic casing, so the check is for cracks, loose seams and missing pieces of casing.

Where batteries and magnets hide in a sensory setup

  • Light-up sensory bottles, glowing balls and LED tea lights placed in a bin for effect.
  • Battery compartments on toys and sound boards: the cover should need a screwdriver or a firm press to open.
  • Spare batteries left in a drawer or basket inside the play area.
  • Magnetic tiles with cracked edges, magnetic fishing games and decorative fridge magnets.

Treat any loose button cell or loose magnet as a remove-on-sight item: unlike a large bead, neither one gets safer because the child is a little older.

Step 4: Set Water Limits Before Filling Anything

Water play needs the closest supervision of any sensory material. WHO reports that the risk of drowning increases when children interact with water outside of active adult supervision5.

Active supervision is an adult who stays within arm’s reach, watches the child rather than a screen, and keeps watching for the whole activity. WHO also notes that controlling access to water hazards, for example with doorway barriers and playpens, greatly reduces water hazard exposure and risk5.

Water rules for a sensory bin or table

  1. Fill shallow: use only as much water as the scoops need, in a wide tray rather than a deep tub or bucket.
  2. Fill last: add water only when the adult is seated at the table and the rest of the setup is done.
  3. Take the child with you: if the doorbell or phone pulls you away, the child comes too, or the water play ends.
  4. Empty at once: pour out every container, bowl and basin as soon as play ends, and turn them upside down.
  5. Close the route: after play, a closed bathroom door or a gate keeps a toddler away from any remaining water.

Wet floors are part of the water check too. A towel under the tray and a quick wipe before anyone stands up keep a spill from becoming a slip.

If no adult can stay at the table for the whole session, choose a dry activity today. Water is the material where a short gap in attention matters most.

Step 5: Clear Cords and Check the Play Surface

Cords near a sensory corner and the surface under it belong in the screen, because a seated child reaches sideways and a wet floor changes footing. The CPSC is aware of 209 fatal and near-miss strangulations on window covering cords among children 8 years old and younger from January 2009 through December 20213.

That figure is about window blinds and shades, not toys, but it shows how a loop and a child can interact in an ordinary room. The federal rule explains why a quick glance is not enough:

“Strangulation with cords requires only a few minutes to occur and happens silently.”

Federal Register, Consumer Product Safety Commission rule on window covering cords3

Cord check

  • Set the sensory table well away from windows with corded blinds, and tie up or remove any cord you cannot move away from.
  • Route lamp, charger and light-strip cords behind furniture, not across the play floor.
  • On sensory boards, keep strings and ribbons short and taut, with no slack that could form a loop.
  • Remove necklaces, lanyards and drawstring bags from the sensory area before play.

Surface check

The surface check covers what the child sits at and stands on. A sensory table should stand level and resist a push from one side, because children lean their weight onto the rim. Trays should sit flat with no edge hanging over the table.

On the floor, a washable mat with a grip backing catches spills and fillers. Keep the play spot clear of stairs, hard furniture corners and the main walking path, so a child who stands up quickly has room to move.

Place the activity before you set it up. A sensory corner beside a corded blind or a stair edge needs moving, because supervision cannot make up for a poor spot.

Step 6: Read Material Labels and Plan for Skin Contact

Labels tell you what a material is designed for, not whether a child can mouth it or keep it on the skin for an hour. The CPSC’s art and craft safety guide advises reading the labels and only purchasing art and craft materials intended for children8.

The same guide adds a caution about art materials that is worth applying to other play materials. Even products labeled non-toxic can have harmful effects when used in an unintended manner8. ASTM D-4236 is the standard that outlines procedures for developing precautionary labels for art materials with the potential to produce chronic adverse health effects8.

Food fillers and water beads

Food-based fillers solve one problem and leave another. The AAP notes that the shape, size and consistency of certain toys and foods increase their potential to cause choking among children6. Dried beans, whole chickpeas and popcorn kernels can be edible and still fail the small parts check.

Water beads are a separate case. CPSC estimates 6,300 injuries related to water beads were treated in U.S. hospital emergency departments from 2017 through 20221. Some water bead products are not marketed as children’s toys and are outside of the scope of the 2025 federal toy rule1, so a vase-filler pack carries no toy-rule protections.

Skin contact plan

Contact dermatitis is a skin rash caused by a substance touching the skin, either by irritation or by an allergic reaction. The CPSC guide, written with classrooms in mind, notes that asthma or allergies may raise a student’s sensitivity to fumes, dusts or products that come into contact with the skin8.

  • Cover cuts and sores with bandages before using materials, as the CPSC guide advises8.
  • Wash hands after using materials8, and wash faces too if a child rubbed them mid-play.
  • Try a new dough, slime or foam on a small patch of the hand first, and stop if redness appears.
  • Keep food and drinks off the sensory table, so fillers and snacks never share a bowl.

Choose materials made for children’s play over materials borrowed from the kitchen, garden or craft shelf, then plan the hand-washing before the first scoop.

Step 7: Set the Supervision Level and Count the Reset

Supervision is the last layer of the screen, not the only one, because some of these hazards unfold faster than an adult can look up. The CPSC notes that water bead ingestion, nasal and ear insertion, choking and aspiration can occur in seconds1. Its window covering rule describes the cord strangulation hazard as silent, quick and hidden to consumers3.

Supervision gaps are normal in a real home. Research cited by the CPSC found toddlers and preschoolers out of view of a supervisor for about 20 percent of their awake time at home1. They were not within visual or hearing range for about 4 percent of awake time at home1.

“Children need regular and consistent reminders of safety rules, and there is no substitute for direct supervision.”

U.S. Consumer Product Safety Commission (CPSC), Art and Craft Safety Guide8

Three supervision levels

Choosing a supervision level before the activity starts
LevelWhen it appliesWhat the adult does
Within arm’s reachAny water, any child who still mouths objects, any filler near the small parts lineSits at the table for the whole session and ends play before leaving
In the same roomLarge, dry materials for children past the mouthing stageStays in the room with a clear view of hands and faces
Nearby, checking inOlder children with materials that passed every checkChecks in often and reviews the reset at the end

Count the reset

The reset is part of the screen, because a missing piece is a hazard for the next child who walks in. Count small items into the bin at the start and count them back out at the end. If a piece is missing, find it before anyone else plays in the room.

Put the bin away with its lid on, on a shelf the youngest child cannot reach, and store the rejected pile from Step 2 somewhere else entirely. That is the room as a system: the reset leaves the space ready for the next session, not just tidy.

Pick the supervision level from the riskiest item on the table, not the calmest one, and match the reset to the smallest piece in the bin.

The Sensory Play Safety Tips Checklist at a Glance

The finished screen fits on one card. The seven steps become eight lines, because batteries and magnets get one line each. Each line is tied to a published figure or rule and to one action before play. The crosswalk below maps each source onto a home sensory activity and names the setting each source was written for.

Sensory play screening crosswalk: each published figure, its setting, and the check it sets before play
CheckPublished figure or ruleSetting the source coversAction before play
Youngest childSmall parts banned in toys for children younger than 3 years; warning for ages 3 to 6Federal toy rulesScreen to the youngest child present
Small partsSmall parts cylinder with a 31.7 mm openingASTM F963 toy standard, as described by the CPSCRemove every piece that fits the tester
Button batteries32 reported deaths from ingestion, 2011 to March 2023Federal battery ruleRemove loose cells and check compartment covers
Magnets26,600 ED-treated magnet ingestions, 2010 to 2021Federal magnet ruleRemove loose magnets and retire cracked tiles
WaterChildren under 5 are nearly a quarter of drowning deathsWHO, worldwide, all settingsAdult within arm’s reach; empty containers at the end
Cords209 fatal and near-miss strangulations, ages 8 and younger, 2009 to 2021Federal window covering ruleMove the activity away from corded blinds
Materials and skinNon-toxic products can harm when used in an unintended mannerCPSC guide for art and craft materialsRead labels, cover cuts, wash hands after
SupervisionOut of view for about 20 percent of awake timeHome research cited in the water bead ruleChoose the level before starting
Standards crosswalk compiled by Playroom Architect from the Federal Register toy, battery, window covering and magnet rules1234, the WHO drowning fact sheet5 and the CPSC art and craft guide8. None of these sources was written for a home sensory bin.

If one check fails and cannot be fixed today, swap the activity rather than skipping the check: the screen only works when every line passes.

Common Mistakes to Avoid

The most common sensory play mistakes come from trusting a label or a habit over the check itself. Each one below has a simple fix that fits inside the seven steps.

  • Reading “non-toxic” as “fine to mouth”: the label speaks to chemical labeling, not to choking. Run the small parts check on every non-toxic material too.
  • Reading “taste-safe” as “choke-proof”: edible fillers can still be the wrong shape or size. Run the tester on every edible filler, and treat round or squashable pieces with caution even when they pass.
  • Relying on supervision alone: an adult in the room cannot stop something that happens in seconds. Remove the hazard first, then supervise what is left.

Most of these mistakes share one cause, a shortcut on a busy day, so the fix is a sequence short enough to run every time.

When General Guidance Is Not Enough

General sensory play safety tips cover a typical child in a typical setup, and some children need an individualized assessment instead. The screen above uses published rules and population data, which describe groups of children, not the child at your table.

Ask a professional about the specific child when any of these apply:

  • The child still mouths most objects well past the toddler years, or has difficulty chewing or swallowing.
  • The child has known allergies, eczema or a history of skin reactions to play materials.
  • The child has a medical condition that could cause a sudden loss of attention or control near water.
  • The child has sensory processing differences, and you want to know which materials suit them.

For a specific child, consult the child’s pediatrician, and for sensory processing or feeding questions ask about a referral to a pediatric occupational therapist. For a suspected swallowed battery or magnet, seek immediate medical care rather than waiting for symptoms. Playroom Architect offers engineering-informed education, not a child-safety assessment of a specific child or room.

Use the checklist for every activity, and add a professional’s advice on top of it for any child whose needs sit outside the typical range.

Frequently Asked Questions

How do you make sensory play safer for toddlers?

Screen the activity before it starts. Name the youngest child, remove anything that fits a small parts tester, take out loose batteries and magnets, and keep water shallow with an adult within reach. Federal rules ban small parts in toys for children younger than 3 years of age1, so toddler bins need the strictest check.

What sensory bin fillers are choking hazards?

Any filler piece that fits entirely inside a small parts cylinder, which has a 31.7 mm diameter opening1, is a choking hazard for a toddler. Dried beans, chickpeas, small pasta, pebbles, beads and acorns can fall in that range, so check each new bag piece by piece rather than trusting its look.

At what age can kids play with small parts in sensory bins?

Federal toy rules ban small parts for children younger than 3 years of age and require a warning for ages 3 years old to 6 years old1. Age alone does not settle it: a child who still mouths objects needs the toddler screen, and an older sibling’s small-part kits belong in a separate session.

Do you need to supervise sensory play the whole time?

For water, and for any child who still mouths objects, stay within arm’s reach for the whole session. WHO reports that drowning risk increases when children interact with water outside of active adult supervision5. For large, dry materials and older children, supervising from the same room is a reasonable level.

Are water beads okay for sensory play?

Water beads carry ingestion and insertion risks, and CPSC estimates 6,300 injuries related to water beads were treated in U.S. hospital emergency departments from 2017 through 20221. Expanding materials can cause gastrointestinal tract blockage if a child ingests them1. Keep water beads out of any session with a child who still mouths objects; the small parts tester does not clear them.

Limitations and Edge Cases

  • Most figures here come from U.S. federal rules and U.S. emergency department estimates17, while the WHO drowning share is worldwide5. The figures come from different years and methods, so they show where attention belongs, not how the hazards rank against each other.
  • The window cord figure covers window coverings, not toys or sensory boards. It serves here as a reference for cords near a play corner.
  • This screen covers one activity, not the whole room. Where a sensory space sits and how it is stored belong to the Sensory Play Spaces hub overview.

References

Methodology: the figures in this article were gathered in October 2026 from four federal rules published in the Federal Register, a WHO fact sheet, two papers indexed in PubMed and a CPSC safety guide, and each figure was checked against its source text. Playroom Architect founder Oded Feigin holds editorial responsibility.

  1. Federal Register – Safety Standard for Toys: Requirements for Water Beads, U.S. Consumer Product Safety Commission final rule, document 2025-22643, December 12, 2025.
  2. Federal Register – Safety Standard for Button Cell or Coin Batteries and Consumer Products Containing Such Batteries, U.S. Consumer Product Safety Commission final rule under Reese’s Law, document 2023-20334, September 21, 2023.
  3. Federal Register – Safety Standard for Operating Cords on Custom Window Coverings, U.S. Consumer Product Safety Commission final rule, document 2022-25041, November 28, 2022.
  4. Federal Register – Safety Standard for Magnets, U.S. Consumer Product Safety Commission final rule, document 2022-20200, September 21, 2022.
  5. World Health Organization (WHO) – Drowning, fact sheet.
  6. PubMed – American Academy of Pediatrics, Committee on Injury, Violence, and Poison Prevention. Prevention of choking among children. Pediatrics, 2010. DOI 10.1542/peds.2009-2862.
  7. PubMed – Orsagh-Yentis D, McAdams RJ, Roberts KJ, McKenzie LB. Foreign-Body Ingestions of Young Children Treated in US Emergency Departments: 1995-2015. Pediatrics, 2019. Nationwide Children’s Hospital Center for Injury Research and Policy. DOI 10.1542/peds.2018-1988.
  8. U.S. Consumer Product Safety Commission (CPSC) – Art and Craft Safety Guide, publication 5015, with the Art and Creative Materials Institute and Arts, Crafts and Theater Safety.

Conclusion

Sensory play safety tips hold up when they run as a sequence: youngest child, small parts, batteries and magnets, water, cords and surfaces, materials, then supervision and the reset. Each check removes a hazard before play starts, so supervision only has to cover what is left. That is the room as a system: design for the reset, not just the reveal.

See the broader overview in our sensory play spaces guide for how this screen fits into the wider sensory space.

What Makes Storage Ideas for a Small Playroom Work: Vertical Storage That Clears the Floor

Author: Oded Feigin · Created On: October 16, 2026 · Last Updated: October 16, 2026

Storage ideas for a small playroom work when they move toys off the floor and onto one planned wall, inside the heights a child can reach. Our small-space playroom layouts guide is the broader overview of planning a small room that works. This article goes deep on one angle: vertical storage that clears the floor. For children ages 3 and 4, the Access Board’s advisory reach range, written for public buildings, runs from 20 to 36 inches3. A wall planned around that band, with every tall unit restrained, gives the floor back to play.

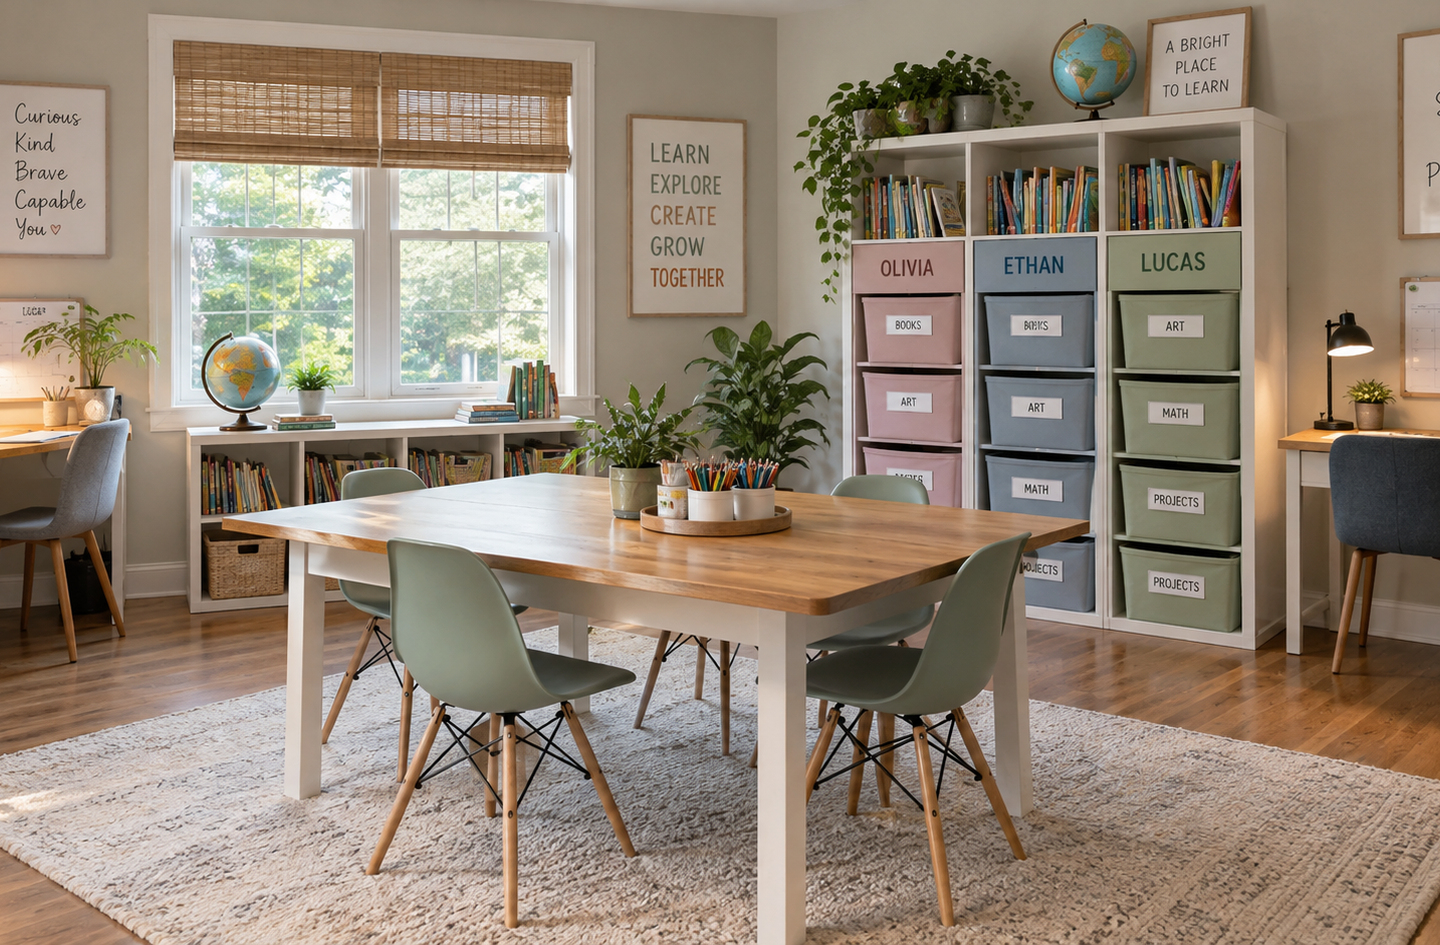
A bright, organized learning and play room with floor-to-ceiling storage, wall-mounted book displays, a world map and a chalkboard beside a large wooden table with green chairs.
Floor-to-ceiling storage and wall-mounted book displays line the walls of a bright room that pairs a study table with a separate play area.

Quick Answer

What makes storage ideas for a small playroom work?

Vertical storage works in a small playroom when daily toys sit inside the youngest child’s reach, backups sit above it, and the floor stays open for play. For public buildings, the Access Board’s advisory children’s reach runs from 20 to 36 inches at ages 3 and 4. It runs from 16 to 44 inches for ages 9 through 123. Restrain every tall unit to the wall.

Key Takeaways

  • Reach comes first. In the Access Board’s advisory table for public buildings, the high maximum is 36 in at ages 3 and 4. It rises to 40 in at ages 5 through 8 and 44 in at ages 9 through 123. Daily toys belong inside the youngest user’s band.
  • Tip-over injuries remain common. From 1990 to 2019, United States emergency departments treated an estimated average of 18,673 children a year for furniture or TV tip-over injuries1.
  • The federal clothing storage rule requires testing of units 27 inches and above in height, but its scope does not cover shelving units, such as bookcases2. Restraining a playroom bookcase is a planning decision for the household.
  • Fewer toys within reach can lengthen play. In a 2018 study, 36 toddlers had longer durations of toy play in a Four Toy session than in a Sixteen Toy session4.
  • Design for the reset, not just the reveal: a wall that gives each category one visible home turns the reset into a matching task.

Getting Started: What Vertical Storage That Clears the Floor Means

Vertical storage that clears the floor moves a small playroom’s toys from floor bins onto one planned wall, so the open floor becomes the play surface. In a small room the floor is the scarcest resource, and every bin left on it shrinks the space children have to build, spread out and move.

What is vertical storage in a small playroom?

Vertical storage is storage that stacks upward on a wall, through shelves, rails, pegboards and tall cube units, instead of spreading across the floor. A wall has height that the floor does not, and a small playroom with one planned storage wall can keep its center open for building, pretend play and movement.

The wall also becomes the room’s map. When every toy category has one visible home, a child can see where a toy goes, and a parent can see at a glance whether the room is reset. That is the room as a system: the storage wall carries the organizing work, so the floor does not have to.

Height cuts both ways, though. Storage above a child’s reach is storage the child cannot use alone, and a tall unit that is not restrained can tip. A floor-clearing wall therefore has two jobs: put the right things at the right height, and keep the whole wall stable.

Who does a floor-clearing storage wall suit?

A storage wall suits families with a small dedicated playroom, a corner of a shared room or a spare bedroom where floor space is tight. It also suits rooms that serve two ages, because one wall can hold toddler toys low and an older child’s materials higher up.

Good fit:

  • Small rooms where floor bins crowd the walking route between the door and the play area.
  • Children old enough to fetch and return toys on their own, which is when shelf height starts to matter.
  • Families who want the room to reset in a few minutes each evening.

Weaker fit:

  • Rental walls where fixings are restricted. Ask the landlord or a licensed installer about fixings first, and still restrain any unit tall enough to tip.
  • Babies who are not yet crawling, whose play happens on a mat beside a parent and needs very little storage.

When the playroom doubles as a home office, the small office playroom storage article covers vertical storage for a shared work and play room.

If floor bins are what makes a small playroom feel full, a planned storage wall is the first fix to try, provided the wall can take fixings.

How Storage Ideas for a Small Playroom Work on One Wall

Storage ideas for a small playroom work on one wall when the wall is split into height bands by who uses each band. The Access Board’s advisory table for public buildings sets children’s reach at 20 to 36 inches for ages 3 and 4. It gives 18 to 40 inches for ages 5 through 8, and 16 to 44 inches for ages 9 through 123.

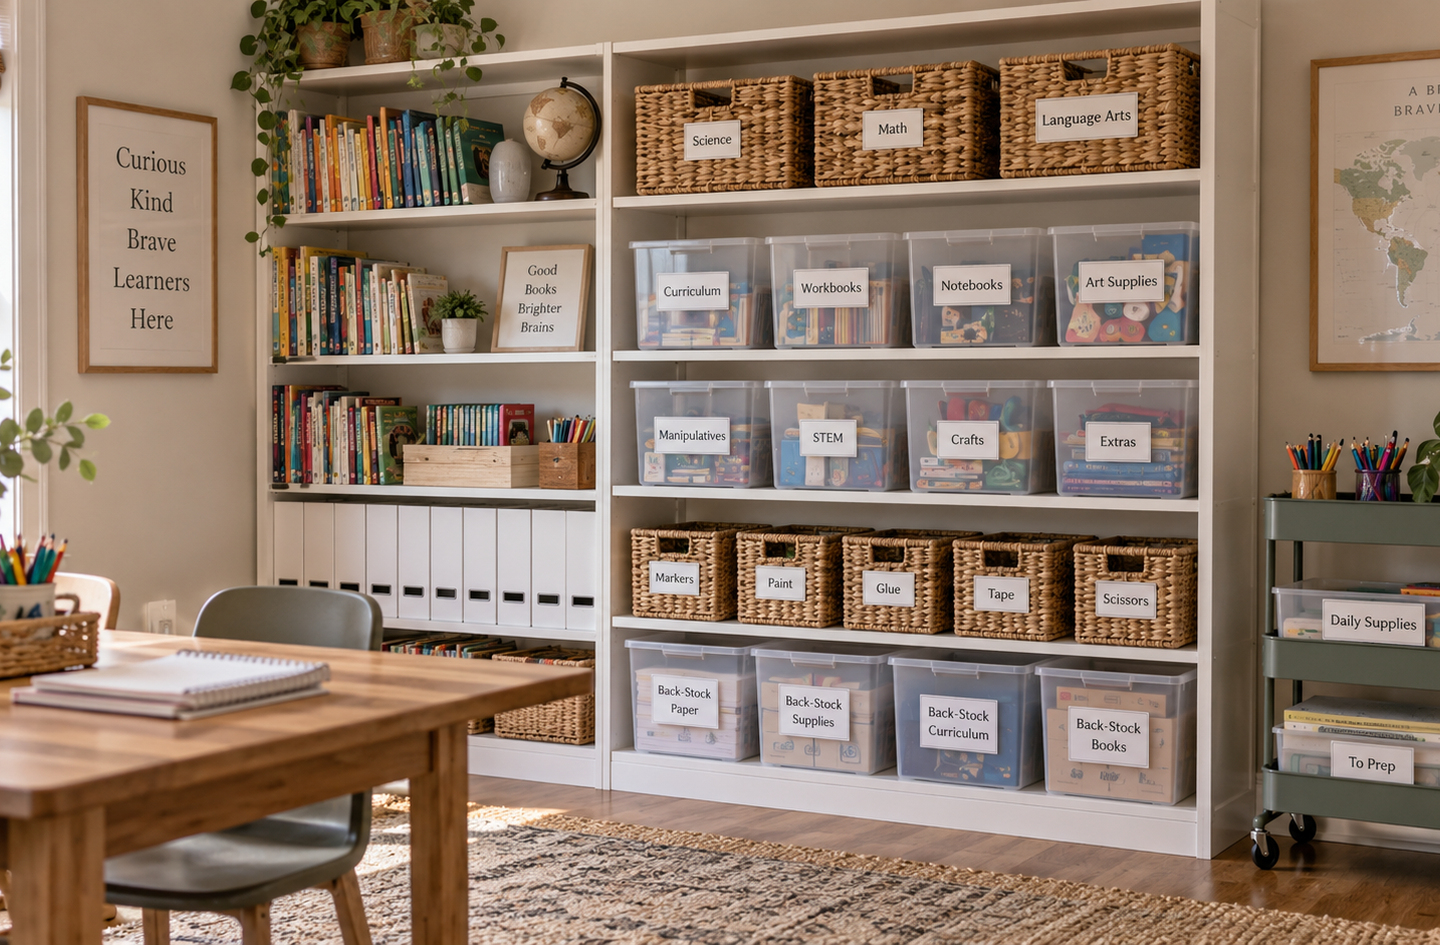
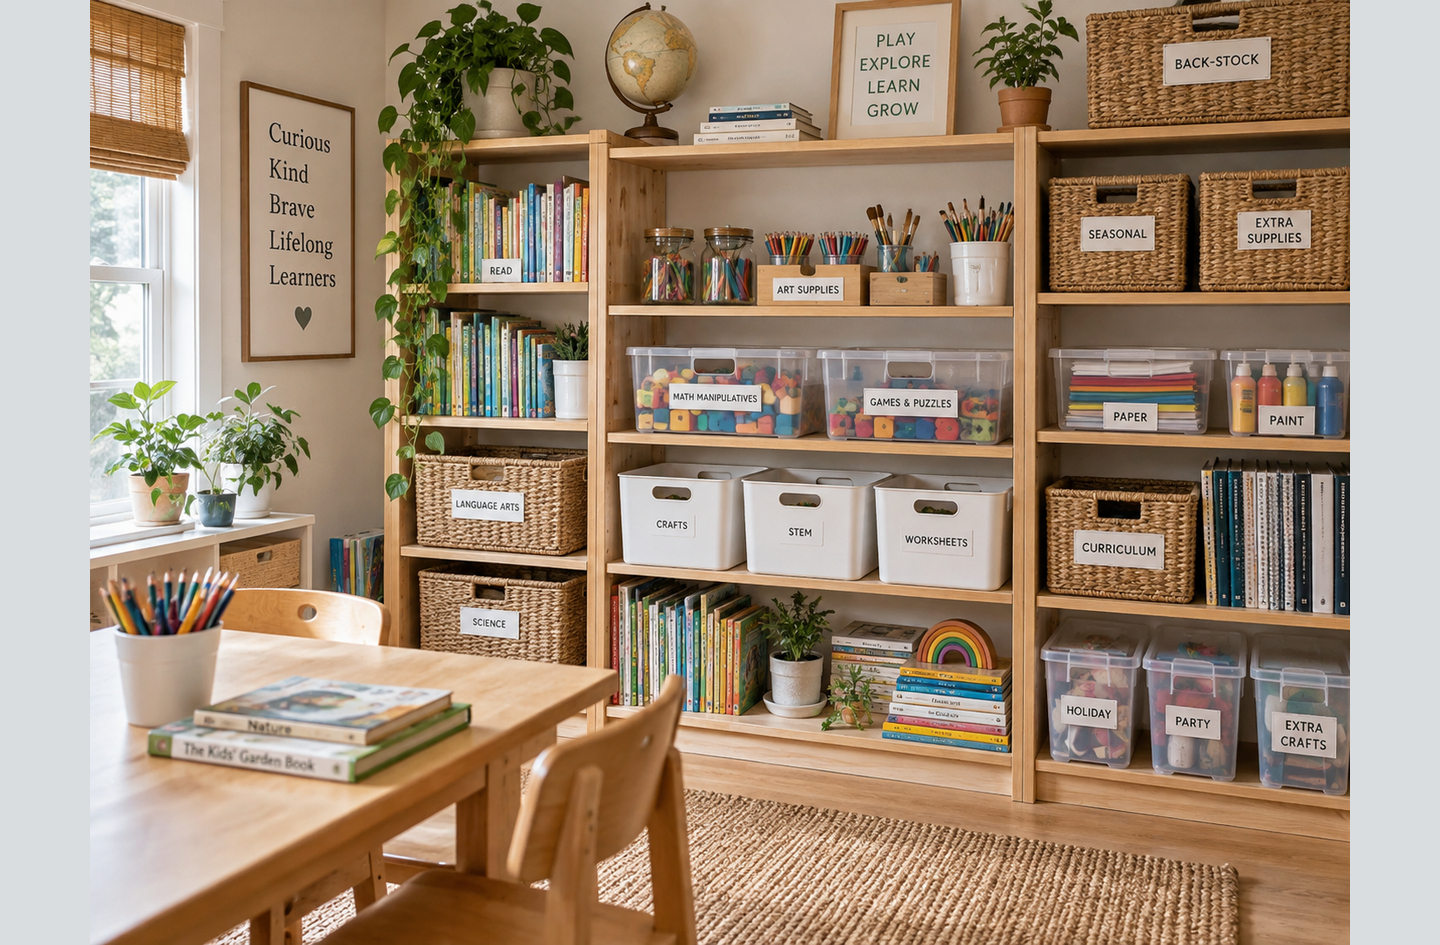
An organized learning zone with wooden shelving units filled with labeled baskets, clear storage bins and books, behind a sturdy wooden table and chairs on a natural fiber rug.
Wooden shelving units hold labeled baskets, clear storage bins and books behind a wooden table and chairs in an organized learning zone.

The three bands of a playroom storage wall

A reach band is the span of heights, measured from the floor, between the low and high limits of a child’s forward or side reach. The Access Board table is accessibility guidance for coat hooks, lockers and similar elements in public buildings. Here it serves as a reference point for a home wall, not a rule for it. The table covers ages 3 through 12 only, and it shows where children can use things, not where they cannot get to them.

  1. The daily band: the shelves inside the youngest user’s range from that table. Daily toys, books and the reset baskets live here, because the youngest child is the one who cannot reach up.
  2. The backup band: the shelves above the oldest child’s high limit, for resting rotation sets in plain lidded bins that give a child little reason to climb. Height alone does not keep things from a child, so paint, glue and other adult-only supplies go in latched or closed storage.
  3. The floor band: the bottom shelf, which can sit below the table’s low limits. A child sitting on the floor reaches it easily. It is also the right home for heavy block sets and full book bins, because weight carried low keeps the center of gravity down.

The federal clothing storage rule adds a second height to the picture. Under the STURDY Act, the rule must test clothing storage units 27 inches and above in height2. CPSC staff assessed that the adopted standard includes tests that simulate the weight of children up to 60 pounds2. Set beside the advisory reach table3, that 27-inch line falls inside every children’s band, but it marks a dresser rule’s scope, not a tip-over threshold for shelving.

Child Reach Bands and the CSU Rule Height Reach ranges are Access Board ADA Standards Advisory 308.1 children’s forward or side reach, written for public buildings. Ages 3 and 4: 20 to 36 inches. Ages 5 through 8: 18 to 40 inches. Ages 9 through 12: 16 to 44 inches. The dashed line marks 27 inches, where the scope of the 2023 federal clothing storage unit rule in the Federal Register begins. Child Reach Bands and the CSU Rule Height Ages 3 and 4 Ages 5 through 8 Ages 9 through 12 20 to 36 in 18 to 40 in 16 to 44 in CSU rule, 27 in and up 0 10 20 30 40 50 Inches above the floor Source: Playroom Architect analysis of Access Board and Federal Register data, 2026
Every children’s reach band in the advisory table crosses the 27-inch height where the federal dresser rule’s scope begins. That line is a dresser scope, not a tip-over threshold for shelving. The reach bands are written for public buildings, and none of the sources cited here sets reach for a home playroom. Compiled by Playroom Architect from Access Board ADA Standards and the Federal Register clothing storage rule.

What is the difference between open and closed vertical storage?

Open storage shows its contents and resets fastest, while closed storage hides visual clutter and keeps adult-only supplies out of sight. A working wall can use both, with open fronts in the daily band and closed fronts in the backup band.

Open and closed vertical storage on a small playroom wall
FeatureOpen shelves and cubesClosed cabinets and lidded bins
What the child seesEvery item, so choosing is quickA label or photo, so choosing takes a step
Reset speedFastest: items drop straight into placeSlower: a door or lid has to open first
Visual load on the wallHigher, especially with bright toys facing outLower: the wall reads as calm surfaces
Best bandThe daily bandThe backup band
Best forBooks, blocks, current toysRotation sets, art supplies, adult-only items

A cleared floor also opens the view across the room, and the open floor and clear sightlines article plans a small playroom around that view.

Plan the wall by bands before choosing a single unit: the band tells you what each shelf is for, and the unit only has to fit the band.

Common Problems: Why Small Playroom Storage Stops Working

Small playroom storage stops working for three repeat reasons: too many toys are out at once, tall units are not restrained, and the wall itself becomes visually busy. Published research bears on each one, from a toddler play study, a national injury analysis and a classroom experiment, though none of them studied home storage walls.

Why does the floor fill up again after a reset?

The floor refills when the daily band holds more toys than a child can use at once. In a 2018 University of Toledo study, 36 toddlers each took part in a Four Toy session and a Sixteen Toy session4. With fewer toys, they had longer durations of toy play and played with toys in a greater variety of ways4.

For a storage wall, that finding argues for a small daily band and a larger backup band. Toy rotation is the practice of keeping a few toys out and swapping in sets from storage on a regular schedule. On a vertical wall, rotation has a natural home: the backup band holds the resting sets, and the daily band holds only what is in play this week.

The study ran supervised sessions with one child at a time, not family homes, so it does not set a toy count for a playroom. It supports a direction, fewer toys within reach, rather than a number. For questions about a specific child’s play or attention, a pediatric occupational therapist is the right professional.

Why do tall shelves raise tip-over questions?

Tall shelves raise tip-over questions because a child can climb, pull or lean on them, and an unrestrained unit can fall forward. From 1990 to 2019, United States emergency departments treated an estimated average of 18,673 children a year for furniture or TV tip-over injuries1. Children younger than 6 accounted for 69.9% of furniture and TV tip-over injuries overall1.

A tip-over is a piece of furniture or a TV falling over, for example when a child climbs it or pulls on an open drawer. A clothing storage unit (CSU) is a freestanding dresser, chest or armoire. ASTM F2057-23 scopes CSUs at 27 inches or greater in height, 30 pounds or greater in mass and 3.2 cubic feet or greater of enclosed storage volume2. CSUs were involved in 17.2% of the tip-overs in that national analysis1.

The federal rule for dressers shows why playroom shelving needs its own plan. The scope of that standard does not cover shelving units, such as bookcases2. An open cube shelf or bookcase in a playroom sits outside that scope whatever its height. Restraining it is a household planning decision, using the hardware and fixing method the maker specifies. The study authors describe the promotion and use of tip restraint devices as important, while calling for stronger stability requirements1.

How heavy-low loading and wall restraints work together

The physics favors heavy-low loading. A unit tips when the weight of the unit, its contents and a child pulling on it shifts the center of gravity past the front edge of the base. Heavy bins on the bottom shelf keep that center low, while a child hanging on an upper shelf pushes it forward. A restraint holds the top of the unit to the wall, which is why it matters most on tall units.

For plaster, brick, masonry or metal-stud walls, or a built-in wall of storage, ask a licensed contractor or installer to confirm the fixings before loading the shelves. Playroom Architect offers engineering-informed education, not an evaluation of a specific room or wall.

Why can a busy storage wall pull attention?

A busy storage wall may pull attention, judging by classroom research on visual displays. The Association for Psychological Science reported a 2014 study in which 24 kindergarten students were placed in laboratory classrooms5. They had six introductory science lessons, taught in a heavily decorated classroom and in a sparse classroom5. Accuracy was higher in the sparse classroom, at 55% correct, than in the decorated classroom, at 42% correct5.

Off-task behavior was also higher in the decorated classroom, at 38.6% time spent off-task, than in the sparse classroom, at 28.4% time spent off-task5. The lead researcher did not argue for bare walls:

“Therefore, I would suggest that instead of removing all decorations, teachers should consider whether some of their visual displays may be distracting to young children.”

Anna V. Fisher, Carnegie Mellon University5

A home playroom is not a classroom, and storage is not decoration. Still, a wall of bright bins with every toy facing out works as a visual display. Plain bins in the daily band, with a few favorite items facing out, keep the wall readable without stripping it bare.

When a small playroom keeps failing, check restraint, toy count and visual load in that order. The first decides the tip-over exposure, the second the reset, and the third how calm the wall reads.

How to Organize a Small Playroom Storage Wall That Resets Fast

To organize a small playroom storage wall, give each toy category one home inside the right band, keep the walking route clear and restrain every tall unit. The reset then becomes a matching task, where each item goes back to the one place that holds its kind.

Best practices for a floor-clearing wall

  1. Walk the room first: before buying a single bin, note where toys pile up and where children actually play. Observation before shopping shows which categories need homes closest to the play floor.
  2. Size the daily band to the youngest user: older siblings can reach down to a low shelf, but the youngest child cannot reach up to a high one. The Access Board table starts at age 3, so for a toddler, watch what the child actually reaches.
  3. Load heavy items low: large block sets and full book bins go on the bottom shelf, which keeps the center of gravity down.
  4. Restrain every tall unit: fix it to the wall with the maker’s restraint hardware, into studs or anchors suited to that wall.
  5. Keep the route clear: for public buildings, the ADA Standards set a clear width of 36 inches minimum for walking surfaces3, a wheelchair-route rule. It is still a useful yardstick for the path from the door to the play floor.
  6. Watch shelves that stick out: the ADA Standards cover this for public buildings. There, objects with leading edges more than 27 inches and not more than 80 inches high protrude 4 inches maximum into a circulation path3. The rule exists so cane users can detect objects. Our own inference is that a deep shelf beside the door can put an edge at a child’s head or shoulder.
  7. Label for the non-reader: a photo or drawing on each bin lets a child who cannot read yet return items alone.
  8. Give rotation its own shelf: plain lidded bins on the top shelves hold the resting toy sets. The daily band stays small, and the top holds nothing a child is eager to climb for.

For the full build sequence from layout to daily use, the DIY playroom ideas for small spaces plan sets out each setup step for a fast shared-space reset.

Storage wall crosswalk: published figures mapped to a small playroom wall

The crosswalk below maps each published figure in this article onto one part of a home storage wall, with the setting each source was written for.

Storage wall crosswalk: each published figure, its setting, and what it means on a small playroom wall
Part of the wallPublished figureSetting the source coversWhat it means on a home wall
Daily band, ages 3 and 4Reach range 20 to 36 inchesAdvisory guidance, public buildingsDaily toys and reset baskets for a preschooler sit in this span
Daily band, ages 5 through 8Reach range 18 to 40 inchesAdvisory guidance, public buildingsThe band widens slightly at both ends as a child grows
Daily band, ages 9 through 12Reach range 16 to 44 inchesAdvisory guidance, public buildingsHobby supplies can rise higher once the youngest user is older
Backup bandAbove the 44-inch high limit for ages 9 through 12Derived from the same tableResting rotation sets sit above every child band; adult-only supplies also need latched storage
Walking routeClear width of 36 inches minimumADA Standards, public buildingsKeep the path from the door to the play floor free of bins
Wall shelf beside the routeLeading edges more than 27 and not more than 80 inches high protrude 4 inches maximumADA Standards, public buildingsKeep deep shelves off the walking route
Tall freestanding dresserTesting of units 27 inches and above; staff assessed the tests simulate children up to 60 poundsFederal clothing storage rule, 2023Dressers sold under the rule face stability tests; shelving units are outside its scope
Bookcase or cube unitNot covered: shelving units, such as bookcasesFederal clothing storage rule, 2023Restrain every tall shelf unit to the wall
Why restraint mattersAn average of 18,673 children a year treated for furniture or TV tip-over injuries, 1990 to 2019National injury surveillance sample, children under 18The figure comes from national injury data, not from anecdotes
Standards crosswalk compiled by Playroom Architect from Access Board ADA Standards3, the Federal Register clothing storage rule2 and the Lu tip-over analysis1. Access Board figures are written for public buildings and serve here as reference points for a home wall.

How does a storage wall compare with floor bins and under-furniture storage?

A storage wall frees the most floor, floor bins give a toddler the easiest access, and bench or under-furniture storage hides bulk without adding height. A small room can use all three, as long as the wall carries the daily categories.

Three storage approaches for a small playroom, compared
CriterionStorage wallFloor binsBench or under-furniture storage
Floor space usedLeast: storage moves up the wallMost: every bin takes floorLow: shares a footprint with seating
Child accessGood inside the daily bandEasiest for toddlersGood for bulky, rarely sorted items
Reset speedFast when each category has one homeFast to dump, slow to sortSlow: lids and drawers add a step
Tip-over exposurePresent on tall units until restrainedLow, unless bins are stacked highLow: the unit stays near the floor
Who it suitsSmall rooms that need open floorToddler-only rooms with spare floorRooms that also need seating

The storage wall that works is the one a child can reset alone. If a category has no single home in the daily band, add a home before adding a bin.

Frequently Asked Questions

How do you organize a small playroom?

Organize a small playroom by giving each toy category one home on a single storage wall, with daily toys inside the youngest child’s reach and backups above it. The Access Board’s advisory range for ages 3 and 4, written for public buildings, runs from 20 to 36 inches3. Restrain tall units and keep the walking route open.

How high should shelves be in a playroom?

Daily shelves belong inside the youngest user’s reach, and higher shelves hold backups. For public buildings, the Access Board’s advisory ranges are 20 to 36 inches at ages 3 and 4 and 18 to 40 inches at ages 5 through 8. The range is 16 to 44 inches for ages 9 through 123.

Do playroom bookcases need to be anchored to the wall?

Yes. The federal clothing storage rule covers dressers 27 inches and above in height, but its scope does not cover shelving units, such as bookcases2. Restraint is up to the household. Use the maker’s restraint hardware, and ask a licensed installer about plaster, brick or metal-stud walls.

How many toys should be out in a small playroom?

None of the sources cited here sets a toy count for a home, but fewer toys within reach can lengthen play. In a 2018 study of 36 toddlers, the Four Toy session produced longer durations of toy play than the Sixteen Toy session4. Keep a small daily set out and rotate the rest from a higher shelf.

Are wall shelves better than toy bins for a small playroom?

Wall shelves free more floor than floor bins, but bins set on low shelves combine the strengths of both. The shelf lifts the bin off the floor, and the bin keeps small pieces together. Use open fronts for daily toys and lidded bins for backups, and restrain any tall shelving unit to the wall.

Limitations and Edge Cases

  • The children’s reach ranges come from accessibility guidance for public buildings. They are reference points for a home wall, not a rule for it, and children of the same age differ in height and reach.
  • The toy-count and classroom findings come from supervised laboratory sessions with toddlers and kindergarten students, so they show a direction rather than a number for a family playroom.
  • The tip-over figures are national emergency department estimates for 1990 to 2019 and include TVs as well as furniture1. Zoning the whole room, beyond its storage wall, belongs to the Small-Space Playroom Layouts hub.

References

Methodology: the figures in this article were gathered in October 2026 from federal accessibility standards, a federal product safety rule, two peer-reviewed studies and a research news release. Each figure was checked against its source page. Playroom Architect founder Oded Feigin holds editorial responsibility.

  1. PubMed – Lu C, Badeti J, Mehan TJ, Zhu M, Smith GA. Furniture and television tip-over injuries to children treated in United States emergency departments. Injury Epidemiology, 2021. DOI 10.1186/s40621-021-00346-6.
  2. Federal Register – Safety Standard for Clothing Storage Units, Consumer Product Safety Commission direct final rule, document 2023-08997, May 4, 2023.
  3. U.S. Access Board – ADA Accessibility Standards (2010 ADA Standards for Accessible Design with advisories), sections 307.2, 403.5.1 and Advisory 308.1.
  4. PubMed – Dauch C, Imwalle M, Ocasio B, Metz AE. The influence of the number of toys in the environment on toddlers’ play. Infant Behavior and Development, 2018. University of Toledo Occupational Therapy Doctoral Program. DOI 10.1016/j.infbeh.2017.11.005.
  5. Association for Psychological Science (APS) – Heavily Decorated Classrooms Disrupt Attention and Learning In Young Children, news release on Fisher, Godwin and Seltman, Psychological Science, May 27, 2014.

Conclusion

Storage ideas for a small playroom work when the wall does the storing and the floor does the playing. Plan the bands by reach, keep the daily set small, load heavy items low and restrain every tall unit. Shelving can tip, and the federal dresser rule does not cover bookcases. That is the room as a system: design for the reset, not just the reveal.

See the broader overview in small-space playroom layouts for how one storage wall fits into planning a small room that works.

Closet Reading Nook Ideas for Kids: Convert an Unused Closet Into a Book Hideaway

Author: Oded Feigin · Created On: October 14, 2026 · Last Updated: October 14, 2026

Closet reading nook ideas for kids start with a test, not a cushion. Can this closet hold a child, a light and a stack of books, with moving air and an adult able to see in? Our reading nooks guide is the broader overview of quiet reading corners at home. This article covers one conversion: turning an unused or underused closet into a book hideaway. Making books easy to reach is one small lever. In 2023, only 14 percent of students reported reading for fun almost every day in the NAEP sample of 13-year-old students1.

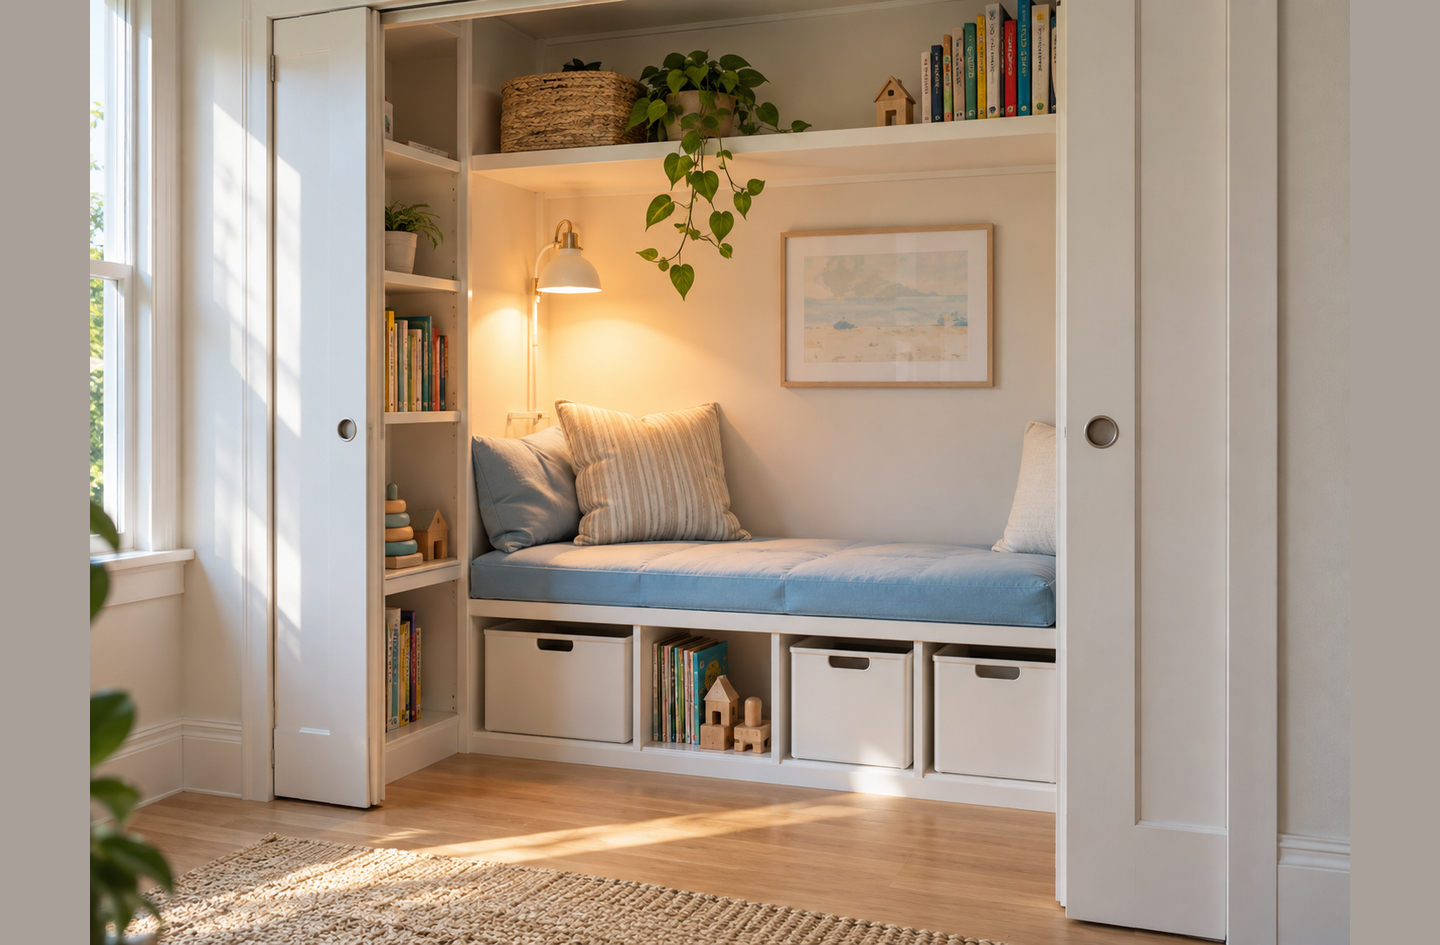
One of several closet reading nook ideas for kids: a closet turned into a reading nook with a custom built-in bench, a soft blue cushion, organized storage bins, shelving for books and a warm wall-mounted lamp.
A closet-turned reading nook with a built-in bench and blue cushion, storage bins, book shelving, house plants and a wall-mounted lamp.

Quick Answer

How do you turn a closet into a reading nook for kids?

Measure the opening first, then check the air, light, floor and book reach before buying anything. For public buildings, the ADA Standards require door openings with a clear width of 32 inches minimum2, a useful yardstick for a home closet rather than a rule. Keep candles and heaters out, take the door off or fix it open, and place the nook where an adult can see in.

  1. Measure the closet opening and interior.
  2. Decide what happens to the closet door.
  3. Check air, moisture and heat.
  4. Light the page without heat or loose cords.
  5. Build a floor and seat the child can leave easily.
  6. Shelve books inside the child’s reach.
  7. Keep the nook visible and plan the reset.

Key Takeaways

  • For public buildings, the ADA Standards set door openings at 32 inches minimum and openings more than 24 inches deep at 36 inches minimum2. A home closet can borrow both as reference points.
  • Moisture is the first air check: the EPA advises keeping indoor humidity below 60 percent, ideally between 30 and 50 percent3.
  • Shelves between 20 and 36 inches sit inside all three of the Access Board’s advisory reach ranges for children ages 3 to 122. Those ranges are written for public buildings, but one shelf band can serve years of growth.
  • Restrain every freestanding unit and fix wall shelves into studs. From 1990 to 2019, U.S. emergency departments treated an estimated average of 18,673 children a year for furniture or TV tip-over injuries4.
  • Design for the reset, not just the reveal: a closet nook that clears in a minute is ready for the next reader.

Before You Start: What a Closet Reading Nook Needs

A closet reading nook needs five things before any decor: a usable opening, moving air, a cool light, a soft floor and books within reach. A reach-in closet is a shallow closet used from outside, with a rod and a shelf behind a door. A walk-in closet is a closet deep enough to step into, with storage on one or more walls. Either can become a reading nook, but they fail in different ways, so name the type first. Gather these before buying anything:

  • A tape measure and a notepad to sketch the opening, the depth, the fixed shelf and every outlet, vent and light.
  • A flashlight to check the back corners and the floor for stains, damp patches or a musty smell.
  • A hygrometer, a small meter that reads the humidity of the air, left in the closet for a week.
  • Painter’s tape to mark where the cushion, the shelf and the room’s walking path will sit.
  • Time: an evening to measure, a stretch of humidity readings and a weekend to set up.

Observation before shopping keeps a cushion purchase from deciding the plan, and the room as a system decides whether a child uses the closet. Playroom Architect founder Oded Feigin, a mechanical engineer (M.Sc., UCLA) who plans residential renovations, wrote this guide. It is engineering-informed planning, not structural, electrical or developmental advice for a specific home or child.

Step 1: Measure the Closet Opening and Interior

Step 1 decides whether the closet can work at all, by measuring the clear opening, the depth and the free floor inside. The opening matters most, because it is where a child climbs in, a parent kneels to help and the light from the room enters.

No home code sets a size for a reading nook, so public-building figures make a useful yardstick. For public buildings, the ADA Standards require door openings with a clear width of 32 inches minimum, and openings more than 24 inches deep need 36 inches minimum2. Those figures are written for accessible design in public buildings, not for home closets. They still give a concrete comparison: a closet opening narrower than 32 inches is tighter than a standard accessible doorway.

  1. Measure the opening at its narrowest point, which is often the trim, a door track or a folded bifold panel.
  2. Measure the depth from the back wall to the line of the door.
  3. Measure the height to the underside of the fixed shelf, and note the rod height.
  4. Mark every outlet, vent, light fixture, pipe and access panel on the sketch.

Reach-in and walk-in closets measure differently

A reach-in closet is usually wide and shallow, so the nook runs along the back wall and the child sits facing out into the room. A walk-in closet is deeper, so the nook sits at the far end and the doorway becomes a short passage. That passage is the part to check, because a child and an adult both need to pass through it.

Look for anything that rules a closet out. A closet holding a water heater, a furnace, an electrical panel or a plumbing access panel is a utility space, not a nook candidate. Removing a closet wall or widening a framed opening is structural work for a licensed contractor.

The step is complete when the sketch shows the opening, depth, shelf height and every fixed item, with any ruling-out feature circled.

Measure the opening before anything else, because a closet with a pinched or blocked entrance stays unused however soft the cushion is.

Step 2: Decide What Happens to the Closet Door

Step 2 settles the door, because a closet reading nook works best when a child cannot be shut inside it and the room’s light can reach the page. Most closet doors were chosen to hide clothes, not to frame a reading spot, so each type needs a decision.

  • Hinged door: take it off and store the hinges and pins with the door, or fix it fully open with a doorstop that holds it against the wall.
  • Bifold door: remove it, because the folded panels narrow the opening and the hinge gap between panels can catch small fingers.
  • Sliding door: lift it off its track, or leave one panel fixed and open the other, so the nook does not sit behind a moving panel.
  • No door, or a curtain: a tension rod and a light curtain give a sense of a hideaway while staying easy to push aside.

Check the hardware too. A passage knob is a door handle with no lock, the type used on most hall closets. If the closet door stays on and has a locking knob, swapping it for a passage knob keeps the nook from ever being locked from either side.

The step is complete when the door is off, fixed open or replaced by a curtain, and no lock remains on the opening.

Treat the door as part of the nook’s safety reasoning, not as decor: an open or removed door costs nothing and helps keep the child in view and within reach.

Step 3: Check Air, Moisture and Heat in the Closet

Step 3 checks the air, because a closet is a small, closed box that holds moisture and heat in a way an open room does not. Closets on outside walls or beside a bathroom or laundry deserve the closest look.

Moisture and mold

Relative humidity is the amount of water vapor in the air, shown as a percentage of the most the air could hold at that temperature. The EPA advises keeping indoor humidity below 60 percent, ideally between 30 and 50 percent3. Leave the hygrometer in the closet for a week, with the door open as it will be in use, and compare its readings with the room outside.

Moving air is the fix for a closet that reads higher than its room. Keep the door off or open, leave a gap behind cushions and shelves, and avoid sealing the opening with a heavy curtain. If the closet still reads high, ask an HVAC professional about airflow before the nook goes in.

“The key to mold control is moisture control.”

U.S. Environmental Protection Agency (EPA)3

A musty smell, staining at the base of the walls or damp carpet signals excess moisture, whether from a leak or from condensation in still air. The EPA advises drying water-damaged areas and items within 24 to 48 hours to prevent mold growth3. A cushion soaked by a hidden leak comes out at once. Find and fix the source first, with a licensed plumber or contractor where a pipe or an outside wall is involved.

Heat sources and fire

A reading nook fills a small space with things that burn: cushions, blankets, paper books and fabric. The U.S. Fire Administration advises keeping anything that can burn at least 3 feet from all heat sources, including space heaters and candles5. Few closets offer that much distance from every surface, so candles, space heaters and heat lamps stay out of a closet nook entirely.

The step is complete when a week of readings sits inside the EPA range, no moisture source remains and nothing in the plan produces open flame or heater heat.

A closet that stays damp is not a reading nook yet: fix the moisture first, because cushions and paper books turn a small humidity problem into a mold problem.

Step 4: Light the Page Without Heat or Loose Cords

Step 4 adds light that reaches the page without adding heat, hot surfaces or cords a child can pull. A closet usually has one ceiling fixture or none, and that fixture sits behind and above the reader, which puts a shadow on the book.

  • Plug-in wall sconce: mount it to one side at the height of the seated child’s shoulder, and run the cord down the wall in a cord cover.
  • Battery LED lights: stick-on lights under the fixed shelf need no wiring; choose units whose battery cover closes with a screw.
  • String lights: use LED strings only, keep them on the wall or the shelf edge, never draped across fabric, and keep plugs out of the nook.
  • Existing fixture: keep it as background light, with an LED bulb no stronger than the fixture’s labeled maximum.

Hardwired changes belong with a professional. Electrical codes limit closet fixture types and their clearance from stored items, and a licensed electrician confirms what applies. A new or moved fixture, a new outlet or a dimmer is a job for a licensed electrician. A plug-in or battery light needs no change to the wiring and comes out when the nook does.

The step is complete when the child can read a page from the seat without a shadow across it, and no cord crosses the floor or hangs within reach.

Light from the side at shoulder height does more for reading than a brighter ceiling bulb, and plug-in or battery lights keep the closet easy to reverse.

Step 5: Build a Floor and Seat the Child Can Leave Easily

Step 5 builds the floor and seat, which decide whether a child settles in for a chapter or climbs out after a page. The test is simple: the child should get in, sit and get out again without climbing over anything or asking for help.

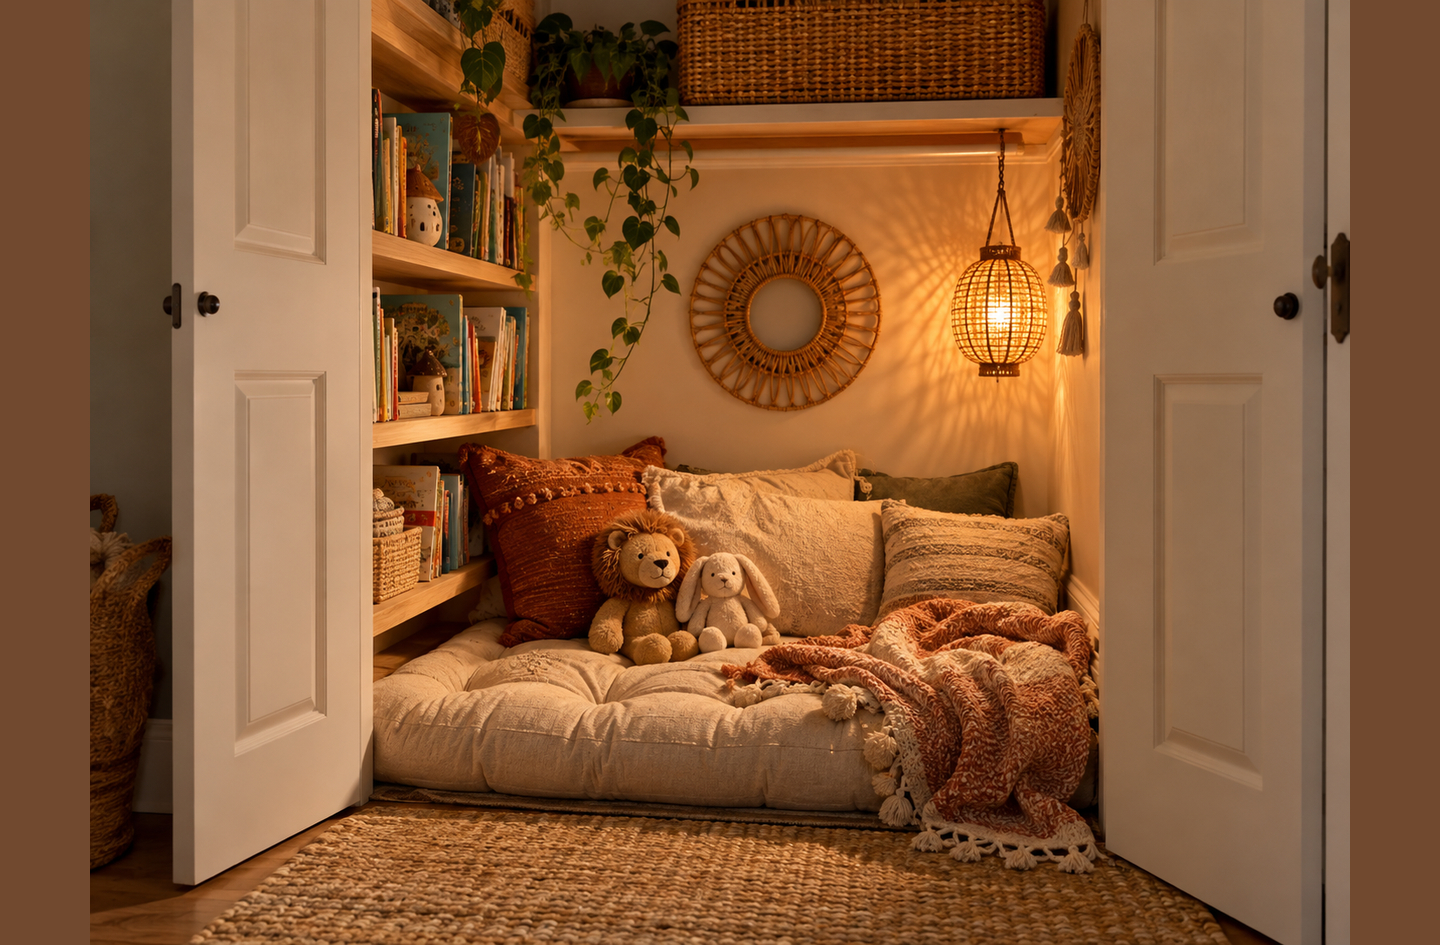
A children's reading nook set inside a closet with a plush floor cushion, soft throw pillows, stuffed animals, wooden shelves filled with books, hanging greenery and a low-hanging rattan pendant light.
A floor-cushion closet nook with throw pillows, wooden book shelves, hanging greenery and a low rattan pendant light.

The floor layer

A floor nook is the most reversible option and suits a shallow reach-in closet. Lay a non-slip rug pad first, then a firm floor cushion or a folded mat, then two or three pillows against the back wall. Choose covers that unzip and wash, because a closet holds dust and spills longer than an open room.

Air new foam cushions in the room before they go into the closet, and stand them on edge now and then so the underside dries. Keep the layer low and flat at the opening, so nothing at the threshold trips a child stepping in.

A bench seat

A bench suits a wider reach-in or a walk-in closet and adds storage underneath. A freestanding low bench is semi-permanent and moves with the family; a built-in bench fixed to the walls is a carpentry job. Keep the seat low enough that the child’s feet reach the floor or a cushion, and keep the front edge clear of the door line.

Seating types trade footprint against support and cleanability, and our guide to reading nook furniture for kids compares chairs, floor cushions, benches and daybeds by those measures.

The step is complete when the child can sit, read and leave three times in a row without help, and every cover comes off for washing.

Start with a floor layer even if a bench is the plan, because watching the child sit, sprawl or lie down decides the bench.

Step 6: Shelve Books Inside the Child’s Reach

Step 6 places the books, and the useful band for a closet book nook sits lower than most closet shelving. For public buildings, the U.S. Access Board publishes advisory reach ranges for children: 20 to 36 inches for ages 3 and 42. The ranges widen to 18 to 40 inches for ages 5 through 8, and 16 to 44 inches for ages 9 through 122. A reach range is the band between the lowest and highest point a child can reach forward or to the side, as the Access Board table labels it.

Median height for boys rises faster than the top of that reach band. WHO growth tables put the median height of boys at 103.3 cm at age 4, about 40.7 inches6. The WHO median reaches 127.3 cm at age 8, about 50.1 inches, and 149.1 cm at age 12, about 58.7 inches7.

Book Reach Band and Median Height, Inches Reach ranges are U.S. Access Board ADA Standards Advisory 308.1 children’s forward or side reach, written for public buildings: ages 3 and 4, 20 to 36 inches; ages 5 through 8, 18 to 40 inches; ages 9 through 12, 16 to 44 inches. Median heights are WHO growth tables for boys: 103.3 cm at age 4, about 40.7 inches; 127.3 cm at age 8, about 50.1 inches; 149.1 cm at age 12, about 58.7 inches. Book Reach Band and Median Height, Inches 0 20 40 60 36 in 20 in 40 in 18 in 44 in 16 in Height 40.7 Height 50.1 Height 58.7 Ages 3 and 4 Height at age 4 Ages 5 through 8 Height at age 8 Ages 9 through 12 Height at age 12 Source: Playroom Architect analysis of Access Board and WHO data, 2026
Median height for boys climbs from 40.7 to 58.7 inches across these ages while the top of the reach band rises from 36 to 44 inches. A 20 to 36 inch book band sits inside every group’s range. Compiled by Playroom Architect from Access Board ADA Standards and WHO growth tables.

Where the books go

By our reading of the Access Board table, the 20 to 36 inch band of the youngest group sits inside both older groups’ ranges2. Shelves placed there keep working as a child moves through the grades, so confirm the top shelf from the child’s actual seat. Put a face-out ledge or rail in that band for the books in current use, with covers showing. Keep the closet’s original high shelf for the rotation stock, which an adult swaps in every few weeks.

A forward-facing display lowers the effort of choosing, because a child picks by cover, not by spine. For deeper storage built around the seat, our guide to a reading nook with storage compares benches, cubbies and low bookcases.

Anchor every shelf

A child who reads in a closet may also climb, and a closet leaves little room to step clear of a falling shelf. From 1990 to 2019, U.S. emergency departments treated an estimated average of 18,673 children a year for furniture or TV tip-over injuries4. In that study, children younger than 6 accounted for 69.9% of furniture and TV tip-over injuries4. A tip restraint is a strap or bracket that ties a freestanding unit to the wall framing so it resists pitching forward.

Fix wall shelves and ledges into studs, and restrain any freestanding unit. Plaster, brick or a wall with unknown framing needs a licensed installer before anything heavy goes up.

The step is complete when the child can reach every current book from the seat, and every shelf passes a firm pull test without moving.

Build the book band low and anchor it once, because a 20 to 36 inch band suits a preschooler and still suits the same child years later.

Step 7: Keep the Nook Visible and Plan the Reset

Step 7 connects the closet nook to the room around it, so an adult can see in and the nook resets in about a minute. A hideaway works for a child when it feels enclosed, and works for a parent when the opening still faces the room.

“Reading together often with infants and young children strengthens their relationships with parents and caregivers at a critical time in child development, stimulating brain circuitry and early attachment.”

American Academy of Pediatrics (AAP), Council on Early Childhood8

Leave room at the opening for an adult to sit beside the child, which keeps shared reading possible for younger readers. Keep the room’s walking path past the closet clear. For public buildings, the ADA Standards set walking surfaces at 36 inches minimum2, a fair target for that path. In a bedroom, keep the closet nook distinct from the bed, and our bedroom reading nook ideas cover that separation in more depth.

  1. Give books in use one basket or one ledge, and the rest a single return shelf.
  2. Fold the blanket onto the cushion and stand the pillows against the back wall.
  3. Switch off the light at the end of each session, and check that no cord has moved.

The step is complete when an adult can see the reader from the room, and the child can reset the nook alone.

Design for the reset, not just the reveal: one basket and one return shelf keep a nook in use, while five storage spots turn it back into a closet.

Removable and Permanent Closet Reading Nook Ideas

Closet reading nook ideas fall into three groups: removable setups, semi-permanent furniture that moves with the family, and built-in work that changes the closet. The right group depends on whether the closet will ever store clothes again and on who does the work.

Closet reading nook approaches compared by reversibility and who does the work
ApproachWhat it involvesReverses byWho does the work
Floor nookRug pad, floor cushion, pillows, battery or plug-in light, face-out ledgeLifting it outParent
Curtain nookDoor removed, tension rod and curtain, floor nook insideRehanging the doorParent
Freestanding benchLow bench or storage bench, wall ledges fixed into studsMoving the bench, filling screw holesParent, with a stud finder
Built-in bench and shelvesBench fixed to the walls, shelves replacing the rodCarpentry to removeCarpenter or contractor
Wider opening or new wiringReframed opening, new fixture or outletNot practical to reverseLicensed contractor and licensed electrician

Small closet reading nook ideas

A small or shallow reach-in closet works best as a floor nook. Keep the rod out, run a single face-out ledge along one side wall, light the page from the other side and leave the full width of the opening clear. A curtain on a tension rod adds a sense of enclosure without narrowing the way in.

If the closet fails Step 1 or Step 3, an open corner of the same room can do the job. Our corner reading nook ideas show how to define one.

Call a qualified professional before any change to the structure or the wiring. A licensed contractor handles removing a closet wall, widening a framed opening or work under a stair. A licensed electrician handles a new fixture, outlet or switch. For a specific child’s reading, sensory or motor needs, ask a pediatric occupational therapist.

Start removable and earn the built-in: a floor nook lets a family judge the closet over a season, and only a nook still chosen every day justifies carpentry.

Closet Reading Nook Checklist: Reference Figures Mapped to a Home Closet

A closet reading nook checklist can borrow published figures, as long as each one is read for the setting it was written for. The table below maps each check from the steps above onto its source figure and states whose setting that figure comes from.

Standards cross-walk: published reference figures mapped onto a home closet nook
Closet checkReference figureWhose settingHow to use it at home
Opening widthDoor openings 32 inches minimum clear width2ADA Standards, public buildingsCompare with the narrowest point of the closet opening
Walk-in passageOpenings more than 24 inches deep: 36 inches minimum2ADA Standards, public buildingsCompare with the doorway passage of a walk-in closet
Path past the nookWalking surfaces 36 inches minimum clear width2ADA Standards, public buildingsKeep the room’s path past the opening at least this clear
HumidityBelow 60 percent, ideally between 30 and 50 percent3EPA guidance for homesCompare with a week of hygrometer readings
Leaks and spillsDry within 24 to 48 hours3EPA guidance for homesPull out wet cushions and books at once
Heat sourcesAnything that can burn at least 3 feet from heat sources5U.S. Fire Administration, homesNo candles, heaters or heat lamps in the closet
Book bandAges 3 and 4: 20 to 36 inches2Access Board advisory, public buildingsKeep current books in this band for ages 3 through 12
Each row pairs one closet check with a published figure and the setting it was written for. Compiled by Playroom Architect from the ADA Standards, EPA mold guidance and the U.S. Fire Administration.

The ADA figures describe public buildings and wheelchair access; at home they are comparison points, not requirements. The EPA and Fire Administration guidance is written for homes and fits a closet as stated.

Read every figure for its setting: the EPA and USFA guidance fits a closet as stated, while the ADA widths only compare a closet with an accessible doorway.

Common Mistakes When Converting a Closet Into a Reading Nook

The most common closet nook mistakes come from treating the closet as a photo set instead of a small room with its own air, light and access. Each one below has a cheap fix.

  • Buying the cushion first. A cushion sized from a photo rarely fits the measured depth. Measure in Step 1, then shop.
  • Keeping a lockable door. A locking knob or a heavy sliding panel can close a child in. Remove the door or fit a passage knob.
  • Draping lights over fabric. String lights on a canopy or blanket add heat and loose cord to the softest part of the nook. Mount lights on the wall or shelf edge.
  • Shelving at adult eye height. Books on the closet’s original high shelf are out of a child’s reach. Keep current books in the low band from Step 6.
  • Ignoring a musty smell. A smell is a moisture signal, and fabric hides it. Run the Step 3 humidity check before the cushion goes in.

Most of these mistakes cost nothing to avoid, because each one comes from skipping a check that takes a tape measure, a hygrometer or a minute of thought.

What a Working Closet Book Nook Looks Like

A working closet book nook is one the child enters alone, reads in and leaves tidy, while an adult can see in. These signals show the conversion is doing its job:

  • The child chooses the nook without being sent there.
  • An adult can see the reader from the room or the doorway.
  • The hygrometer still reads inside the range from Step 3 a month later.
  • Current books sit on the low ledge, and the high shelf holds the rotation stock.
  • The nook resets in about a minute, with nothing hot and no loose cord.

Judge the nook by use, not by how it looks: a plain closet nook that gets used daily beats a styled one that waits for a photo.

Frequently Asked Questions

How do you make a reading nook in a closet?

Measure the opening, remove or fix open the door, then check the air for a week before adding anything soft. The EPA advises indoor humidity below 60 percent3. Add a plug-in or battery light at the side, a floor cushion and a low face-out ledge anchored into studs.

How wide should a closet reading nook be?

No home code sets a width for a reading nook. For public buildings, the ADA Standards require door openings with a clear width of 32 inches minimum2, a handy comparison for a closet opening. A narrower reach-in closet can still hold a floor nook if a child sits comfortably and an adult can see in.

Can a walk-in closet work as a reading nook?

Yes, when the doorway passage stays clear and clothes storage is moved or screened off. For public buildings, openings more than 24 inches deep need 36 inches minimum under the ADA Standards2, a fair yardstick for a walk-in passage. Put the seat at the far end, facing the door.

Is a reading nook in a closet under the stairs a good idea?

It can work if the space stays dry and the stair structure is left alone. Never cut stair framing to gain headroom; that is work for a licensed contractor. The U.S. Fire Administration advises keeping anything that can burn at least 3 feet from heat sources5, so keep heaters and candles out.

Limitations and Edge Cases

  • The ADA widths and Access Board reach ranges describe public buildings. No U.S. code sets sizes for a home reading nook, so they serve only as comparison points.
  • The WHO heights are medians for boys; girls’ tables differ, and any one child can sit well above or below the median.
  • Closets holding a water heater, furnace, electrical panel or plumbing access are outside this guide. Seating and storage outside the closet belong to the Reading Nooks overview.

References

Methodology: the figures in this article were gathered in October 2026 from U.S. accessibility standards, federal home-safety guidance, WHO growth tables and peer-reviewed research, and each was checked against its source page. Playroom Architect founder Oded Feigin holds editorial responsibility.

  1. The Nation’s Report Card (NAEP) – Highlights of the 2023 Long-Term Trend Reading and Mathematics Assessments at Age 13, National Center for Education Statistics, 2023.
  2. U.S. Access Board – ADA Accessibility Standards (2010 ADA Standards for Accessible Design with advisories), sections 403.5.1, 404.2.3 and Advisory 308.1.
  3. U.S. Environmental Protection Agency (EPA) – A Brief Guide to Mold, Moisture and Your Home.
  4. PubMed – Lu C, Badeti J, Mehan TJ, Zhu M, Smith GA. Furniture and television tip-over injuries to children treated in United States emergency departments. Injury Epidemiology, 2021. DOI 10.1186/s40621-021-00346-6.
  5. U.S. Fire Administration – Heating fire safety outreach materials, FEMA.
  6. World Health Organization (WHO) – Child Growth Standards, simplified field tables: Height-for-age, boys, 2 to 5 years (percentiles).
  7. World Health Organization (WHO) – Growth reference 5 to 19 years: Height-for-age, boys (percentiles), 2007.
  8. PubMed – Klass P, Miller-Fitzwater A, High PC; American Academy of Pediatrics Council on Early Childhood. Literacy Promotion: An Essential Component of Primary Care Pediatric Practice: Policy Statement. Pediatrics, 2024. DOI 10.1542/peds.2024-069090.

Conclusion

A closet becomes a reading nook when its opening, air, light, floor and book band all pass a simple check, and when an adult can still see in. Start removable, keep the books low and anchored, and keep heat and locks out of the closet. The room as a system decides whether the nook gets used, more than the cushion does.

See the broader overview in our practical guide to reading nooks for how a closet nook fits the wider topic of quiet reading corners at home.

Learning Corner Ideas for Kids: Build a Small Focus Zone at Home

Author: Oded Feigin · Created On: October 11, 2026 · Last Updated: October 12, 2026

Learning corner ideas for kids work best when the corner is planned as a small system, not as a desk pushed into a spare gap. Our homeschool learning zones guide covers learning areas across the whole home. This article covers one smaller job: turning a single corner into a focus zone with a sized surface, nearby supplies, a clear edge and a short reset. School children need that spot too: in 2019, K-8 students who did homework outside school spent an average of 4.6 hours a week on it1.

One of several learning corner ideas for kids: a small white desk tucked into a room corner with a sage green spindle chair, a brass desk lamp, a corkboard, two floating shelves and a tall shelf unit with woven baskets and bins labeled Math, Reading, Science and Projects.
A compact learning corner with the desk set into the corner, a task lamp and corkboard above the work surface, and labeled subject bins on a narrow shelf unit beside it.

Quick Answer

How do you set up a learning corner for kids?

Watch where the child already works, then pick a corner an adult can see. Mark its edge with a rug or low shelf and keep the path open. For public buildings, the ADA Standards permit accessible children’s work surfaces at 26 to 30 inches high2, a range written for wheelchair access rather than a home desk height. Keep only the day’s supplies within reach and end each session with a short reset.

Key Takeaways

  • Calm walls can matter: in a lab study of 24 kindergartners, children scored 55% correct in a sparse classroom and 42% in a decorated one3.
  • Fewer materials can lengthen play: in a study of 36 toddlers, sessions with four toys led to longer play with each toy than sessions with sixteen4.
  • For public buildings, the ADA Standards permit accessible children’s work surfaces at 26 to 30 inches and require 36 inch walking paths2; at home, both are references only.
  • Anchor any shelf in the corner. From 1990 to 2019, U.S. emergency departments treated an estimated average of 18,673 children a year for furniture or TV tip-over injuries7.
  • Plan the reset, not just the setup: a corner that clears in a few minutes is ready for the next session.

Before You Start: What a Learning Corner for Kids Needs

A learning corner for kids needs a chosen spot, a clear edge, a fitted surface and a small set of supplies. A learning corner is a defined part of a shared room, set up for one child’s reading, writing or screen work, with its own surface, light and supplies. It is smaller than a homeschool room and more permanent than a kitchen table. Gather these before buying anything:

  • A one-week activity log noting each task, whether it used paper, a book or a screen, and where it happened.
  • Two or three candidate corners, each sketched with its window, outlets and the path past it.
  • The child’s seated measurements: floor to the back of the knee and floor to the elbow.
  • Painter’s tape to mark the footprint on the floor before any furniture moves.
  • Time: one week of watching and one weekend of setup.

Observation before shopping keeps the furniture from writing the plan. Treat the room as a system: the desk is one part, and the edge, light, storage and reset decide whether the corner gets used. Playroom Architect founder Oded Feigin, a mechanical engineer (M.Sc., UCLA) who plans residential renovations, wrote this guide. It is engineering-informed planning, not developmental or medical advice for a specific child.

Step 1: Choose the Corner by Watching How the Child Works

Step 1 picks the corner by matching the child’s need for help to where an adult usually is at work time. Many K-8 students get frequent help: in 2019, parents of 29.5% of K-8 students who did homework helped three or four days a week1. Another 14.0% helped five or more days1.

A child who gets help most days needs a corner within sight of the adult. An older child who works alone can use a bedroom corner, with a plan for screens at night. For a full day of homeschool lessons, a corner is only a start, and our compact learning zone guide covers a whole small room.

Sound matters too: a review of noise research found that short-term noise harmed speech perception and listening comprehension in experiments, with stronger effects in children than in adults5. The same review found disruption of reading and of memory for visually presented lists5. A corner beside the television or the dishwasher can work against reading and listening tasks.

  1. Rank the candidate corners by how easily the helper can see the child.
  2. Cross off any corner beside a television, a busy doorway or the kitchen at cooking time.
  3. Prefer a corner with the window to one side of the desk.

The step is complete when one corner is chosen and each rejected corner has a written reason.

Put the corner where help and quiet overlap, because a well-equipped corner in a far room loses to the sofa when the child needs an adult.

Step 2: Mark the Edge of the Learning Corner

Step 2 gives the corner a visible edge, so the child knows where focused work happens and everyone else knows where to walk. A visual boundary is a physical cue that shows where one activity zone ends and the next begins.

The edge must not take over the path, and for public buildings the U.S. Access Board sets the clear width of walking surfaces at 36 inches minimum2. It also limits objects with leading edges between 27 and 80 inches above the floor to 4 inches of protrusion into a circulation path2. Homes are not bound by either figure, but both argue against a deep shelf at head height beside the path.

Which boundary works in a small room?

A rug is the simplest boundary, because it marks the zone without adding height. A low shelf turned with its back to the room adds storage and a firmer edge, but it must be anchored. A block of wall color works where the floor is too tight for anything else.

How big should the corner be?

The corner should hold the surface, the chair pulled back and room to stand up. Tape that footprint on the floor for two days before buying anything. If people step on the tape to get past, the corner is too big or in the wrong place.

A shared room with an adult workspace on the left and a children's learning corner on the right, where a small wooden table and sage chair sit on their own dotted rug beside low cube shelves with baskets and a whiteboard.
A children’s corner on its own rug, set apart from an adult workspace in the same room.

The step is complete when the footprint is taped, the path stays clear and anyone in the family can say where the corner starts.

Choose the lowest boundary that still reads as an edge, because a rug or low shelf marks the zone without blocking the adult’s line of sight.

Step 3: Size the Work Surface and Seat to the Child

Step 3 fits the surface and chair to the child, so the child works without perching or hunching. For public buildings, the ADA Standards permit accessible work surfaces for children with tops at 26 inches minimum and 30 inches maximum2. The same section allows knee clearance of 24 inches minimum under them2.

Knee clearance is the open height under a work surface where a seated person’s knees and thighs fit without touching the underside. That range is written for accessible surfaces a child using a wheelchair can pull up to, so it does not size a desk for a child on an ordinary chair. The child’s own fit decides the final height.

  1. Set the seat first: the child’s feet should rest flat on the floor, or on a sturdy footrest when the seat is raised.
  2. Check the surface: with shoulders relaxed, the forearms should rest near the desk top while writing.
  3. Check the legs: the thighs should clear the underside of the desk with room to shift position.

A wall-mounted or fold-down desk saves floor space, but a licensed installer should check the wall, the fixings and the load. Our homework station planning guide covers the desk-or-table decision and chair fit in more detail.

The step is done when the child can write for ten minutes without sliding forward or lifting the shoulders, and the fit gets a recheck each school year. If a child slumps, tires quickly or reports pain while writing, a pediatric occupational therapist can assess seating for that child.

Fit the chair before the desk, because a chair and footrest are cheap to change and let one surface serve a growing child for several years.

Step 4: Put the Day’s Supplies Within Reach, and Fewer of Them

Step 4 places daily supplies within reach of the chair and keeps the total small. Accessibility guidance for public buildings lists reach ranges for building elements designed mainly for children. They run 20 to 36 inches at ages 3 and 4, 18 to 40 at ages 5 to 8, and 16 to 44 at ages 9 to 122.

A reach range is the band of heights above the floor that a person can reach, forward or to the side. These bands come from Advisory 308.1 of the ADA Standards, which is guidance rather than a requirement2. They still give a starting band: daily supplies inside it, spares above it.

Fewer materials can also lengthen play with each item. In a study of 36 toddlers, four toys led to longer play with each toy, and more varied play, than sixteen did4.

“This suggests that when provided with fewer toys in the environment, toddlers engage in longer periods of play with a single toy, allowing better focus to explore and play more creatively.”

Carly Dauch, Alexia E. Metz and colleagues, Occupational Therapy Doctoral Program, The University of Toledo, in Infant Behavior and Development, 20184

That study watched toddlers at free play, not school-age children at work. It is a reason to test a smaller set of materials, not proof that one number suits every child.

What belongs in the learning corner?

Keep only the daily kit: pencils, an eraser, a sharpener, markers, paper, the current book and any charger. One labeled spot per item turns the end-of-session check into a glance, because an empty spot shows what is missing.

What belongs somewhere else?

Refills, finished work, projects and other children’s materials belong in a closet bin or an adult-managed cabinet. Our homeschool storage system guide covers back-stock, overflow rules and larger book collections.

The step is done when the child can finish a session without leaving the chair, and every item in the corner appeared in the week’s log.

Stock the corner for one day of work, not one term, because every extra item is one more thing to move before work starts and to return afterward.

Steps 2 to 4 add up to one footprint, drawn here from above. Each zone carries a figure cited in its step: surface height, reach and path width from the Access Board2, and the display result from the lab study3.

A learning corner in plan view, with its reference figures Top-down diagram of a learning corner, not to scale: a desk along the back wall, a chair on a rug marking the focus zone, a low anchored shelf on the side wall, one display board and a walking path. Figures from U.S. Access Board sections 902.4.2 and 403.5.1 and Advisory 308.1, and from the Association for Psychological Science report on Fisher, Godwin and Seltman, 2014. A learning corner in plan view, with its reference figures Desk Board Shelf Chair Focus zone Walking path, 36 in clear Work surface 26 to 30 in, accessible children’s surfaces, Access Board Supply shelf Reach 18 to 40 in, ages 5 to 8, Access Board advisory Display wall Whole-room lab study: sparse 55%, decorated 42% correct Walking path 36 in clear width, public-building standard Work surface Low shelf Focus zone rug Display board Source: Playroom Architect analysis, 2026
One small corner carries four zones, each with a reference figure: a 26 to 30 inch surface, supplies inside an 18 to 40 inch reach band, one display board and a 36 inch clear path. The Access Board figures are written for accessible features in public buildings, and the display result compares whole lab classrooms; no source sets a standard for a home learning corner. Compiled by Playroom Architect from U.S. Access Board and Association for Psychological Science sources.

Step 5: Keep the Wall the Child Faces Calm

Step 5 limits what hangs on the wall in the child’s line of sight while working. In a Carnegie Mellon University lab study of 24 kindergartners, children scored 55% correct after lessons in a sparse classroom and 42% in a decorated one3. Time spent off task was 38.6% in the decorated room and 28.4% in the sparse room3.

“Therefore, I would suggest that instead of removing all decorations, teachers should consider whether some of their visual displays may be distracting to young children.”

Anna V. Fisher, lead author and associate professor of psychology, Carnegie Mellon University3

The advice is to edit displays, not strip them. The study ran six science lessons in lab classrooms3, so it is a signal about young children’s attention, not a rule for every wall.

How do you sort the walls around a corner?

Sort them by where the child looks: the facing wall carries one board with the current week’s work and nothing else. The side wall holds storage, ideally closed bins, so the contents do not compete with the page. Artwork, maps and posters go behind the child.

What goes on the one board?

Keep the board to the work in hand: a session checklist, a calendar if the child uses one, and one or two pieces of current work. Move finished work into a folder each week.

The step is complete when the seated child sees the board, the page and a plain wall.

Edit the wall the child faces and leave the rest of the room alone, because the corner needs calm in one direction, not a bare house.

Step 6: Light the Page and Manage Screens and Sound

Step 6 lights the work without glare and keeps screens and noise from pulling the child away. Glare is bright light that reflects off a screen or glossy page, or shines straight into the eyes, and makes the work harder to see. The American Academy of Ophthalmology advises avoiding screens outside or in brightly lit areas, where glare on the screen can create strain6.

  1. Turn the desk so the window is to one side: a window behind the screen or behind the child can create glare.
  2. Add a shaded task lamp: place it opposite the writing hand, so the hand does not shadow the page.
  3. Set the screen position: the AAO suggests keeping the computer or desk at arm’s length and at a slight downward angle from the child’s face6.
  4. Build in look-up breaks: the same guidance suggests pre-marking books with a paperclip every few chapters, as a reminder to look up6.

Sound needs the same care, because a corner shares the room’s noise. Reverberation is sound that persists in a room after its source stops, because it keeps reflecting off hard surfaces. The noise review reports that studies linked indoor noise and reverberation in classrooms with poorer performance in verbal tasks5.

At home, a rug, a curtain and a filled bookshelf all soften hard surfaces. Keeping the television off during work time deals with the louder source.

The step is complete when the page is evenly lit, nothing reflects in the screen, and the child can hear a quiet instruction from the adult’s usual spot.

Fix glare with placement before buying a brighter lamp, because turning the desk a quarter turn costs nothing and can remove the reflection at its source.

Step 7: Anchor the Furniture and Plan the Daily Reset

Step 7 secures anything that could tip, then adds a short routine that returns the corner to its ready state. An estimated 560,203 children under 18 were treated in U.S. emergency departments for furniture or TV tip-over injuries from 1990 to 20197. That is an average of 18,673 children a year, and children under 6 accounted for 69.9% of the injuries7.

Anchor every shelf, bookcase and drawer unit in the corner to the wall, even a low one, and keep heavy items on the lowest shelves. Plaster, brick, uneven walls and any wall-mounted desk call for a licensed installer.

A reset is the short, fixed sequence of actions that returns a space to its starting layout at the end of each session. Five moves cover most corners:

  1. File the work: finished pages go into the school bag first.
  2. Return the kit: each supply goes back to its labeled spot.
  3. Clear the surface: books, scraps and plates leave the desk.
  4. Park the screen: the device goes to its agreed charging spot, which may be outside the bedroom.
  5. Check the empty spots: anything missing goes on the shopping list now.

Put the five moves on a card at the corner, with pictures for a pre-reader. With a younger child, the adult does the reset alongside at first, then hands over one move at a time. Where the corner must clear completely each evening, our portable learning system guide covers caddies and carts that pack away.

Design for the reset, not just the reveal: the corner that keeps working is the one a child can restore in a few minutes without help.

Learning Corner Ideas by Room and Age

Learning corner ideas change with the room and the age of the child. The same five parts apply everywhere: a chosen spot, a visible edge, a fitted surface, a small kit and a reset. What changes is which part needs the most attention.

Where a kids learning corner can go, and what each spot trades
Corner locationWorks well forBoundary ideaWatch for
Living room cornerChildren who need an adult nearbyA rug plus a low shelf with its back to the roomThe television sightline and its sound
Bedroom cornerOlder children who work aloneA desk facing a side wall, on a small rugScreens near the bed at night
Landing or under-stair spaceOne child who prefers a quiet spotA block of wall colorDim light and the stair path
Window cornerReading and paper workA rug under the desk and chairScreen glare, so keep the window to one side
Closet nook with the doors removedOne child who likes an enclosed spotThe closet frame itselfLight, airflow and a reachable outlet
Fold-down wall deskRooms with no floor to spareThe open desk marks the zoneAn installer check of the wall and fixings
Shared sibling roomTwo children of different agesOne corner each, with separate binsTwo surface heights in one room

Preschool learning corner, about ages 3 to 5

A preschool corner works best at a low table, with trays that hold one activity each and picture labels on every bin. Every item’s labeled spot should sit within the child’s reach without a step stool, and the corner belongs in the room where the adult already is.

Early school learning corner, about ages 6 to 8

An early school corner adds a small desk, a chair with a footrest and one board for the week. As homework starts, the kit grows to include a ruler, a sharpener and a folder for papers.

Learning corner for older kids, about ages 9 to 12

An older child’s corner needs a deeper surface for a laptop beside a notebook, closed storage and a clear rule about where devices charge. The child can run the whole reset.

Plan for the child’s next two years, because a surface and storage that adjust with a footrest or a moved shelf avoid a second purchase.

Common Mistakes When Setting Up a Kids Learning Corner

Most learning corner mistakes come from buying first and placing second, and each is cheaper to prevent with tape on the floor than to fix later.

Buying the desk before choosing the corner

A desk bought for its looks lands wherever it fits, which is rarely where the child works or the adult can help. The fix is to run the log, choose the corner, then buy the surface.

Leaving a shelf unanchored because it is low

A low shelf is easy to climb, and a child leaning on an open drawer shifts its balance. The fix is to anchor every storage unit in the corner, whatever its height.

Fix placement and edges before buying more organizers, because most learning corner problems are layout problems that no bin will solve.

What a Working Learning Corner at Home Looks Like

A working learning corner at home is ready when the child arrives, fits the child’s body and resets in minutes. The checks are simple to observe over one school week:

  • The child starts work without clearing the desk or hunting for a pencil.
  • Feet rest flat on the floor or a footrest, and the forearms rest near the desk top while writing.
  • The wall straight ahead shows one board and little else.
  • The five-move reset happens after each session, and the desk top is clear by bedtime.

The stretch goal is to let the child run the corner. Playroom Architect uses a phrase associated with the Reggio Emilia approach to early education, the Third Teacher. It means the room itself supports independence, focus and routine alongside the adults. A corner the child can set up, use and reset alone has reached that point.

Frequently Asked Questions

What is a learning corner for kids?

A learning corner is a defined part of a shared room set up for one child’s reading, writing or screen work, with its own surface, light and supplies. It suits school children too: in 2019, K-8 students who did homework outside school averaged 4.6 hours a week on it1.

How much space does a learning corner need?

A learning corner needs room for the surface, the chair pulled back and a clear route past it. For public buildings, the U.S. Access Board sets walking paths at 36 inches of clear width minimum2. Use it to check that the corner leaves the route open.

What desk height works for a kids learning corner?

For public buildings, the ADA Standards permit accessible children’s work surfaces at 26 to 30 inches2, a range written for wheelchair access. At home, fit the child instead: feet flat on the floor or a footrest, and forearms resting near the desk top.

Should a learning corner have decorations on the wall?

Keep the wall the child faces light. In a lab study of 24 kindergartners, children scored 55% correct after lessons in a sparse classroom against 42% in a decorated one3. Keep one board for current work in front and artwork elsewhere.

Where should a learning corner go in the house?

A learning corner should go where help already happens, away from the television. In 2019, parents of 29.5% of K-8 students who did homework helped three or four days a week1. A child who gets help most days needs a corner within an adult’s sight, and an older child who works alone can use a bedroom.

Limitations and Edge Cases

  • The Access Board figures apply to accessible features in public buildings, and Advisory 308.1 is guidance rather than a requirement2. Neither sets a standard for a home corner or for a specific child.
  • The display study used lab classrooms and kindergartners3, and the toy study watched toddlers4. The noise review notes that reported effects are usually small5.
  • The NCES homework figures exclude homeschooled students1, so a homeschool corner may carry more daily work than these averages suggest.
  • A child with ongoing trouble focusing, eye strain or pain needs a pediatrician, a pediatric ophthalmologist or a pediatric occupational therapist, not a new corner.

References

Methodology: every figure comes from an independent published source, and each link was checked live on October 11, 2026. The plan view, wall sort and reset routine are planning syntheses built on those sources by the article’s author.

  1. National Center for Education Statistics – Digest of Education Statistics, Table 227.40, homework time and parent involvement, 2007, 2012, 2016 and 2019, prepared April 2021.
  2. U.S. Access Board – ADA Accessibility Standards, sections 307.2, 403.5.1 and 902.4 and Advisory 308.1 on children’s reach ranges.
  3. Association for Psychological Science – Heavily Decorated Classrooms Disrupt Attention and Learning in Young Children, on Fisher, Godwin and Seltman in Psychological Science, May 27, 2014.
  4. PubMed – Dauch C, Imwalle M, Ocasio B, Metz AE. The influence of the number of toys in the environment on toddlers’ play. Infant Behavior and Development, February 2018.
  5. PubMed – Klatte M, Bergstrom K, Lachmann T. Does noise affect learning? A short review on noise effects on cognitive performance in children. Frontiers in Psychology, August 2013.
  6. American Academy of Ophthalmology – Screen Use for Kids, Eye Health Tips and Prevention.
  7. PubMed – Lu C, Badeti J, Mehan TJ, Zhu M, Smith GA. Furniture and television tip-over injuries to children treated in United States emergency departments. Injury Epidemiology, August 2021.

Conclusion

A learning corner for kids works when it follows the child’s real routine. Help and quiet choose the spot, a rug or low shelf marks the edge, and the child’s body sets the height. A calm facing wall, a one-day kit and a five-move reset keep it ready. The room as a system, not the desk alone, decides whether the corner gets used.

For how one corner fits the wider plan for learning areas at home, see the overview in the homeschool learning zones guide.

Art Drying Rack for Kids: Size a Drying Zone Without Blocking the Room

Author: Oded Feigin · Created On: October 06, 2026 · Last Updated: October 12, 2026

An art drying rack for kids works when wet paintings leave the table right away and the rack never sits in the walking path. Our Art & Craft Stations guide is the overview of planning a home art station. This article covers one step of it: the drying zone. Floor space is the real constraint. Federal accessibility standards set 36 inches as the minimum clear width of a walking surface1, and a loaded rack can take that space fast. Here, tabletop, freestanding and mobile racks are compared on paper size, capacity, footprint, airflow, stability, child access and location.

An art drying rack for kids on locking casters, its wire shelves loaded with paintings and paper collage, standing between two children's tables in a bright playroom.
A rolling wire drying rack, loaded with paintings and collage, parked between two children’s work tables beside a window.

Quick Answer

Which art drying rack for kids fits a home playroom best?

A freestanding wire rack suits most families who paint every week, because it holds a whole session flat on a small patch of floor. A tabletop rack suits small batches and tight rooms. A mobile rack suits shared rooms where the zone must clear away. In its guidance for drying flood-damaged papers, the National Archives describes well-supported screens, stacked with space between them, as an excellent compact drying surface2.

Key Takeaways

  • Size the rack by the largest sheet your child paints on and the number of wet pieces from one session, not by the shelf count on the box.
  • Keep the drying zone out of the walking path. Accessibility standards set 36 inches as the minimum clear width of a walking surface1.
  • Humidity sets drying speed. The EPA advises keeping indoor humidity below 60 percent, ideally between 30 and 50 percent3.
  • Freestanding and mobile racks add a tip-over question. An estimated 18,673 children a year were treated in U.S. emergency departments for furniture or TV tip-overs from 1990 to 20194. That study did not cover drying racks, but a loaded floor rack is also a tall object.
  • Keep paper at least 3 feet from radiators and space heaters, as the U.S. Fire Administration advises for anything that can burn5.
  • A common misconception is that a fan aimed at the rack is the best way to dry work. National Archives drying guidance positions fans for maximum air circulation and does not aim air flow directly at drying materials2.

Art Drying Rack for Kids Compared: Tabletop, Freestanding and Mobile

Three rack types cover most home drying zones, and each one trades floor space against capacity and stability. Store names overlap, so this comparison defines each type before it rates them.

A tabletop drying rack is a short stack of hinged wire shelves that sits on a table or counter. A freestanding drying rack is a taller frame of wire shelves that stands on the floor on fixed feet. A mobile drying rack is a freestanding rack on casters, so it can roll to the table during a session and away afterward. Wall-mounted racks, pull-out shelves in cabinetry and clip lines appear as alternatives inside the sections where they fit.

Kids art drying rack types compared on how they behave in a real room (shelf counts and sizes are planning ranges; measure the specific rack)
CategoryTabletop rackFreestanding rackMobile rack
Best forOne or two children, small batchesWeekly painting, larger batchesShared rooms where the zone must clear away
Planning range of shelves8 to 1515 to 2515 to 25
Largest sheet to check for12 x 18 in18 x 24 in18 x 24 in
Floor footprintNone, but uses table spaceAbout 2 x 2 ft plus loading spaceAbout 2 x 2.5 ft plus a rolling path
AirflowLimited on the side facing the table surface or a wallOpen on all sides when placed off the wallOpen on all sides and can roll to better air
StabilityLow and compact, little height to tipTaller; check the base width and anchoringTaller and wheeled; locking casters needed
Child can load itTop shelves sit high once the rack is on a tableMiddle shelves within a child’s reachMiddle shelves within a child’s reach
Clears away after useLifts off, but needs a shelf to live onNoYes
VerdictWins on footprintWins on capacity per square footWins on flexibility

No rack wins every row, so the right choice starts with the floor plan and the family’s painting rhythm rather than the shelf count printed on the box.

Paper Size: Which Kids Art Drying Rack Fits the Biggest Sheets?

A freestanding or mobile rack wins on paper size, because floor racks have room for wider shelves than a rack built to sit on a table. The largest sheet a child paints on sets the minimum shelf size. When a sheet is wider than its shelf, the edges droop through the wires or onto the work below, and wet paint transfers.

Common U.S. paper sizes in a home art station and the rack type that holds each one flat
SheetSizeTypical useRack type that holds it flat
Letter8.5 x 11 inDrawing, marker work, worksheetsAny of the three
Small construction paper9 x 12 inCollage, crayon and light paintAny of the three
Large construction or painting paper12 x 18 inTempera and watercolor at the tableMany tabletop racks; most floor racks
Easel pad18 x 24 inEasel painting, large group workFreestanding or mobile racks sized for it

Easel paintings decide the shelf size

The easel pad is the largest common sheet in a home art station. If the household has an easel, size the rack for 18 by 24 inch paper from the start, or large paintings end up on the floor.

Heavy and soaked work needs firm support

Thick tempera, glue-heavy collage and watercolor on thin paper all sag when wet, so a shelf with closely spaced wires supports them better than one with wide gaps.

Buy the shelf size for the biggest sheet in the house, since one oversized painting per session is enough to defeat a small rack.

Capacity: How Many Shelves Does a Kids Art Drying Rack Need?

A drying rack needs one shelf for every wet piece a session produces, plus shelves for work still drying from the session before. The shelf count on the box is the upper limit, not the useful number.

A simple planning rule works for most homes. Multiply the number of children by the wet pieces each makes per session, then by the sessions that overlap on the rack, and add one spare shelf. Two children making three paintings each, with the last session still damp, need twelve shelves plus a spare.

One wet piece per shelf

Stacking two wet sheets on one shelf transfers paint and glues them together. For wet documents, the National Archives advises air drying them flat, in small piles about half an inch high or individually if possible2. A painted face picks up color from anything touching it, so each painting gets its own shelf.

Shelves by child, not by first come

In a sibling household, give each child a band of shelves. Younger children get the shelves they can reach, and older children or adults take the high and low ones. Each child then knows where their work is, and the rack is easier to clear at the end of the week.

Clay and models need a tray, not a wire shelf

Clay pieces, cardboard models and thick collage do not belong on a wire paper rack. They need a flat tray or a solid shelf while they dry, then a ledge or box once they are finished. The rotating gallery comparison covers ledges for finished three-dimensional work.

Size the rack for the busiest normal session, not the average one, because overflow from a busy day ends up on the floor.

Footprint and Clearance: Keep the Drying Zone Out of the Walking Path

A tabletop rack wins on floor footprint because it uses no floor at all, but it takes table space the next session needs. A freestanding rack takes a patch of floor about two feet square, and a mobile rack needs that patch plus a clear route to roll along.

The walking path is the space to protect first. Federal accessibility standards set 36 inches as the minimum clear width of a walking surface1. The rule governs public buildings, not homes, but it is a useful reference: a rack that leaves less than that between itself and the table is likely to get bumped.

Floor zone to plan for each drying approach (Playroom Architect planning estimates; measure the specific rack)
ApproachRack footprintLoading space in frontFloor zone to reserve
Tabletop rackNone on the floor; about 14 x 20 in of tableNone extraTable space only
Freestanding rackAbout 24 x 24 inAbout 24 inAbout 24 x 48 in
Mobile rackAbout 24 x 30 inAbout 24 in, plus a 36 in route to rollAbout 24 x 54 in where it parks
Wall-mounted fold-down rackNone when foldedAbout 24 in when in useA strip along the wall

Wall-mounted racks and the protrusion rule

Wall racks save floor space but stick out from the wall when open. Federal standards limit objects with leading edges between 27 and 80 inches above the floor to 4 inches of protrusion into a circulation path1. An open drying rack sticks out far more than that, so mount it beside the table rather than along a route people walk.

Corners, doors and closets

A corner beside the art table suits a floor rack because few people walk through it, provided the rack stays clear of door swings. Tape the floor zone before buying and live with the tape for a few days.

Reserve the floor zone before choosing the rack, because a rack that blocks the path gets moved, and a moved rack stops being used.

Airflow and Humidity: Where a Paint Drying Rack for Kids Works Best

A mobile rack wins on airflow because it can roll to the spot with the best air, but any rack dries well when air moves around all its sides. Open wire shelves let air reach both faces of a sheet. The National Archives describes well-supported screens, stacked with space between them, as an excellent compact drying surface, and notes that the porous surface helps air circulate2.

“To provide optimal air drying conditions, fans should be positioned for maximum air circulation (do not aim air flow directly at drying materials).”

U.S. National Archives and Records Administration, Emergency Salvage of Flood Damaged Family Papers2

That guidance was written for flood-damaged family papers, but the physics carries over to children’s paintings. Moving room air carries moisture away from every shelf, while a fan aimed straight at the rack can lift light sheets off it.

Humidity matters as much as airflow. The EPA advises keeping indoor humidity below 60 percent, ideally between 30 and 50 percent3. A laundry room, a bathroom or a damp basement corner is a poor drying spot for that reason. The EPA also notes that a humidity meter is a small, inexpensive instrument costing $10 to $503, which takes the guesswork out of choosing the spot.

Relative humidity is the amount of water vapor in the air compared with the most the air could hold at that temperature, given as a percent. The lower it is, the faster wet paper gives up its water.

Humidity guidance for the art room and paper storage Horizontal range chart on a relative humidity axis from 0 to 100 percent. EPA, A Brief Guide to Mold, Moisture and Your Home: keep indoor humidity below 60 percent, ideally between 30 and 50 percent; drawn as a solid bar from 30 to 50 and a lighter bar from 50 to 60. U.S. National Archives, Storing Family Papers and Photographs: keep relative humidity below 65 percent, and avoid humidity below 15 percent, which can cause brittleness; drawn from 15 to 65. Library of Congress, Care, Handling and Storage of Works on Paper: a relatively dry environment of about 35 percent relative humidity; drawn as a single point. A shaded band marks the EPA ideal range of 30 to 50 percent, which falls inside the National Archives window and contains the Library of Congress target. None of the three sources sets a humidity level for drying art. Humidity guidance for the art room and paper storage Recommended range Above ideal, below EPA limit Single target EPA ideal range, inside every other guideline EPA indoor humidity National Archives storage Library of Congress paper 30 to 50% Below 60% 15 to 65% About 35% 0 20 40 60 80 100 Relative humidity, percent Source: Playroom Architect analysis, 2026
The EPA’s ideal indoor range of 30 to 50 percent sits inside the National Archives storage window and contains the Library of Congress target of about 35 percent; no source sets a humidity for drying art. Compiled by Playroom Architect from EPA, National Archives and Library of Congress guidance.

Two days is the outer limit

Two federal sources use a similar two-day window for water-damaged material. The EPA says water-damaged items should be dried within 24 to 48 hours to prevent mold growth3. The National Archives says wet records that cannot be air dried within two days should be frozen2. A child’s painting carries far less water than a flooded document, so the window is a ceiling, not a target. Work still damp after two days points to the spot, not the rack.

Tabletop racks and the wall

A tabletop rack pushed against the wall dries slowest on its blocked side. Pull it forward a hand’s width, or turn its open sides toward the room, so air reaches the back of every shelf.

Choose the drying spot for its air before choosing the rack for its shelves. A large rack in a damp, still corner loses to a small one in moving air.

Stability: Which Drying Rack Stays Put Around Children?

A tabletop rack wins on stability, because its low, compact frame has little height to tip, provided it sits well back from the table edge. Floor racks are taller and carry weight high up once the top shelves fill. A mobile rack adds wheels, which is useful at clean-up time and a liability when the casters are left unlocked.

Tall furniture that tips is a well-measured risk. A study of U.S. emergency department data from 1990 to 2019 found an average of 18,673 children a year treated for furniture or TV tip-over injuries4. Children under 6 accounted for 69.9% of those injuries4. The study did not look at drying racks. Still, a loaded floor rack is also a tall object a child can pull, lean on or climb.

Freestanding racks: wide base, low weight

Choose a floor rack whose base is wide for its height, and fill it from the bottom shelf up so the weight stays low. Where a tall rack stands in a play area, a wall strap reduces avoidable risk. Have a licensed installer match the strap and fixings to the wall.

Mobile racks: locked unless moving

Locking casters should stay locked except while an adult rolls the rack. Move it before the session, while the shelves are empty, because a loaded rack jolts over a rug edge and wet sheets slide together.

Hardware does not replace an adult in the room. The federal art and craft safety guide, written about art materials, makes the same point about supervision.

“Children need regular and consistent reminders of safety rules, and there is no substitute for direct supervision.”

U.S. Consumer Product Safety Commission, Art and Craft Safety Guide8

The taller the rack, the more its base, casters and climbing rules matter, so families with toddlers gain most from a low rack set back on the table.

Child Access: Can Kids Load the Drying Rack Themselves?

A floor rack wins on child access, because most of its shelves fall within the reach ranges federal guidance lists for children. Federal guidance gives a forward or side reach range of 20 to 36 inches for ages 3 and 4. The ranges widen to 18 to 40 inches for ages 5 to 8 and 16 to 44 inches for ages 9 to 121. These are design ranges for building elements, not a measure of one child’s reach.

A tabletop rack changes the math because the table lifts it. Federal accessibility standards place accessible work surfaces for children’s use at 26 to 30 inches above the floor1; home tables vary, so measure yours. A tabletop rack about 15 inches tall on that table puts its top shelf near 41 to 45 inches above the floor. That is well above the 36 inch high reach for ages 3 and 4.

The Third Teacher is the idea, from the Reggio Emilia approach to early education, that the room itself teaches, alongside parents and teachers, by making good routines easy to follow. A drying rack a child can load is a small example. When putting a wet painting away is something the child does alone, the art session ends with the child’s own reset instead of a parent’s chore.

Low shelves for younger children

Reserve the shelves inside the youngest child’s reach for that child. Give the top and very bottom shelves to adults or older siblings, and label each band with a color dot.

Hands, sleeves and wet paint

Children carry a wet sheet by its dry corners, lift the shelf, slide the paper in and lower the shelf, and painty hands leave prints on the frame. The painting station plan covers water and hand washing near the table.

Put the rack where the child who paints can also put the painting away, because a rack only an adult can load turns every session into an adult’s job.

Location: Connect the Drying Zone to the Table, Display and Storage

The drying zone works best within a few steps of the painting table, on the route finished work already travels: table, rack, display, storage. When the rack sits in another room, wet paintings wait on the table, and the next session starts by moving them. The room as a system decides the spot, not the empty wall.

A tabletop drying rack of wood and wire on a children's craft table, holding several paintings beside paint trays, brush jars and colored stools.
A tabletop drying rack set on a craft table with paint trays and brush jars, holding several children’s paintings within a step of the work surface.

Heat sources are the first thing to keep away from the rack. The U.S. Fire Administration advises keeping anything that can burn at least 3 feet from all heat sources, including radiators and space heaters5. Portable heater fires were only 3% of home heating fires in 2017 to 2019, yet they accounted for 41% of fatal heating fires in homes5. A rack of paper is fuel, so a heater is never a drying aid.

In its storage guidance for works on paper, the Library of Congress also lists distance from radiators and vents and no exposure to direct or intense light7. A spot across the room from a sunny window, with moving air, serves both needs.

From the table to the rack

Place the rack on the side of the table away from the walking path, so a child carrying a wet sheet never crosses traffic. The kids art table comparison covers the space the table itself needs.

From the rack to the box

Dry work moves on to the display or to storage, and only dry work goes into a box. The National Archives advises keeping stored papers below 75 degrees Fahrenheit, with relative humidity below 65% to prevent mold growth6. The kids artwork storage guide covers what happens to each piece after it leaves the rack.

Design for the reset, not just the reveal: the best drying spot empties the table in seconds and feeds the display and the box without a detour.

Cost and Hidden Costs

A tabletop rack costs the least and a freestanding wire rack costs more, while a mobile rack adds casters and a heavier frame. Wall-mounted and built-in racks cost the most once installation is counted. The hidden costs are floor space occupied all year, paintings ruined on an undersized shelf, and wall repair after a wall rack comes down.

Judge each rack by the cost per usable shelf over a school year, not the price on the package.

Who Should Choose Which Drying Rack?

A family that paints every week and has a spare corner should choose a freestanding rack. Where floor space is the hard limit, a tabletop rack fits, and where the room changes jobs after the session, a mobile rack with locking casters works best.

  • One preschooler who paints a few times a week: a tabletop rack set back from the table edge.
  • Siblings who paint together: a freestanding rack in the corner beside the table, with a band of shelves per child.
  • A shared living room or dining room: a mobile rack that rolls to the table for the session and parks in a closet or corner afterward.
  • A small apartment with no free floor: a wall-mounted fold-down rack beside the table, or a tabletop rack stored on a shelf.
  • An easel painter: any floor rack with shelves sized for 18 by 24 inch paper.

Pick the rack for the room’s busiest normal day and the child who will load it, not for the photo of a full rack on the box.

Verdict: Category Winners

A freestanding wire rack wins most categories for a home that paints every week. A tabletop rack wins where floor space is the limit, and a mobile rack wins where the room must clear.

Category winners for an art drying rack for kids
CategoryWinner
Paper sizeFreestanding or mobile rack
Capacity per square footFreestanding rack
Floor footprintTabletop rack
AirflowMobile rack, or any rack off the wall
StabilityTabletop rack set back from the edge
Child accessFreestanding or mobile rack
Clearing the roomMobile rack
OverallFreestanding rack for weekly painters; tabletop for small rooms; mobile for shared rooms

Start by taping the floor zone and counting a busy session’s wet pieces, then let those two numbers pick the rack type.

Frequently Asked Questions

How much space does a kids art drying rack need?

A floor rack needs a patch about two feet square, plus about two feet in front for loading. Keep the walking path beside it clear: accessibility standards set 36 inches as the minimum clear width of a walking surface1. A tabletop rack needs no floor but takes table space.

Where should a drying rack for kids’ paintings go?

Within a few steps of the painting table, away from heat and direct sun. The U.S. Fire Administration advises keeping anything that can burn at least 3 feet from radiators and space heaters5. Avoid humid rooms; the EPA advises indoor humidity below 60 percent3.

How long can kids’ artwork stay damp on a drying rack?

Treat two days as the outer limit. The EPA says water-damaged items should be dried within 24 to 48 hours to prevent mold growth3. A painting holds far less water than a flooded document, so work still damp after two days points to a humid or still spot.

Is a rolling drying rack a good idea with toddlers?

It can work if the casters stay locked and the rack is not climbed. Children under 6 accounted for 69.9% of furniture and TV tip-over injuries in a 30-year U.S. emergency department study4. With toddlers, a low tabletop rack set back from the table edge is the simpler choice.

Should a fan point at the drying rack?

No. Circulate the room air instead. National Archives guidance for drying wet papers says to position fans for maximum air circulation and not to aim air flow directly at drying materials2. A direct blast can lift light sheets off the shelves.

Limitations and Edge Cases

  • The reach ranges and clear widths come from accessibility standards for public buildings and describe groups of children, not one child. Watch where your own child can reach, and for a specific child’s motor needs, consult a pediatric occupational therapist.
  • The drying guidance from the EPA and the National Archives was written for water-damaged buildings and papers, not art paint. Oil-based or solvent paints are outside this comparison; follow the product label and ventilate the room.
  • Wall-mounted racks, built-in pull-out shelves and wall straps need fixings matched to the wall. Before installation, evaluate the wall and hardware with a licensed installer or contractor.

References

Methodology: every cited figure comes from a published source listed here, each checked live on October 5, 2026. The comparison tables, the shelf-count rule, the floor-zone estimates and the humidity chart are Playroom Architect planning syntheses built from those sources, not product tests.

  1. U.S. Access Board – ADA Accessibility Standards (2010), sections 307.2, 403.5.1 and 902.4.2 and Advisory 308.1 on children’s reach ranges.
  2. U.S. National Archives and Records Administration – Emergency Salvage of Flood Damaged Family Papers, Preservation, Conservation.
  3. U.S. Environmental Protection Agency – A Brief Guide to Mold, Moisture and Your Home.
  4. PubMed – Lu C, Badeti J, Mehan TJ, Zhu M, Smith GA. Furniture and television tip-over injuries to children treated in United States emergency departments. Injury Epidemiology, August 2021.
  5. U.S. Fire Administration – Heating Fire Safety, Home Fire Prevention, FEMA.
  6. U.S. National Archives and Records Administration – Storing Family Papers and Photographs, How to Preserve Family Archives.
  7. Library of Congress – Care, Handling and Storage of Works on Paper, Collections Care, Preservation.
  8. U.S. Consumer Product Safety Commission – Art and Craft Safety Guide, publication 5015.

Conclusion

An art drying rack for kids earns its place when it empties the table in seconds, stays out of the walking path and sits in moving, moderately dry air. Size it by the biggest sheet and a busy session’s wet pieces. Then choose the type: freestanding for weekly painters, tabletop for tight rooms, mobile for shared rooms.

To see how the drying step fits the wider art space, return to the art station planning overview, the summary of planning a home art station.

Corner Reading Nook Ideas for Kids: Make an Empty Corner Work

Author: Oded Feigin · Created On: October 02, 2026 · Last Updated: October 12, 2026

Most corner reading nook ideas start with a chair and a stack of pillows. Then they stall within a week, because the corner blocks a path or the books sit out of reach. This article sits under our Reading Nooks guide, the overview of quiet reading corners for kids. Here the focus is narrower: 11 layouts for square, narrow and awkward corners, each checked against reach, circulation and reset. The stakes are real. In 2023, only 14% of 13-year-olds reported reading for fun almost every day1, so a corner that removes friction from reading earns its floor space.

One of several corner reading nook ideas: a young girl reads a pink book in a patterned fabric hanging chair tucked into a playroom corner beside a wooden shelf of colorful books.
A playroom corner turned into a reading spot: a fabric hanging chair beside a low wooden shelf stocked with books. A ceiling-hung seat needs its mount evaluated by a licensed contractor.

Quick Answer

What makes an empty corner work as a kids reading nook?

A corner works as a reading nook when four parts line up. The seat faces out of the corner, and a rug or low boundary marks the floor area. Books sit between 20 and 36 inches off the floor for ages 3 and 42. The fourth part is a clear walking path past the nook, plus a light source beside the reader rather than glare from above.

Key Takeaways

  • The shelf band every child from 3 to 12 can reach runs from 20 to 36 inches off the floor, based on the U.S. Access Board’s advisory reach ranges for children2.
  • The federal dresser stability rule does not cover bookcases, so anchoring a corner bookcase is the family’s job, not the manufacturer’s test result4.
  • Children under 6 account for 69.9% of furniture and TV tip-over injuries treated in U.S. emergency departments3.
  • The corner itself is not the nook. The nook is the system of seat, boundary, books, light and path, and each corner shape changes which part is hardest.
  • Pushing the seat deep into the corner is a layout trap: it turns the reader’s back to the room and puts the books behind them.

Square Corner Reading Nook Ideas: Using Both Walls

A square corner is the easiest shape to turn into a reading nook because two walls give the seat a back and the books a home on either side. A reading nook is a small, defined area set aside for reading, with its own seat, its own books and its own light. The corner supplies the shelter. The layout decides whether a child actually sits there.

Measure the corner as a floor area, not as a wall: the free length along each wall, minus the walking path that runs past it. That footprint picks the idea.

A bright playroom reading corner with a gray armchair angled toward the room, a striped rug marking the floor area and a wooden bookshelf filled with books.
An armchair, a striped rug and a nearby bookshelf turn a square playroom corner into a defined reading spot.

1. The Diagonal Armchair With a Lamp Behind It

Setting one armchair at a 45-degree angle across a square corner gives the reader a view of the room and leaves a triangle of floor behind the chair. That triangle is the most useful space in the nook. It holds a floor lamp, a basket or a plant, and it keeps the lamp cord out of the walking path.

The angle also helps supervision. A child facing out of the corner stays in a parent’s line of sight from the doorway, and the lamp light falls over the reader’s shoulder onto the page.

Best for: children about 5 and older who can climb in and out of a chair on their own. It needs a square corner with roughly 4 feet free along each wall. A child-sized chair shrinks that footprint. For a side-by-side look at chairs, beanbags and benches, see our reading nook furniture comparison.

Reset logic: one basket beside the chair arm, with a fixed limit of books. When the basket is full, a book goes back to the shelf before a new one comes out.

2. The L-Shaped Floor Cushion Corner

Two long floor cushions laid along both walls form an L that seats a toddler, a preschooler and a parent at the same time. Floor seating removes the climb, removes the fall height and makes the nook a shared reading spot rather than a single-child perch.

The books go on a low, face-out shelf along one wall, so covers sit at a toddler’s eye level. For ages 3 and 4, the Access Board’s advisory reach range runs from 20 to 36 inches above the floor2. A shelf that tops out near 30 inches keeps every cover inside that band with room to spare.

Best for: toddlers and preschoolers, shared parent-child reading, and corners that must convert back to open floor for play.

Reset logic: cushions lean against the wall each evening, and the shelf holds only as many books as it can show face-out.

3. Two-Wall Picture Ledges Inside the Reach Band

Picture ledges mounted on both walls of the corner turn the walls into a cover display that a child can scan from the seat. Each ledge holds a single row of books facing out, so a child chooses by cover instead of pulling spines from a packed shelf.

The height rule is simple and sourced. The U.S. Access Board’s advisory children’s reach range is 18 to 40 inches for ages 5 through 8 and 16 to 44 inches for ages 9 through 122. Mount the lowest ledge near 20 inches and the highest near 36 inches, and every child from 3 to 12 can reach every cover.

Best for: corners with tight floor area but free wall space, and families with children of different ages.

Watch the visual load. Two or three ledges of covers read as a menu. Six ledges on both walls read as wallpaper, and the corner stops being a calm place to focus.

“Children were more distracted by the visual environment, spent more time off task, and demonstrated smaller learning gains when the walls were highly decorated than when the decorations were removed.”

Anna V. Fisher, Karrie E. Godwin and Howard Seltman, Carnegie Mellon University, Psychological Science (2014)5

That study placed kindergarten children in a laboratory classroom for six science lessons and compared highly decorated walls with walls whose decorations were removed5. A reading corner is not a classroom, but the mechanism carries over: a nook wrapped in color, signs and stickers competes with the page.

4. The Canopy or Tent Corner

A fabric canopy or a freestanding play tent gives the corner a soft roof and a doorway, which tells a child exactly where the nook begins and ends. That boundary is the canopy’s real job. It turns two walls and a rug into a place.

A light ceiling hoop for a fabric canopy is a different load from a hanging chair. A hanging chair carries a child’s moving weight, so the ceiling mount, the joist and the hardware need evaluation by a licensed contractor or structural engineer before installation. A floor-standing frame avoids the question entirely.

Best for: preschoolers and early readers who like a “den” feeling. Keep fabric clear of radiators, baseboard heaters and lamps.

Reset logic: the tent floor is the boundary for books too. Anything that leaves the tent goes back to the shelf at cleanup, so the inside stays a reading space and not a storage bin.

For a square corner, age decides the idea. Floor cushions and ledges serve the youngest readers, while a diagonal chair suits a child who can climb in alone.

Small Corner Reading Nook Ideas for Narrow and Shallow Corners

A narrow corner works as a reading nook when the seat runs along the longer wall and the walking path stays at its full width. The constraint here is not the nook. It is the path beside it. A circulation path is the route people already use to cross a room, from door to closet or from desk to window. A nook that pinches it gets moved within a month.

A useful benchmark comes from accessibility design. Under the 2010 ADA Standards, the clear width of a walking surface is 36 inches minimum2. A home is not bound by that rule, but it is a sound target for the main path past a nook.

5. The Wall-Hugging Single Seat

In a corner where one wall is short, the seat turns to run parallel with the longer wall instead of facing out of the corner. A slim lounge chair, a firm floor mattress or a single long cushion works. The short wall then carries the books, and the reader sits side-on to the room.

This layout protects the path. The nook depth stays near 2 feet, which leaves the rest of a narrow room open. It also fits a bedroom, where the narrow corner beside a closet or window is often the only free spot. Our bedroom reading nook ideas cover how to keep that kind of nook separate from sleep.

Best for: narrow rooms, hallway-facing corners and bedrooms where the bed already takes the main wall.

Reset logic: a single wall-mounted rail or a narrow basket on the short wall. With one place for books, a child can see at a glance whether the nook is “done.”

6. The Corner Bench With a Book Rail Above

A low bench along one wall gives a shallow corner a seat, and a book rail mounted above it puts the books within arm’s reach of the reader. A storage bench also turns the space under the seat into a home for rotated books.

Two height checks keep this idea working. The seat should let a child’s feet reach the floor, and the rail should sit inside the reach band for the youngest reader. For a 3- or 4-year-old, the high reach is 36 inches2, so a rail above that line is a parent-only shelf.

Best for: shallow corners of about 18 to 24 inches, and families who want storage built into the nook. For capacity and access height by storage type, see our guide to reading nook storage benches.

Reset logic: books on the rail are “out”; books in the bench are “resting.” Swapping the two sets is the whole rotation routine.

7. The Rug-Defined Micro Nook

A small rug is the cheapest way to define a nook in a corner that cannot take furniture. A 3-by-5-foot rug, one floor cushion and one basket of books mark a clear reading spot without blocking anything. The rug edge is the boundary, and children read boundaries well.

This idea suits corners that must stay flexible, such as a living room corner or a playroom corner that doubles as building space. Use a non-slip rug pad, since a sliding rug creates a trip hazard at the edge of the path.

Best for: rentals, shared rooms and corners under 3 feet per wall.

Reset logic: the rule is “nothing on the rug but the reader, the cushion and the basket.” Toys that drift onto the rug go back to their own zone.

8. The Rotating Crate Nook

A single crate of books, swapped on a fixed schedule, keeps a small corner fresh without adding shelving. The crate faces out of the corner with covers up, and the rest of the family’s books live elsewhere.

The case for fewer choices has some evidence behind it, though it comes from toy research. In a University of Toledo study of 36 toddlers, children given 4 toys rather than 16 played with each toy longer and in a greater variety of ways6. Books are not toys, so treat this as a reason to try a smaller selection, not as proof that it works for reading.

Best for: any small corner, and families who already rotate toys.

Reset logic: the crate holds a set number of books, and the swap happens on the same day each week. A child can help choose the next set, which builds ownership of the nook.

In a narrow corner, protect the path before you choose the seat. A nook that keeps the full walking width survives daily traffic; one that pinches it rarely does.

Cozy Corner Reading Nook Ideas for Awkward Corners

Awkward corners make some of the coziest reading nooks once their one hazard or conflict is solved. The corner by a window, behind a door or under a slope each has a single feature that decides the layout. Plan around it, and the rest follows the square-corner rules.

9. The Window Corner

A corner beside a window offers the best reading light in the house, and it also brings the corner’s biggest hazard: blind and shade cords. From 1990 to 2015, an estimated 16,827 window blind-related injuries among U.S. children under 6 were treated in emergency departments7. Entanglement made up 11.9% of those cases, and 98.9% of entanglement cases involved blind cords7.

The layout answer is to remove cords from the nook, not to manage them. Cordless shades or a fixed panel solve it. Then keep the seat beside the window rather than under it, so the window does not become a climbing target. A seat placed below an opening window raises a child closer to the sill, so window guards or opening limits belong in the plan before the bench goes in.

Best for: rooms with good daylight and a cordless window treatment. Daylight from the side, not from behind the page, reduces glare on glossy picture books.

Reset logic: keep books off the windowsill. Sun fades covers, and a sill shelf invites climbing.

10. The Corner Behind a Door

A door swing is the quarter-circle of floor a door sweeps as it opens, and the corner behind a door sits inside or beside it. That corner is often the only unused one in a small bedroom, which is why it gets picked. The question is whether the nook clears the swing.

Measure the door width, since the swing radius equals it. A 30-inch door sweeps a 30-inch radius. If the corner beyond that arc is at least 2 feet deep, a floor cushion or a slim chair fits without the door striking the reader. If it is not, the door wins: a nook that gets hit by the door every morning does not last.

Best for: small bedrooms and offices where every other corner is taken. Floor seating suits it best, since it sits below the door handle.

Reset logic: a wall-hung pocket or a single rail on the far wall holds the books, so nothing sits in the door’s path.

11. The Sloped-Ceiling or Under-Stair Corner

A corner under a sloped ceiling or a staircase has low headroom, which is exactly what makes it feel like a den to a child. The usable area is the part where the reader can sit up straight, so measure headroom at the seat, not at the wall.

Floor seating suits these corners best, because it uses the low zone that an adult cannot. Lighting needs more thought than in an open corner: a slope blocks ceiling light, so add a clip-on or wall-mounted reading light with the cord routed along the wall. Before cutting into an under-stair closet or a knee wall, have a licensed contractor confirm what the framing carries.

Best for: attic bedrooms, finished basements and under-stair spaces.

Reset logic: one low basket at the open end, where an adult can reach it during cleanup without crawling in.

An awkward corner is not a worse corner; it is a corner with one problem to solve first, and the nook only works once that problem is gone.

Comparison Table: Which Corner Book Nook Fits Your Corner

The fastest way to choose a corner book nook is to match the idea to the free floor area and the youngest reader who will use it. The table below lists the planning footprint for each idea, along with the age band it suits and the single tool that keeps it reset. Footprints are Playroom Architect planning estimates for a typical layout, not product dimensions.

IdeaCorner shapeFree floor per wallBest age bandReset tool
1. Diagonal armchairSquareAbout 4 ft5 and upOne basket at the chair arm
2. L-shaped floor cushionsSquare3 to 4 ft1 to 5Low face-out shelf
3. Two-wall picture ledgesSquare2 to 3 ft3 to 12Ledges between 20 and 36 in
4. Canopy or tentSquareAbout 3 ft3 to 7Tent floor as boundary
5. Wall-hugging single seatNarrowAbout 2 ft deep4 and upOne rail on the short wall
6. Bench with book railShallow18 to 24 in deep3 and upRail out, bench resting
7. Rug-defined micro nookAny smallUnder 3 ft2 and upSingle basket on the rug
8. Rotating crateAny smallAbout 2 ft2 and upFixed-size crate, weekly swap
9. Window cornerWindow wall3 to 4 ft4 and upNo books on the sill
10. Behind the doorDoor corner2 ft past the swing3 and upRail on the far wall
11. Sloped or under-stairLow headroomSitting headroom3 to 10Low basket at the open end

If the free floor is under 3 feet per wall, start with idea 7 or 8. If the youngest reader is under 3, start with floor seating rather than a chair.

The best corner nook is the one that fits the smallest measurement in the room, whether that is the floor area, the path width or the youngest child’s reach.

How We Selected These Kids Corner Reading Nook Ideas

Each kids corner reading nook idea on this list passed three filters: structural safety reasoning, developmental fit, and buildability in real homes. If an idea failed one filter, it did not make the list. This was a research and design review, not a hands-on product test, and no item here is a paid placement.

Filter 1: Structural Safety Reasoning

Corners attract tall furniture, because a bookcase tucked into a corner looks tidy. That is the corner’s main structural risk. An estimated 18,673 children under 18 were treated in U.S. emergency departments each year for furniture or TV tip-over injuries from 1990 to 20193. Children under 6 accounted for 69.9% of those injuries3.

The federal rule that covers dressers will not help with a bookcase. The 2023 Safety Standard for Clothing Storage Units applies its stability tests to units 27 inches and above in height, using weights that simulate children up to 60 pounds4. The same rule states that it does not cover shelving units such as bookcases4. A tip restraint is a strap or bracket that ties the top of a unit to the wall framing. For a corner bookcase, installing one is the family’s job.

Every idea on this list either keeps furniture low or puts the books on wall-mounted ledges and rails fixed into studs. Where an idea depends on the ceiling or the framing, as with a hanging chair or an under-stair cut, it names the professional to involve.

Putting the two height figures on one wall shows why corner shelving needs a plan. The children’s reach bands run from 16 to 44 inches across ages 3 to 122, and every band crosses the 27-inch line where the federal dresser stability test begins4. A bookcase tall enough to serve all those reach bands is therefore above that line, yet outside that rule.

The Shelf Band Every Child Can Reach Horizontal range bars of advisory children’s reach ranges from the 2010 ADA Standards, U.S. Access Board. Ages 3 and 4, 20 to 36 inches; ages 5 through 8, 18 to 40 inches; ages 9 through 12, 16 to 44 inches. A fourth bar shows the overlap of all three, 20 to 36 inches, which is a Playroom Architect calculation. A dashed reference line marks 27 inches, the height from which the 2023 CPSC Safety Standard for Clothing Storage Units applies its stability tests; that rule excludes bookcases. The Shelf Band Every Child Can Reach 27 in: start of the federal dresser stability test Ages 3 and 4 Ages 5 through 8 Ages 9 through 12 Shared band, 3 to 12 20-36 in 18-40 in 16-44 in 20-36 in 0 12 24 36 48 Height above the floor, inches Reach band by age group Band every child 3 to 12 can reach 27 in line Source: Playroom Architect analysis, 2026
Every child’s reach band from 3 to 12 crosses the 27-inch line where the federal dresser stability test starts, yet bookcases fall outside that rule. Shelving in the 20 to 36 inch shared band, plus a tip restraint, addresses both reach and anchoring. Compiled by Playroom Architect from the U.S. Access Board’s 2010 ADA Standards advisory children’s reach ranges and the CPSC Safety Standard for Clothing Storage Units (2023).

Filter 2: Developmental Fit

Each idea was matched to the youngest reader who would use it. Floor seating and low shelves serve toddlers, while chairs and taller rails suit children who can climb in and reach on their own. Shared reading also shaped the list, which is why several ideas seat a parent beside the child.

“Reading together often with infants and young children strengthens their relationships with parents and caregivers at a critical time in child development, stimulating brain circuitry and early attachment.”

American Academy of Pediatrics Council on Early Childhood, Literacy Promotion policy statement, Pediatrics (2024)8

For a specific child with motor, sensory or attention needs, a pediatric occupational therapist can advise on seating and position. This list offers general planning ideas, not individual advice.

Filter 3: Buildability in Real Homes

Every idea had to work with ordinary furniture, ordinary walls and a realistic cleanup routine, so built-in window seats and custom millwork were left out. Each item names one reset tool rather than a storage system.

The guiding rule is to design for the reset, not just the reveal. A nook that looks finished on day one but takes a long time to tidy will not stay a reading spot.

The three filters explain why this list leans on floor seating, ledges and rails: they lower avoidable risk for the youngest reader and let that child reset the nook alone.

Frequently Asked Questions

How high should books sit in a kids corner reading nook?

Place the books a child should reach between about 20 and 36 inches off the floor. That band sits inside the U.S. Access Board’s advisory reach range for every age group from 3 to 122. Books above it become parent-managed storage, which works well for the next rotation.

How much space does a small corner reading nook need?

A small corner reading nook can work in the space of a 3-by-5-foot rug with one cushion and one basket. The bigger constraint is the path beside it. The ADA Standards set 36 inches as the minimum clear width of a walking surface2, a useful target for the main route past a nook at home.

Does a bookcase in a reading corner need to be anchored?

Anchoring a corner bookcase to the wall framing reduces avoidable risk, and no federal stability test covers it. The 2023 clothing storage unit rule tests units from 27 inches tall but excludes bookcases4. Children under 6 account for 69.9% of furniture and TV tip-over injuries treated in U.S. emergency departments3.

Is a window corner a good place for a reading nook?

A window corner offers the best natural light, provided the cords go first. In a study of window blind injuries to U.S. children under 6, 98.9% of entanglement cases involved blind cords7. Choose cordless shades, keep the seat beside the window rather than under it, and keep books off the sill.

How many books should a corner book nook hold at once?

A corner book nook works best with a small, visible set that rotates, often one crate or one ledge of covers. Toy research points the same way: toddlers offered 4 toys instead of 16 played longer with each one6. Books are different from toys, so adjust the number to the child.

Limitations and Edge Cases

  • The reach ranges are advisory guidance for buildings that serve children. Individual children vary, so check the band against the actual child before mounting anything.
  • The injury figures are U.S. emergency department estimates for specific age groups and years. They describe patterns across many homes, not the risk in one room.
  • Built-in window seats, custom millwork and structural changes are outside these ideas. Any change to framing, ceiling mounts or window openings belongs with a licensed contractor or structural engineer.

References

Methodology: every statistic in this article comes from an independent published source linked below; dimensions, footprints and the shared 20 to 36 inch reach band are Playroom Architect planning estimates.

  1. NAEP, National Center for Education Statistics – Long-Term Trend Reading and Mathematics Highlights, 13-year-olds, 2023
  2. U.S. Access Board – 2010 ADA Standards for Accessible Design, Advisory 308.1 Children’s Reach Ranges and 403.5.1 Clear Width
  3. Lu et al., Injury Epidemiology – Furniture and television tip-over injuries to children treated in United States emergency departments, 2021
  4. Federal Register, U.S. Consumer Product Safety Commission – Safety Standard for Clothing Storage Units, direct final rule, May 4, 2023
  5. Fisher, Godwin and Seltman, Psychological Science – Visual environment, attention allocation, and learning in young children, 2014
  6. Dauch et al., Infant Behavior and Development – The influence of the number of toys in the environment on toddlers’ play, 2018
  7. Onders et al., Pediatrics – Pediatric Injuries Related to Window Blinds, Shades, and Cords, 2018
  8. American Academy of Pediatrics, Pediatrics – Literacy Promotion: An Essential Component of Primary Care Pediatric Practice, Policy Statement, 2024

Conclusion

An empty corner becomes a reading nook when the seat faces the room and a boundary marks the floor. The books sit in the 20 to 36 inch band, and the path stays clear. Pick the idea by the smallest measurement in the room, then anchor anything tall. Treat the room as a system, and the corner keeps working after the first week.

For how the corner fits the wider picture of quiet reading spaces, see our reading nooks overview.

Montessori Playroom Ideas: 15 Layout, Shelf and Activity-Zone Ideas

Author: Oded Feigin · Created On: September 30, 2026 · Last Updated: October 12, 2026

A Montessori playroom is a room that works before it photographs; it earns calm through structure. This guide gathers fifteen Montessori playroom ideas that address what most rooms get wrong. Each idea sits under our Montessori playroom setup guide, the overview of the prepared environment for the whole topic. Research on toy count shows toddlers played twice as long with four toys on display than with sixteen2. So the count of activities on the shelf is one of the highest-leverage decisions in the room. Every idea passes structural safety reasoning, developmental fit, and buildability in a real home. You can adapt them to a shared corner or a whole basement.

Wooden shelves and a child-sized table in a Montessori playroom, one of many Montessori playroom ideas for a calm prepared environment
A prepared environment with a low shelf, a child-sized work table, and plants; the parts a Montessori playroom must earn before decor.

Quick Answer

What is a Montessori playroom, and how do you set one up?

A Montessori playroom is a room set up so a child can move, choose, and reset without adult help. That looks like low anchored shelves and a small rotating set of activities: four to eight for a toddler5. Add open floor for movement and quiet zones for reading, art, and rest. Every choice starts with observation of how the child uses the space.

Key Takeaways

  • Fewer accessible activities support longer, deeper play: research shows four toys on display doubled toddlers’ play time compared with sixteen2.
  • Anchor every piece of furniture over 30 inches tall into wall studs; CPSC tip-over data makes this a floor rule, not a preference3.
  • Design for the reset, not just the reveal: every item needs a labeled home a two-year-old can find without asking.
  • Sightlines and circulation come before decor; walk the room before you shop.

Layout Ideas (1 to 5)

A Montessori playroom starts with layout, not decor: the paths, sightlines, and zones a child moves through daily set the room’s ceiling. These five ideas map the observations that should shape a floor plan before any purchase.

The reader’s decision here is which two friction points to observe first, because circulation and sightlines usually pay back faster than shelf or decor decisions.

1. Walk the room before you shape it

Observation is watching where the child moves, stops, and abandons play, without steering them. That data beats any Pinterest layout, because it tells you where the friction points already sit. Spend three separate half-hour blocks watching, not tidying. Note where feet travel, where toys pile up by the end of the session, and where the child looks up to check on you. Those three patterns anchor every zone the room will hold.

Sketch the room on a single sheet of paper. Draw arrows for the paths you saw. Mark the pile spots with an X and the check-on-you sightlines with a dashed line. Only then decide where the shelf, the rug, and the reading corner belong. This is what we mean by the room as a system: layout follows behavior, not the other way around.

2. Anchor low shelves under 32 inches, into wall studs

Child-scale storage means shelves low enough that a toddler can retrieve and return items without adult help, usually 24 to 32 inches high at the top edge. Every piece of furniture over 30 inches tall gets tip-over hardware into wall studs, not drywall alone. The Consumer Product Safety Commission reports that on average one child dies about every two weeks from a tip-over incident3. About 11,300 emergency-department visits each year involve furniture or television tip-overs3.

That is why a low shelf on a hard floor is still a load-bearing safety decision, not only a design one. Use the hardware the shelf ships with, add a stud-finder check, and treat wall-anchor questions on brick, plaster, or uneven walls as a licensed-installer job. For a deeper read on shelf construction and height, see our toy shelf height guide.

3. Reserve open floor space of at least 4 by 6 feet

A prepared environment needs a clear zone big enough for gross motor work, floor puzzles, block building, and a rug that defines the boundary of a single work. In a real home that usually means keeping a 4 by 6 foot rectangle free of furniture, wires, and low tables. That is the smallest area that fits an adult crouched next to a toddler rolling out a mat.

Open floor space also matters for circulation. An adult with a laundry basket needs a 24 to 30 inch clear path across the room. A child abandoning a work needs somewhere to walk that is not the middle of an activity. If the room is small, protect the floor by moving storage up (higher wall shelves for the adult back stock) rather than by shrinking the play zone.

4. Keep the caregiver in the sightline

A child who can see you plays longer alone. Position at least one line of sight between the primary play zone and the room’s most-used adult seat: a sofa, a desk chair, or the kitchen doorway. That single sightline reduces the check-ins that break concentration.

The rule matters most in the 12 to 30 month band, when secure-base behavior is at its strongest. It also matters in shared rooms, where an older sibling can quietly hold the sightline for a younger one. Avoid tall storage between the child and the adult; use lower shelves along that axis and put taller cabinets on the perpendicular wall. If the reading corner sits behind a bookcase, that is the corner you can afford to hide, because a child in a reading nook usually is not seeking connection.

5. Neutral walls, low visual noise, and the Third Teacher

The Third Teacher refers to the idea that the room itself, along with adults and other children, guides a child’s focus and independence. Walls, color, and pattern belong to that teacher. Choose muted paint (warm off-whites, soft naturals, quiet greens) and hang two or three pieces of child-height art rather than a saturated feature wall.

Visual quiet is not a taste preference; it lets the shelf display be the loudest signal in the room, which is what carries the day’s choice architecture. Save saturated color for the works themselves: a red set of pegs, a blue sorting tray, a woven yellow basket. For the palette and material choices that support this, see our sibling on Montessori decor guidance. Structural reasoning first, decor inspiration second.

Shelf and Storage Ideas (6 to 10)

The shelf is where a Montessori room either supports independent play or fights it. These five ideas cover how many activities to show, how to present them, and how to make cleanup possible without an adult.

The reader’s decision here is how much to show at once, and the rule from the toy-count research is that fewer visible activities produce longer, deeper play2.

6. Show 6 to 10 activities at a time, not 30

A Montessori shelf earns its calm by limiting choice. Dauch and colleagues found that when the accessible toy count dropped from 16 to 4, toddlers played roughly twice as long with each toy2. They also moved through fewer distinct items in a session. Extend the finding across age bands and pair it with AMI’s prepared-environment guidance6. Under two years, show 4 to 6 activities. From two to three, show 6 to 8. From three to six, show 8 to 12.

The rest live in adult-managed back stock: a labeled bin in a closet, a top shelf out of sight, or a garage tote. Rotate weekly. Watch the shelf on the third day; the activities a child ignores for a week come out, and a new tray goes in.

Activities on the shelf, by age band A column chart. Under two years: 4 to 6 activities on the shelf. Two to three years: 6 to 8 activities. Three to six years: 8 to 12 activities. Sources: Association Montessori Internationale prepared-environment guidance, NAEYC Developmentally Appropriate Practice position statement, and Dauch et al. 2018 in Infant Behavior and Development. Activities on the shelf, by age band 0 4 8 12 4 to 6 6 to 8 8 to 12 Under 2 years 2 to 3 years 3 to 6 years Upper range Lower range Source: Playroom Architect analysis, 2026
Compiled by Playroom Architect from Dauch et al. 2018 (Infant Behavior and Development), AMI prepared-environment guidance, and NAEYC Developmentally Appropriate Practice; the ranges tighten focus without starving the shelf.

7. One tray per activity, one activity per tray

A tray is a shallow container that defines the boundary of a single work: the tray is the mat’s edge in miniature. Wooden trays, cane baskets, and small tin dishes all work. What matters is that the tray holds the whole activity: the pieces, the tools, the cloth for spills. Then a child can carry it to the rug and back in one motion. That single boundary reduces piece-loss and makes cleanup a child-led step, not an adult intervention.

Do not mix activities on a single tray; do not stack. A shelf with ten neat trays, each holding one work, teaches the reset without a lecture. For deeper cross-references on categories, labels, and back-stock, see our Montessori storage plan.

8. Front-facing books, 6 to 8 visible

A cover-forward bookshelf reduces the decision cost of picking a book by showing the illustration, not the spine. Keep 6 to 8 titles visible; rotate the rest. That count matches the toy-count logic: fewer visible choices produce longer engagement with each one2.

Height matters as much as facing: the top row belongs at the child’s shoulder, not eye level, so that reaching for a book is easy and returning it is easier. A single-row rail is enough for infants and toddlers; a two-row unit works from about age three. If books scatter every night, the count is too high, not the child’s fault.

A low wooden shelving unit displays small trays, wooden pegs, a vase with flowers, and a standing whiteboard in a bright organized playroom
A shelf with one activity per tray, a low vase of flowers, and open work slots keeps the choice architecture legible without crowding.

9. Every item has a home the child can find

Fast reset depends on a rule that never varies: every item lives in the same place, every day. Draw silhouettes on the shelf, label baskets with a photograph, or tape a single word to the front of a bin. The label is for the child, not the adult, so it should read at eye level and use images or single words rather than sentences.

This one detail turns cleanup from a nightly negotiation into a game a two-year-old can play. It also turns “put it back” into an achievable instruction, because the “back” is legible. Design for the reset, not just the reveal.

10. Real materials, in child-scaled sizes

Real materials belong on the shelf: a small ceramic pitcher, a metal-tined fork, wooden pegs, a glass jar with a lid a child can turn. Real weight and real texture give a child feedback that plastic cannot, and breakage is part of the lesson. The scale is what matters: an adult pitcher is a hazard, a child-sized pitcher is a work.

Two safety rules override this idea. First, glass at the shelf level is only for supervised practical-life work with children old enough to understand consequence, roughly two and a half and up. Second, any material with a swallowing hazard (small beads, magnets, batteries) stays in adult-managed storage. The American Academy of Pediatrics treats swallowed small parts as a first-tier hazard for under-threes1.

Activity Zone Ideas (11 to 15)

Zones let one room hold movement, art, reading, and rest without collision. These five ideas map each zone’s placement, materials, and boundaries so the activities coexist and reset quickly.

The reader’s decision here is which zone to protect first: in a shared or small room, movement and reading usually win, because they need floor space and quiet respectively.

11. Movement zone against an outer wall

A movement zone holds gross motor work: a balance beam, a low climber, a mirror with a horizontal bar. Place it against an outer wall where possible, so wall-mounted hardware anchors into studs rather than into a shared partition. Keep at least a 4 by 6 foot clear pad in front of the hardware, with soft flooring under the fall zone.

Wall-mounted climbing, pull bars, or Swedish ladders are structural decisions, not decor decisions. A licensed installer, and (for older stock walls or non-standard framing) a structural engineer, should evaluate the specific wall and hardware before installation. This is engineering-informed guidance, not a certified installation.

12. Art zone near the door and near a wipeable floor

An art zone belongs where spills are cheapest: near the door, on a floor you can wipe or on a rug you already accept as sacrificial. A child-sized table, a small chair, and a low shelf holding one paint activity, one drawing activity, and a stack of paper are enough to open the zone.

Two systems keep it working. First, a hanging line or clip rail above the shelf for wet paintings; drying vertically saves table space. Second, an art apron on a hook the child can reach; the hook is the invitation to put the apron back on the child’s own initiative. Watch the paper stack: if it never runs down, the zone is unused, and the count on the shelf is too high, not too low.

13. Reading nook in the quiet corner

A reading nook belongs in the quietest corner, farthest from the door and the movement zone. Two floor cushions, a low lamp for after-dark reading, and a forward-facing book display of 6 to 8 titles are the whole assembly. A soft rug marks the boundary; the child either sits inside or is not reading.

Keep the nook small on purpose. A single-child nook (about 4 by 4 feet) supports concentration; a nook large enough for three children usually becomes a wrestling ring. If two siblings need to read at once, run two small nooks on opposite walls rather than one large shared one. For the detailed nook setup, see our sibling on the Montessori reading corner.

14. Infant mirror-and-bar station at floor level

For infants aged two to twelve months, a floor-level mirror with a low horizontal wooden bar 18 to 20 inches above the mat gives a full station. That station supports visual self-recognition, pull-to-stand practice, and tummy-time interest. The mirror is safety-film shatter-resistant, or acrylic, anchored top and bottom. The bar mounts into studs, not drywall alone.

Change the station as the child changes. At about ten months, add a low pull toy tied to the bar. At twelve months, swap the mirror for a low art wall. This is the room’s clearest reminder that a Montessori playroom is time-shaped as well as space-shaped. A room that works at eight months does not work unchanged at eighteen. For the underlying design principles across ages, see our sibling on the ten design principles.

15. Small-space adaptation: one wall as the whole prepared environment

When there is no dedicated playroom, one wall can hold the entire prepared environment. The recipe has four parts. Use a single low shelf of six to eight activities and a small rug in front of it, about 3 by 5 feet. Add a low mirror at one end for infant work or dressing practice. Mount a book rail above the shelf. That is the minimum viable Montessori environment for an apartment or a shared bedroom.

Two rules keep it honest. First, the wall must earn priority: nothing else on that wall competes with the shelf (no toy chest, no television, no laundry hamper). Second, back-stock and rotation happen in a closet or a labeled bin elsewhere. A one-wall setup fails the moment adult overflow starts landing on the child’s shelf.

How We Chose These Montessori Playroom Ideas

We chose these fifteen Montessori playroom ideas by applying our three-filter test to each candidate. Every idea must pass structural safety reasoning, developmental fit, and buildability in a real home.

Scope. We started with roughly forty candidate ideas drawn from AMI prepared-environment guidance, NAEYC Developmentally Appropriate Practice, and observations of family playrooms in apartments, basements, and shared bedrooms.

Evaluation criteria.

  • Structural safety reasoning. Anchor points, tip-over risk, active-play placement, and swallowing hazards were evaluated against Consumer Product Safety Commission data3 and pediatric guidance1.
  • Developmental fit. Each idea was checked for a specific age band (infant, toddler, primary) using CDC developmental milestones7 and Harvard Center on the Developing Child research on executive function4.
  • Buildability in real homes. Every idea had to work in a real family space (a rental apartment, a shared bedroom, or a basement corner), on a real budget, and with realistic upkeep.

Methodology. This is a research-and-observation review, not a certified design service. Every quantitative figure below traces to an independent published source and links to the page that carries it. The article’s methodology is reviewed by the author and refreshed on material change. Playroom Architect sells nothing directly, accepts no sponsored placements, and never gives visibility to a competing brand’s advice.

Prepared-environment choices at a glance, by age band
Design lever Under 2 years 2 to 3 years 3 to 6 years
Activities on the shelf 4 to 6 6 to 8 8 to 12
Books visible (front-facing) 4 to 6 6 to 8 8 to 10
Shelf top height 18 to 24 inches 24 to 30 inches 28 to 32 inches
Open floor pad 4 by 6 feet 4 by 6 feet 5 by 7 feet
Tip-over anchoring Required for anything over 24 inches Required for anything over 30 inches Required for anything over 30 inches
Movement zone hardware Floor mirror plus low bar Low balance beam plus low climber Wall bars evaluated by a licensed installer

“Play is essential to development because it contributes to the cognitive, physical, social, and emotional well-being of children and youth.”

Kenneth R. Ginsburg, MD, MSEd, FAAP, American Academy of Pediatrics1

Frequently Asked Questions

What is a Montessori playroom?

A Montessori playroom is a room designed as a prepared environment. That means low anchored shelves, a small rotating set of activities (four to eight for a toddler)5, open floor space, and quiet zones for reading, art, and movement. Every choice supports child-led activity and a fast reset without adult help.

How many toys should be on a Montessori shelf?

Show 4 to 6 activities under age two, 6 to 8 at two to three, and 8 to 12 from three to six. Research by Dauch and colleagues found toddlers played roughly twice as long per toy with four toys accessible than with sixteen2. That finding is the empirical basis for the lower counts.

Do Montessori playroom ideas work in a small space or a shared bedroom?

Yes. A one-wall setup works in an apartment or a shared bedroom: a single low shelf, a 3 by 5 foot rug, a low mirror, and a book rail. The rules that scale down are the same three filters: safety, developmental fit, and buildability.

What is the best age to set up a Montessori playroom?

A prepared environment can start at birth with a floor mirror and a soft mat, then evolve. CDC milestones and pediatric guidance support age-adapted setups from infancy through the primary years7. Reset the room roughly every three months in the first two years, then twice a year.

Limitations and Edge Cases

  • These fifteen ideas cover indoor playrooms in temperate homes; outdoor prepared environments, sensory needs specific to a child, and therapeutic environments are outside our scope. For advice tuned to a specific child’s sensory or developmental profile, consult a pediatric occupational therapist.
  • Anchor, hardware, and structural questions on non-standard walls (brick, plaster, prefab, uneven framing) belong with a licensed contractor or installer. The general figures here are engineering-informed reasoning, not a certified installation plan.
  • For the parts of the Montessori topic these ideas do not cover (color palette, materials, storage back-stock), see the sibling articles on Montessori decor guidance and Montessori storage plan.

References

Methodology: every figure below comes from an independent published source and links to the page that carries it; the article’s methodology is reviewed by the author and refreshed on material change.

  1. American Academy of Pediatrics – Kenneth R. Ginsburg, “The Importance of Play in Promoting Healthy Child Development and Maintaining Strong Parent-Child Bonds,” Pediatrics, 2007.
  2. Infant Behavior and Development – Dauch, C., Imwalle, M., Ocasio, B., and Metz, A. E., “The influence of the number of toys in the environment on toddlers’ play,” Volume 50, 2018, pages 78 to 87.
  3. U.S. Consumer Product Safety Commission – “Anchor It! campaign, tip-over prevention statistics,” accessed 2026.
  4. Harvard University Center on the Developing Child – “Executive Function and Self-Regulation,” accessed 2026.
  5. National Association for the Education of Young Children – “Developmentally Appropriate Practice: A Position Statement,” 2020 revision.
  6. Association Montessori Internationale – “The Prepared Environment,” AMI public guidance, accessed 2026.
  7. Centers for Disease Control and Prevention – “CDC’s Developmental Milestones, Learn the Signs. Act Early,” accessed 2026.

Conclusion

A Montessori playroom is a room that quietly teaches independence, and it does that by getting circulation, sightlines, shelf counts, and reset logic right before decor. Fewer activities on display, real materials, one clear “home” per item, and a movement zone that respects structural anchoring do more for calm than any color palette. The room is not background for play; it is part of the play system.

For the wider view of how these ideas fit together, read the Montessori playroom setup guide for the overview of the prepared environment as a single topic.

Kids Painting Station: Plan for Water, Wet Media, Splashes and Drying

Author: Oded Feigin · Created On: September 29, 2026 · Last Updated: October 12, 2026

A kids painting station fails in a different way than a drawing table, because water spills, paint splashes and wet sheets all need somewhere to go. Our Art & Craft Stations guide is the overview of planning a home art station. This article goes deeper on one angle, planning for wet media, starting with the paint itself. The U.S. Consumer Product Safety Commission advises against art products with warning labels for children up to 12 years old, meaning pre-kindergarten through grade six1. Then plan for water, splashes and drying.

A kids painting station in a home playroom with a light wood table, art supplies, a nearby sink, storage shelves and an easel.
A light wood art table set up in a playroom, with a sink, storage shelves and an easel close by.

Quick Answer

How do you plan a kids painting station that does not flood the room?

Plan the water first: use water-based paint, small cups and a short walk to a sink. Put the table on a hard floor or a wipeable mat, keep supplies within the child’s reach and give every wet sheet a drying area a few steps away. The EPA advises drying water-damaged areas within 24 to 48 hours to prevent mold growth2, so plan for spills to dry quickly.

Key Takeaways

  • A painting station has three jobs a drawing table does not have: handling water, containing splashes and drying wet work.
  • The CPSC tells adults to give children only small amounts of art materials to minimize spills and mishaps1, so small cups beat large jars.
  • Children aged three to four reach between 20 and 36 inches above the floor3, so paint cups and brushes belong inside that band.
  • The splash zone is a floor and wall problem, not only a table problem, so plan both before buying a mat.
  • A frequent miss is drying: a wet painting with no place to go ends up on the floor, the couch or the next project.

Before You Begin: How a Kids Painting Station Differs From a Drawing Table

A kids painting station is a wet zone with a table in it, while a drawing table is a dry zone with paper on it. That one difference changes the floor, the wall, the supply layout and the exit route for finished work. Wet media are art materials applied with water or another liquid, such as watercolor, tempera, finger paint and washable acrylic, which drip, splash and stay wet afterward.

Crayons fail quietly, because a dropped crayon stays where it lands, while a tipped water cup runs off the table edge and soaks the rug in seconds. Treating the painting area like a coloring table creates daily friction points: wet sleeves, gray rinse water on the floor and sheets drying in a stack.

The room as a system means planning the water route before choosing a single product. Walk the room for a week and note where children paint, where water gets refilled and where wet work ends up. Those locations identify where the station belongs.

Drawing table vs. kids painting station: what changes
Planning questionDrawing or coloring tableKids painting station
Floor under the tableAny floor, including rugsHard floor or a wipeable mat that extends past the chairs
Wall behind the tableUsually untouchedWashable paint, a panel or an easel backing at splash height
Supplies on the tableBins and cups of dry toolsPaint cups, a rinse cup, a sponge and a towel, all within reach
Water accessNot neededA sink nearby, or a lidded water jug the adult refills
Finished workGoes straight to a tray or a wallNeeds a drying area first, away from the walking path
CleanupSort and put awayRinse brushes, wipe surfaces, dry the floor, then put away

What you will need:

  • A table at the child’s working height, or an easel with a paint tray.
  • Water-based paints with the manufacturer’s label intact.
  • Small, weighted or spill-resistant paint cups, plus one separate rinse cup.
  • A wipeable floor mat larger than the table and chair footprint.
  • A drying rack, a clothesline with clips or a clear flat shelf.
  • A cleanup kit: a sponge, an old towel, a small bucket for adult use and a smock.

Time: one afternoon to set up, then a short reset after each session. Difficulty: beginner, unless the plan adds a sink or wall-mounted hardware.

A painting station earns its space through the water plan: the table matters less than where water comes from, where it spills and where wet work goes.

Step 1: Choose Water-Based Wet Media and Set the Water Volume

By the end of this step, the station holds only paints a child can use without solvent cleanup, in amounts small enough to tip without a flood. The CPSC tells adults to avoid solvents and solvent-based supplies, including turpentine and paint thinner, for children up to 12 years old1. Water-based paint keeps both the paint and the cleanup in plain water.

Choosing the medium comes first because it sets every later choice: watercolor needs the most water, finger paint needs the most floor protection and tempera sits in between.

Read the label before the paint reaches the shelf

The CPSC Art and Craft Safety Guide tells families to look for products labeled “Conforms to ASTM D-4236” and to avoid products with cautionary warnings for young children1. ASTM D-4236 is the labeling standard that outlines how precautionary labels are developed for art materials that could cause chronic health effects. The statement is not a product guarantee; it means the label and its warnings follow that standard.

Keep paints in their original containers or decant them into small cups at the start of each session, never into an unlabeled jar that later lives on the shelf.

Match the medium to the age and the room

Younger painters tend to dip, smear and pour, while older children can manage a palette and a rinse routine. Match the medium to the room you have, not the room in a photograph.

How common water-based paints load a kids painting station
MediumWater at the tableSplash and drip loadDrying needBest station shape
Watercolor (cake or liquid)High: rinse cup refilled during the sessionLow to medium: drips from loaded brushesFlat drying; wet sheets curl if hung too soonTable with a rim or tray
TemperaMedium: one rinse cupMedium: thick paint flicks from brushesRack or line; dries faster than watercolor washEasel or table
Finger paintLow at the table, high at cleanupHigh: hands, sleeves and floorFlat; heavy paint can crack if lifted wetLow table on a large mat, sink close
Washable acrylic for kidsMedium: rinse brushes before paint driesMediumRack or line; brushes must be rinsed promptlyTable or easel, older children

Water volume is the second half of this step. The CPSC tells adults to give children only small amounts of materials to minimize spills and mishaps1. In practice, that means a rinse cup filled a third of the way: a tipped small cup requires a wipe, while a tipped jar requires a mop.

“Children need regular and consistent reminders of safety rules, and there is no substitute for direct supervision.”

U.S. Consumer Product Safety Commission, Art and Craft Safety Guide1

Verification: every paint on the shelf is water-based and labeled, and the rinse cup holds only a few sips of water.

Buy the paint after you know which mess the room can absorb, since a carpeted room suits watercolor at a rimmed table far better than finger paint.

Step 2: Place the Painting Area for Kids Near Water and Out of the Walking Path

A painting area for kids works best on a hard floor, near a water source and away from the main route through the room. By the end of this step, the station has a fixed location where spills land on a wipeable surface. A wet child never crosses the rug to reach the sink.

Rank the candidate spots

List every place a station could go, noting the floor type, the distance to water and whether a walking path crosses it. A tiled corner near the kitchen beats a sunny bedroom spot on a rug. A lamp can fix poor lighting, but nothing fixes a carpet that soaks up rinse water every week.

Plan for the sink, or plan without one

A sink at child height is ideal, but few homes include one. The federal accessibility standards permit 24 inches of knee clearance at a children’s sink with a rim no higher than 31 inches, for ages six through twelve3. Adding plumbing is a job for a licensed plumber or contractor. Without a sink, an adult-filled lidded jug for clean water and a second jug for dirty water keep refills under adult control. A step stool on a non-slip surface at an existing sink is another option.

Verification: stand at the station and walk to the water source. If the route crosses carpet or a doorway, try a different location.

The shortest water route wins over the prettiest corner, because every extra step between table and sink becomes a drip line on the floor.

Step 3: Set Working Heights and Place Paint Cups Within Reach

Paint cups, brushes and the rinse cup belong inside the child’s reach band, on the side of the painting hand. Federal accessibility guidance lists children’s high and low reach for three age groups. The ranges run from 20 to 36 inches for ages three and four up to 16 to 44 inches for ages nine through twelve3. Supplies placed outside that band invite leaning, stretching and climbing.

By the end of this step, a seated or standing child can reach every cup without leaning across wet paper, which drags sleeves through paint and knocks cups over.

Pick the table or easel height

The same standards set children’s work surfaces at 26 to 30 inches high, and permit knee clearance of 24 inches3. Those figures apply to older children’s tables in public buildings, so treat them as a reference, not a rule for a toddler. For a full comparison of table size and seating, see our art table sizing guide.

An easel changes the geometry: paint runs downward on a vertical surface, so drips land on the tray, the easel legs and the floor in front. Set the paper so its center sits near the child’s shoulder height.

Place cups by hand, not by symmetry

Position the paint cups on the painting-hand side, close to the paper, with the rinse cup just beyond, so the brush moves from paint to paper to rinse. Keep the towel on the opposite side, so the loaded brush never crosses the page twice.

Put the reach figures side by side and one band stands out. Children from three to twelve can all reach between 20 and 36 inches3, and a children’s table top at 26 to 30 inches3 sits inside it. That band is the zone for cups, brushes and the rinse station. Inside that band sits a second line worth knowing: the federal tip-over standard covers clothing storage units 27 inches and taller4. Storage that tall sits within a child’s reach, so plan to anchor tall furniture near the station.

One height band fits all three reach ranges, ages 3 to 12 Horizontal range chart of heights above the floor in inches. Children’s forward or side reach: ages 3 and 4, 20 to 36 inches; ages 5 through 8, 18 to 40 inches; ages 9 through 12, 16 to 44 inches (U.S. Access Board, 2010 ADA Standards, Advisory 308.1). Children’s table and counter tops, 26 to 30 inches (2010 ADA Standards, 902.4.2). Shaded band from 20 to 36 inches marks the range all three age groups can reach. Dashed line at 27 inches marks the height from which clothing storage units are covered by the federal tip-over standard (Federal Register, May 4, 2023). One height band fits all three reach ranges, ages 3 to 12 Reach, ages 3 to 4 20 to 36 in Reach, ages 5 to 8 18 to 40 in Reach, ages 9 to 12 16 to 44 in Children’s table top 26 to 30 in 27 in 0 12 24 36 48 in Children’s reach range Children’s table top Shared reach band Tip-over standard starts at 27 in (clothing storage) Source: Playroom Architect analysis, 2026
The 20 to 36 inch band falls inside all three published reach ranges for ages three to twelve, so it suits paint cups and brushes. Compiled by Playroom Architect from the U.S. Access Board 2010 ADA Standards and the Federal Register clothing storage unit rule.

Verification: watch one session, and if the child stands up, leans or walks around the table to reach a cup, move the cup.

Reach is the hidden splash control: a cup within easy reach gets set down gently, while a cup at the edge of reach gets knocked over.

Step 4: Contain Splashes With a Defined Splash Zone

Splash containment covers the floor, the wall and the table edge, not just the tabletop. A splash zone is the area around a painting station where drips, flicks and spills can land, including the floor near the chairs and the wall behind the paper. By the end of this step, every surface inside that zone can be wiped clean.

Workplaces that use water follow the same logic, and federal rules ask employers to keep workroom floors clean and, where feasible, dry.

“When wet processes are used, drainage must be maintained and, to the extent feasible, dry standing places, such as false floors, platforms, and mats must be provided.”

U.S. Occupational Safety and Health Administration, 29 CFR 1910.22(a)(2)5

That rule does not apply to a home, but the principle transfers: where water is part of the activity, give people a dry, stable place to stand.

Size the floor mat to the chairs, not the table

Measure the table, then add the space where chairs slide back and children stand up, because splashes land where hands move. A mat that stops at the table legs leaves the busiest strip bare. Select a mat that lies flat, grips the floor and has no curling edges that could trip someone.

Protect the wall at splash height

Easels throw paint onto the wall behind them, while tables throw it lower, near the table edge. Cover that strip with a scrubbable paint finish, a wipeable panel or a clear acrylic sheet. Mount panels with anchors suited to the wall type, and ask a licensed installer if the wall is plaster, brick or unknown.

Give the table edge a lip

A tray with raised edges under the paint cups catches small tips before they reach the floor and turns cleanup into a single lift to the sink.

Verification: after a session, look for paint outside the mat, since every mark shows where the splash zone needs to grow.

Paint reaches the floor on hands, sleeves and brushes as well as from tipped cups, so the floor plan matters as much as the table finish.

Step 5: Pick Washable Surfaces and Plan Brush Storage

Washable surfaces turn a spill into a short wipe instead of a lasting stain. The EPA notes that porous materials such as carpet may have to be thrown away if they become moldy. It also advises drying water-damaged areas and items within 24 to 48 hours2.

By the end of this step, every surface in the splash zone can be wiped, and brushes have a home where they dry instead of soaking.

Select surfaces by how they clean

Sealed wood, laminate and plastic tabletops wipe clean, while raw wood and fabric absorb paint and water. On the floor, vinyl, tile and sealed hardwood handle splashes better than rugs. If a rug must stay, cover it with a mat wider than the splash zone and lift both after a large spill so the rug can dry.

The CPSC guide tells artists to clean up spills immediately, even small spills1. Keep a sponge and a towel inside the station, not in the kitchen, so the first wipe happens immediately.

Store brushes so they dry, not soak

Rinse each brush, press out the water with a towel and store it bristles up in a cup or flat on a towel. A brush left standing on its bristles in water bends out of shape. Keep the brush cup inside the reach band, so children can return brushes themselves.

The CPSC guide also says never to hold brushes or tools in your mouth1. A brush cup within reach gives a busy painter a better place to park one.

Verification: spill a cup of water on purpose during setup. If the cleanup takes one sponge and under a minute, the surfaces are right.

A surface that wipes clean protects the room more than any rule about being careful, because children will spill and the surface decides what happens next.

Step 6: Create a Direct Path From the Painting Station to Drying

Every wet painting needs a drying area within a few steps of the station, reachable without crossing the rug or the walking path. A drying path is the short, fixed route a wet painting travels from the easel or table to the place where it dries flat or hangs. By the end of this step, no painting dries on the table, a chair or the floor.

A home art station with a wooden storage unit of paper and supplies, an easel holding a painting and children's artwork hung on a string line above the desk.
An easel and a string line beside the art station give paintings a place to dry and hang, close to where they were made.

Drying space runs out before paint does: one session can produce several wet sheets, and each requires its own space, so plan capacity for a full session.

Select a rack, a line or a shelf

A wire drying rack holds many sheets flat in a small footprint and suits watercolor and finger paint, while a clothesline with clips suits tempera and lighter paper. A clear flat shelf works for heavy, wet pieces. Mount any line or rail securely, above head height, with cords kept out of young children’s reach.

Mind the air around the drying area

Paper dries faster in moving, drier air, and the EPA suggests keeping indoor humidity below 60 percent, ideally between 30 and 50 percent2. A drying area in a steamy bathroom or a damp basement stays wet much longer. The EPA also lists paints among household sources of organic compounds and reports that levels of several organics average 2 to 5 times higher indoors6. The EPA advises increasing ventilation when using products that emit VOCs, so open a window near the drying area.

Connect drying to storage and display

For what happens once a piece is dry, see our guide to storing kids artwork, which covers trays, portfolios and archives. For pieces headed to a wall, the rotating art gallery article compares clip systems, frames and ledges.

Verification: after a busy session, count the wet sheets and confirm that each one has its own drying space.

The drying area decides whether painting feels possible on a weekday, because a station without one turns every session into a pile of wet paper.

Step 7: Test the Reset Routine Before You Call the Station Done

A painting station is finished when a child can help reset it in a few minutes, not when it looks finished. A reset routine is the short, repeatable sequence that returns the station to its ready state after each session. Design for the reset, not just the reveal.

By the end of this step, the reset has a fixed order a child can follow with a little help.

  1. Move wet paintings to the drying area.
  2. Close paint containers and pour out the rinse water.
  3. Rinse brushes and stand them bristles up.
  4. Wipe the table, the tray and the wall strip.
  5. Check the floor and mat, then dry any wet spots.
  6. Hang the smock and return the cups to their places.

The CPSC guide adds one more step for every session: wash hands after using materials1. Place soap and a towel along the route between the station and the next activity.

Verification: time the reset for a week. If it keeps growing, the slowest step shows which part of the station sits in the wrong place.

The reset is the real test of the plan: a station that takes a long time to reset will be used less, however good it looks.

Common Mistakes in a Kids Paint Station

Many mistakes in a kids paint station come from treating it as a dry art table, and each has a simple fix.

Using a full jar of water

A large jar holds more water than any painting requires. Swap it for a small, weighted rinse cup, filled a third of the way and refilled by an adult.

Putting the station on carpet

Rugs absorb rinse water and paint, so move the station to a hard floor or cover the rug with a wipeable mat larger than the splash zone.

Drying on the table

Wet paintings left on the table smear and block the next session, so give drying its own location before the first session.

Storing supplies above the reach band

Paint stored on a high shelf invites climbing, so keep everyday supplies inside the reach band. Anchor any tall freestanding shelf to the wall, following the manufacturer’s instructions. The federal tip-over standard for clothing storage does not cover shelving units such as bookcases4, so anchoring a shelf falls to you. Ask a licensed installer if the wall type is unclear.

Each of these mistakes moves work from the station onto the parent, which is the clearest sign that the plan needs a change.

What a Working Home Painting Station for Kids Looks Like

A working home painting station for kids gets used on an ordinary weekday without a major cleanup. Children paint, move their work to the drying area and assist with the reset in minutes, while spills remain on the mat and brushes dry bristles up.

A useful stretch goal is a smaller second wet zone: a portable tray of watercolors for the kitchen table, with the same small cups and drying location.

Success shows up as frequency: the station that gets used every week is the one that resets fast.

Frequently Asked Questions

What should a kids painting station include?

A kids painting station needs a child-height work surface, water-based paint, small paint cups, a separate rinse cup, a wipeable mat, a cleanup kit and a drying area. Federal accessibility standards set children’s table tops at 26 to 30 inches3, a useful reference for school-age painters.

Where is the best place for a painting area for kids?

The best place is a hard floor near a water source and out of the main walking path. Rugs soak up rinse water, and the EPA advises drying water-damaged areas within 24 to 48 hours to prevent mold growth2. A kitchen corner or a tiled room usually works better than a carpeted bedroom.

What paint works best for a kids paint station?

Water-based paints such as watercolor, tempera and washable kids’ acrylic suit a home station because they clean up with water. The CPSC advises against art products with warning labels for children up to 12 years old1. Look for “Conforms to ASTM D-4236” on the label.

How high should paint supplies be for children?

Keep paint cups, brushes and the rinse cup inside the child’s reach band. Federal accessibility guidance gives a reach range of 20 to 36 inches for children aged three and four3, and wider ranges for older children. Supplies above that band invite climbing and leaning across wet paper.

How do you dry kids’ paintings at home?

Use a wire drying rack for flat, wet work, a clothesline with clips for lighter sheets, or a clear shelf for heavy pieces. Place it a few steps from the station. Paper dries faster in drier air, and the EPA suggests keeping indoor humidity below 60 percent2.

Limitations and Edge Cases

  • This plan assumes water-based paints. Oil paints, solvent-based products and spray paints change the ventilation and cleanup needs, and the CPSC guide advises avoiding solvents for children up to 12 years old1.
  • The heights cited here come from accessibility standards for public buildings and describe groups of children, not one child. Watch your own child paint and adjust. For a specific child’s motor or sensory needs, consult a pediatric occupational therapist.
  • Adding a sink, new plumbing or wall-mounted rails is outside a planning article. Before installation, evaluate the work with a licensed plumber, contractor or installer.

References

Methodology: every cited figure comes from a published source listed here, each checked live on October 5, 2026. The reach-band chart and two planning tables are Playroom Architect planning syntheses, not measurements.

  1. U.S. Consumer Product Safety Commission – Art and Craft Safety Guide, Publication No. 5015.
  2. U.S. Environmental Protection Agency – A Brief Guide to Mold, Moisture and Your Home.
  3. U.S. Access Board – Guide to the ADA Accessibility Standards (2010 ADA Standards), Advisory 308.1 Children’s Reach Ranges, 606 Lavatories and Sinks, 902.4 Work Surfaces for Children’s Use.
  4. Federal Register – Safety Standard for Clothing Storage Units, U.S. Consumer Product Safety Commission, May 4, 2023.
  5. Occupational Safety and Health Administration – 29 CFR 1910.22, Walking-Working Surfaces: General Requirements.
  6. U.S. Environmental Protection Agency – Volatile Organic Compounds’ Impact on Indoor Air Quality.

Conclusion

A kids painting station works when the water has a plan. Choose water-based paint, keep water volumes small, place supplies inside the reach band, contain the splash zone and give every wet sheet a short path to drying. Then test the reset until a child can help finish it in a few minutes.

To see how the painting station fits the wider art space, return to the art station planning overview, the summary of planning a home art station.

Homeschool Storage Ideas: Organize Books, Supplies, and Back-Stock

Author: Oded Feigin · Created On: September 26, 2026 · Last Updated: October 12, 2026

Homeschool storage ideas work best when every item has an owner: the child, the parent or the back-stock shelf. Our homeschool learning zones guide is an overview of setting up learning zones at home. This article covers one part of it, the storage system for books, supplies, manipulatives, projects and less-used back-stock. Many households face that job: 5.4% of U.S. children were reported to be homeschooled in 2020-211. Each of those homes holds a school’s worth of materials without a school’s supply closet.

Homeschool storage ideas in practice: two tall white shelving units hold labeled wicker baskets and clear bins for subjects, curriculum, manipulatives and supplies, with a bottom row of back-stock bins, beside a wooden table and a green rolling cart labeled for daily supplies.
Storage sorted by job: subject baskets on the top shelf, clear bins for curriculum, manipulatives and supplies in the middle, a back-stock row along the floor and a rolling cart for the day’s materials.

Quick Answer

How do you organize homeschool storage for books, supplies and back-stock?

Sort every item into four tiers by how often it is used, then give children the middle shelves and parents the high shelves and cabinets. U.S. Access Board guidance for public buildings puts the forward reach of children ages 5 through 8 at 18 to 40 inches2, a useful band for daily materials. Anchor tall units, keep paper back-stock out of damp spaces, and write overflow rules before buying more bins.

Key Takeaways

  • Sort materials by how often they are used, not by subject: active, on-deck, back-stock and archive. The tier decides the shelf.
  • Put this week’s materials inside the child’s reach. For public buildings, the Access Board gives ages 5 through 8 a reach range of 18 to 40 inches2, a reference band rather than a home rule.
  • Anchor every tall shelf. An average of 18,673 children a year were treated in U.S. emergency departments for furniture or TV tip-overs from 1990 to 20194.
  • Keep surplus and hazardous supplies adult-managed, in line with CPSC art-safety guidance to store surplus materials away from children6.
  • Store paper back-stock in the living area, not a damp basement or hot attic7. The EPA suggests keeping indoor humidity below 60% where possible8.

Before You Start: What a Homeschool Storage System Needs

A homeschool storage system needs an inventory, a map of who uses what and a measured wall before any bin is bought. Observation before shopping saves money, because containers bought first tend to decide the categories instead of serving them. Gather these first:

  • A one-week use log listing every book, tool and supply touched on each school day, plus what sat untouched.
  • A user list with each child’s age, the materials each one uses alone, and the materials that need an adult.
  • A tape measure and a stud finder for every wall that will hold shelving, a pegboard or an anchor strap.
  • Plain labels and a marker, because every container gets a name before it gets a home.
  • Time: one weekend to sort and one to build, with any wall cabinet or heavy shelf checked by a licensed installer.

The room as a system frames every step. Storage is not a side project next to the school day: it decides how fast a lesson starts and how fast the room resets when the lesson ends.

Step 1: Sort Every Item Into Four Storage Tiers

Step 1 gives every book, supply and project a tier based on how often it is used, so the shelf follows the schedule instead of the subject. One likely source of homeschool clutter is mixed tiers: next term’s workbooks sit beside today’s, and the child has to dig past both to start a lesson.

A storage tier is a group of materials that share a use frequency, and therefore share a location and a manager. Four tiers cover almost everything a home school owns.

The four storage tiers for homeschool books, supplies and back-stock
TierWhat it holdsWhere it livesWho manages it
ActiveThis week’s books and workbooks, pencils, the current manipulative setInside the child’s reach, near the work surfaceChild
On-deckThe next unit’s books, refill paper, the next manipulative setJust above the child’s reach, or the lower shelf of the cartParent
Back-stockNext term’s curriculum, bulk supplies, spare workbooksClosed bins on a high shelf, or heavy bins on the floor rowParent
ArchiveFinished work samples, records, curriculum kept for a younger siblingLabeled document boxes in the living areaParent
  1. Empty one subject at a time onto a table, so the sort stays manageable.
  2. Check each item against the use log and give it a tier.
  3. Put a sticky note with the tier name on each pile before anything goes back on a shelf.
  4. Remove anything with no tier: duplicates, dried-out markers, and outgrown books with no younger sibling waiting for them.

The step is finished when every item carries a tier and each child’s active pile fits in a single shelf section. When the active pile is larger than that, some of it belongs on-deck.

Sort by frequency before subject, because a shelf organized only by subject still asks a child to search through months of material to find today’s page.

Step 2: Split Child-Accessible and Adult-Managed Storage

Step 2 places the active tier where children can reach it without help and puts the other three tiers under adult control. This split lets a child start and finish a lesson independently, while the parent keeps control of quantities, sharp tools and surplus.

Child-accessible storage is any shelf, bin or drawer a child can open, reach and return without climbing or calling an adult. Adult-managed storage is everything above that band or behind a latch, filled and emptied by a parent.

Accessibility standards for public buildings tie storage to reach. Section 811.3 of the ADA Standards says storage elements shall comply with at least one of the reach ranges in section 3082. For children, the reach ranges sit in Advisory 308.1 of the same standards. Ages 3 and 4 reach from 20 to 36 inches, and ages 5 through 8 from 18 to 40 inches2. Ages 9 through 12 reach from 16 to 44 inches2. Homes are not bound by these rules, but the bands are a sound place to start measuring.

What belongs on the child’s shelves?

The child’s shelves hold the active tier and nothing else. Readers stand cover-out in a shallow rack, and workbooks sit upright in one magazine file per child. The current manipulative set lives in a lidded bin with a picture label. Labels in words and pictures let a pre-reader return materials alone, which is the whole point of the band.

What stays adult-managed?

Surplus supplies, refills, sharp tools and anything with small or loose parts stay above the child’s reach. CPSC guidance on art materials says to store surplus materials away from children and to give only small amounts to minimize spills and mishaps6. In practice, the child’s shelf gets one glue stick and the back-stock bin holds the other eleven.

Magnetic manipulatives deserve the same care. CPSC estimated 26,600 emergency-department-treated magnet ingestions from 2010 through 20215. Its 2022 magnet rule covers products made for entertainment, jewelry, mental stimulation or stress relief5, so it may not cover every magnetic manipulative.

A homeschool room with a wooden worktable and sage green chairs in front of a tall white cube shelf, where each of three columns carries a child's name and holds colored fabric bins labeled for books, art, math and projects, with books and a globe on top.
One column per child: each child’s labeled bins for books, art, math and projects sit in a single column of the shelf, so materials go back to one known place without adult help.

Verify the split by asking each child to fetch and return three active-tier items alone. If anyone climbs, stretches onto a chair or asks for help, move those items down a shelf.

Give the child’s shelves only what the child should use alone, because a shelf within reach works as an invitation, whatever its label says.

Step 3: Build Vertical Shelving and Anchor It

Step 3 moves storage up the wall, with the heaviest loads at the bottom and every tall unit tied to the wall framing. Wall height is often unused space, and homeschool book storage needs plenty of it, because curriculum, readers and reference books add weight quickly.

Tall shelving also raises a stability question. National emergency department data estimate an average of 18,673 children a year treated for furniture or TV tip-over injuries from 1990 to 20194. Children under 6 made up 69.9% of those injuries4, and homeschool families with toddlers and older students under one roof need to plan for the youngest climber.

The federal tip-over rule targets clothing storage units. It tests units 27 inches and above in height with weights that simulate children up to 60 pounds3. The voluntary standard it builds on does not cover shelving units such as bookcases3.

A tip-over restraint is a strap, bracket or cable that ties the top of a furniture unit to the wall framing to reduce the chance that the unit pitches forward. Fix it into studs, not drywall alone, and have a licensed installer evaluate plaster, brick or any wall where the studs fall in the wrong place.

How should books and bins be stacked?

Load each unit from the bottom up. Boxed curriculum and reams of paper go on the floor row in closed bins, where they lower the unit’s center of gravity. They also spare the parent a lift from overhead. CPSC applies a similar idea to hazardous chemicals, advising large containers below shoulder height to minimize falls and drops6. Light back-stock, like spare folders or seasonal craft paper, can go above the child’s reach.

Where do wall shelves and pegboards fit?

Wall-mounted shelves suit hallways and narrow rooms where a floor unit would block the path. Pegboards suit tools that children use daily, like rulers, scissors in a sheath and hole punches, because every outline shows where each one returns. Both carry loads into the wall, so the fixings matter more than the shelf, and a licensed installer should confirm them on older walls.

Verify the step by pushing gently on the top corner of each loaded unit. Any rocking means the anchor or the floor needs attention before children use the shelf. A push test does not replace the shelf’s load rating or an installer’s check.

Anchor the shelf on the day it goes up, not after it fills, because a loaded, unanchored unit can tip when a child climbs it.

Step 4: Set Up a Homeschool Rolling Cart for Daily Materials

Step 4 adds a rolling cart that carries the active tier between the shelf and the work surface. A homeschool rolling cart turns the daily reset into one trip. Load it in the morning, roll it to the table, and park it against the wall when school ends.

  1. Top tray: pencils, erasers, a ruler and child scissors, split by child if siblings share the cart.
  2. Middle tray: today’s books and workbooks, standing upright in the order they will be used.
  3. Bottom tray: the heaviest items and the project in progress, which keeps the cart steady when it rolls.
  4. Labels: one per tray, in words and pictures, so a child can reload the cart from the shelf alone.

Give the cart a parking spot outside the walking route. U.S. Access Board standards for public buildings set the clear width of walking surfaces at 36 inches minimum2. That figure is a useful target for the path past a parked cart in a home. Lock the casters whenever the cart is parked, and keep the rule that the cart carries books, not children.

When school moves between the kitchen, the living room and the floor, the portable homeschool system spoke covers carts and caddies that travel between rooms.

Verify the cart by timing the morning load and the afternoon unload for one week. If either takes longer than a few minutes, the cart holds on-deck material that belongs back on the shelf.

Treat the cart as the active tier on wheels, and nothing more, because a cart that holds everything becomes a second shelf that never resets.

Step 5: Use a Homeschool Storage Cabinet for Adult-Managed Supplies

Step 5 puts the supplies children should not use freely behind doors: paints and glues in bulk, solvents, sharp tools, refills and kits with small parts. A homeschool storage cabinet does two jobs at once, because it controls access and also hides a wall of color and packaging from the work area.

CPSC’s art-safety guide gives a clear set of storage habits for hazardous materials. It advises storing toxic materials in a locked cabinet, avoiding food containers for storage, and never removing or defacing a manufacturer’s label6. Its broadest rule fits any homeschool supply closet:

“Never store any material that you are not prepared to control if it spills.”

U.S. Consumer Product Safety Commission, Art and Craft Safety Guide6

Which supplies go behind a latch?

Anything with a cautionary label, anything sharp, anything with loose magnets or small parts, and every bulk refill goes behind the latch. Washable crayons and pencils can stay on the child’s shelf. A homeschool organization cabinet with adjustable shelves lets the parent group these by subject, so a science kit and its refills sit together.

Where should a wall cabinet hang?

A wall cabinet above a walkway brings a different risk: an open door or a deep box at head height. In public buildings, objects with leading edges more than 27 inches and not more than 80 inches above the floor must protrude 4 inches maximum into the circulation path2. In a home, the simpler fix is to hang wall cabinets over a desk or counter, never over the route children walk.

Verify the cabinet by checking that every container inside still carries its original label, and that the latch works with one adult hand.

Lock up by hazard, not by value, because the costly supplies are rarely the risky ones, and a cabinet sorted by price leaves the wrong items within reach.

Step 6: Store Back-Stock Where Paper Lasts

Step 6 finds a home for back-stock and archive boxes inside the living area, where temperature and humidity stay moderate. Paper curriculum, reams and workbooks make up much of a home school’s back-stock, and paper reacts badly to damp and heat.

The National Archives gives three numbers for storing family papers. It advises keeping the temperature below 75 degrees Fahrenheit and relative humidity below 65% to prevent mold growth and reduce insect activity7. It also warns that relative humidity below 15% can cause brittleness7. Its placement advice is short:

“Store items out of damp basements, garages, and hot attics.”

U.S. National Archives and Records Administration, Storing Family Papers and Photographs7

The EPA suggests a tighter target for the whole house. It advises, if possible, keeping indoor humidity below 60%, ideally between 30 and 50%8. A humidity meter costs about $10 to $50 at hardware stores8, so a closet can be checked rather than guessed.

Humidity ranges for stored paper and for the home Horizontal range bars on a relative humidity scale from 0 to 100 percent. National Archives guidance for storing family papers: relative humidity below 65 percent to prevent mold growth and reduce insect activity, and not below 15 percent, which can cause brittleness, giving a range of 15 to 65 percent. EPA guidance for the home: indoor humidity below 60 percent, ideally between 30 and 50 percent; the bar shows the 30 to 50 percent ideal range and a dashed line marks the 60 percent upper limit. Neither source addresses homeschool curriculum specifically. Humidity ranges for stored paper and the home National Archives family papers 15 to 65% EPA whole home 30 to 50% 60% 0 20 40 60 80 100 Relative humidity, percent Paper storage, Archives Ideal indoor, EPA Upper limit, EPA Source: Playroom Architect analysis, 2026
The EPA’s ideal indoor range of 30 to 50% sits entirely inside the National Archives range for family papers. A closet held near the EPA target also meets the Archives humidity limits. No source sets a humidity for homeschool curriculum specifically. Compiled by Playroom Architect from National Archives and EPA guidance.
  1. Choose a closet or a high shelf in a heated room, away from exterior walls, pipes and windows.
  2. Use document boxes with lids, sized so folders stand upright without bending, and do not overstuff them.
  3. Raise every box off the floor on a shelf, so a leak or a spill does not reach the bottom row7.
  4. Label the short end of each box with the subject and the term it is for, so it can be read without lifting it.
  5. Place a humidity meter in the closet and read it at the change of season.

When a leak does reach stored paper, speed matters. The EPA advises drying water-damaged areas and items within 24-48 hours to prevent mold growth8.

Put back-stock where the family already lives, because the spare closet in a heated room protects next year’s curriculum better than the largest shelf in the garage.

Step 7: Write the Overflow Rules

Step 7 sets the rules that stop the system filling up again. They cover a full bin, the end of a term and the arrival of new curriculum. Without them, a well-sorted storage wall can drift back to mixed tiers within a term.

An overflow rule is a pre-agreed action that a full container triggers, so nobody has to decide what to do on a busy afternoon. The rules work best written down and posted inside the cabinet door.

Overflow rules for homeschool storage, listed by what sets them off
TriggerRuleWho acts
A child’s bin will not closeThe oldest item moves to on-deck or the archiveChild, then parent
A new book joins the child’s shelfOne book leaves for on-deckChild
New curriculum arrivesIt goes straight to back-stock, labeled with its start termParent
A back-stock bin is fullNo new purchases for that subject until the bin emptiesParent
A term endsKeep a few work samples in the archive and recycle the restParent and child
Material is outgrown with no younger sibling waitingDonate or pass it on within the monthParent

The rule that does the most work is the full back-stock bin. It turns storage into a budget: when a bin fills, buying stops for that subject. For the desk side of the same system, the homework station plan covers desk storage, lighting and the daily reset.

Design for the reset, not just the reveal: the storage plan that survives is the one with a written answer for the day a bin overflows.

Homeschool Storage Ideas by Room Type

The seven steps apply in every home, but each space has a different limit on storage, whether that is floor area, evening family use or a shared desk. The table matches common homeschool spaces to the storage pieces that fit them best.

Homeschool storage ideas matched to the main limit of each type of room
SpaceMain limitStorage that fits
Dedicated school roomFew limits, so tiers blurFull storage wall by tier, cabinet for adult-managed supplies, archive boxes in the closet
Living room cornerFamily use every eveningCabinet with doors for all tiers but the active one; cart parks inside or beside it
Kitchen or dining tableMeals at set timesRolling cart for the active tier; back-stock in a hall closet
Bedroom nookSchool and sleep share one roomClosed bins only, so school disappears at night
Shared home officeAdult work and school overlapSeparate shelves per user; locked drawer for adult tools

Small rooms push storage up the wall even harder. The compact learning zone spoke covers perimeter placement and the walking path in a small space.

Pick storage by the room’s main limit before picking it by style. In a living room, the cabinet that closes is worth more than the open shelf that looks better.

Common Mistakes in Homeschool Storage

One costly mistake in homeschool storage is buying bins before sorting by tier. The others come from the same root: planning storage for the first day of school instead of the fortieth.

Storing by subject alone

Subject shelves feel logical, but they mix this week’s math book with next term’s. Sort by tier first, then by subject inside each tier.

Putting back-stock within the child’s reach

Spare workbooks on a low shelf get started early, written in, or used as scrap paper. Keep back-stock high or behind a door, and keep heavy boxes on the floor row in closed bins.

Leaving tall shelving unanchored

An empty bookcase seems steady, but a loaded one with a climbing child is a different load case. Anchor every tall unit to studs, and ask a licensed installer about any doubtful wall.

Sending paper to the garage

The garage has the most space and the worst conditions for paper. Keep curriculum in a heated room and use the garage for plastic tubs of non-paper supplies only.

What a Working Homeschool Storage System Looks Like

A working homeschool storage system passes five checks on an ordinary weekday, and once it does, further purchases are optional.

  • Each child can fetch and return every active-tier item without climbing or asking.
  • The rolling cart loads and unloads in a few minutes.
  • Every tall unit is anchored and does not rock when pushed at the top.
  • Every adult-managed container sits behind a door or above reach, with its original label.
  • The back-stock closet sits in a heated room, with a humidity meter inside.

The next stretch goal is the age transition. As children grow, their reach band rises, so re-measure each autumn and move the active tier up a shelf.

Frequently Asked Questions

What are the best homeschool storage solutions for a small home?

The best homeschool storage solutions for a small home use wall height and closed cabinets instead of floor space. Keep the walking route clear: Access Board standards for public buildings set 36 inches as the minimum clear width of walking surfaces2, a useful planning target at home.

How high should homeschool shelves be for children?

Daily materials belong inside the child’s reach band. Access Board guidance for public buildings gives ages 3 and 4 a reach of 20 to 36 inches and ages 9 through 12 a reach of 16 to 44 inches2. Treat these as reference ranges and measure the actual child.

Should homeschool bookshelves be anchored to the wall?

Tall homeschool bookshelves should be anchored to the wall framing. An average of 18,673 children a year were treated in U.S. emergency departments for furniture or TV tip-overs from 1990 to 20194. The voluntary tip-over standard for clothing storage units does not cover bookcases3.

Where should homeschool back-stock be stored?

Homeschool back-stock belongs in a closet or on a high shelf inside the living area. The National Archives advises keeping stored papers below 75 degrees Fahrenheit and below 65% relative humidity7, and keeping them out of damp basements, garages and hot attics.

How should magnetic math manipulatives be stored?

Loose magnets belong in adult-managed storage, handed out per lesson. CPSC estimated 26,600 emergency-department-treated magnet ingestions from 2010 through 20215, and its magnet rule may not cover every magnetic manipulative.

Limitations and Edge Cases

  • The reach ranges, path width and protrusion limit come from U.S. accessibility standards for public buildings. Homes are not required to meet them, and a specific child can fall outside any range, so measure the child.
  • The humidity figures are general guidance for stored paper and for the home. No cited source sets a humidity for homeschool curriculum, and homes in very humid climates may need a dehumidifier to reach either target.
  • Renters who cannot drill into walls should ask the landlord or a licensed installer about approved anchoring before loading any tall unit.
  • If a child has motor, posture or sensory needs that affect reaching or lifting, ask a pediatric occupational therapist to guide shelf heights and container choices.

References

Methodology: every figure comes from an independent published source checked live on October 11, 2026. The storage tiers, overflow rules and humidity chart are planning syntheses built on those sources by the article’s author.

  1. National Center for Education Statistics – Homeschooled Children and Reasons for Homeschooling, Condition of Education.
  2. U.S. Access Board – ADA Accessibility Standards, sections 307.2, 403.5.1 and 811.3 and Advisory 308.1 on children’s reach ranges.
  3. Federal Register – Safety Standard for Clothing Storage Units, Consumer Product Safety Commission final rule 2023-08997, May 4, 2023.
  4. PubMed – Lu C, Badeti J, Mehan TJ, Zhu M, Smith GA. Furniture and television tip-over injuries to children treated in United States emergency departments. Injury Epidemiology, August 2021.
  5. Federal Register – Safety Standard for Magnets, Consumer Product Safety Commission final rule 2022-20200, September 21, 2022.
  6. U.S. Consumer Product Safety Commission – Art and Craft Safety Guide, publication 5015.
  7. U.S. National Archives and Records Administration – Storing Family Papers and Photographs, How to Preserve Family Archives.
  8. U.S. Environmental Protection Agency – A Brief Guide to Mold, Moisture and Your Home.

Conclusion

Homeschool storage works when every item has a tier, an owner and a fixed home. Active materials sit within the child’s reach, adult-managed supplies sit behind a door, and paper back-stock waits in a dry closet inside the living area. Anchored shelving, a rolling cart and written overflow rules keep the system working after the first month. Structural reasoning first, decor inspiration second.

For how storage fits the wider plan for learning areas at home, see the overview in the homeschool learning zones guide.